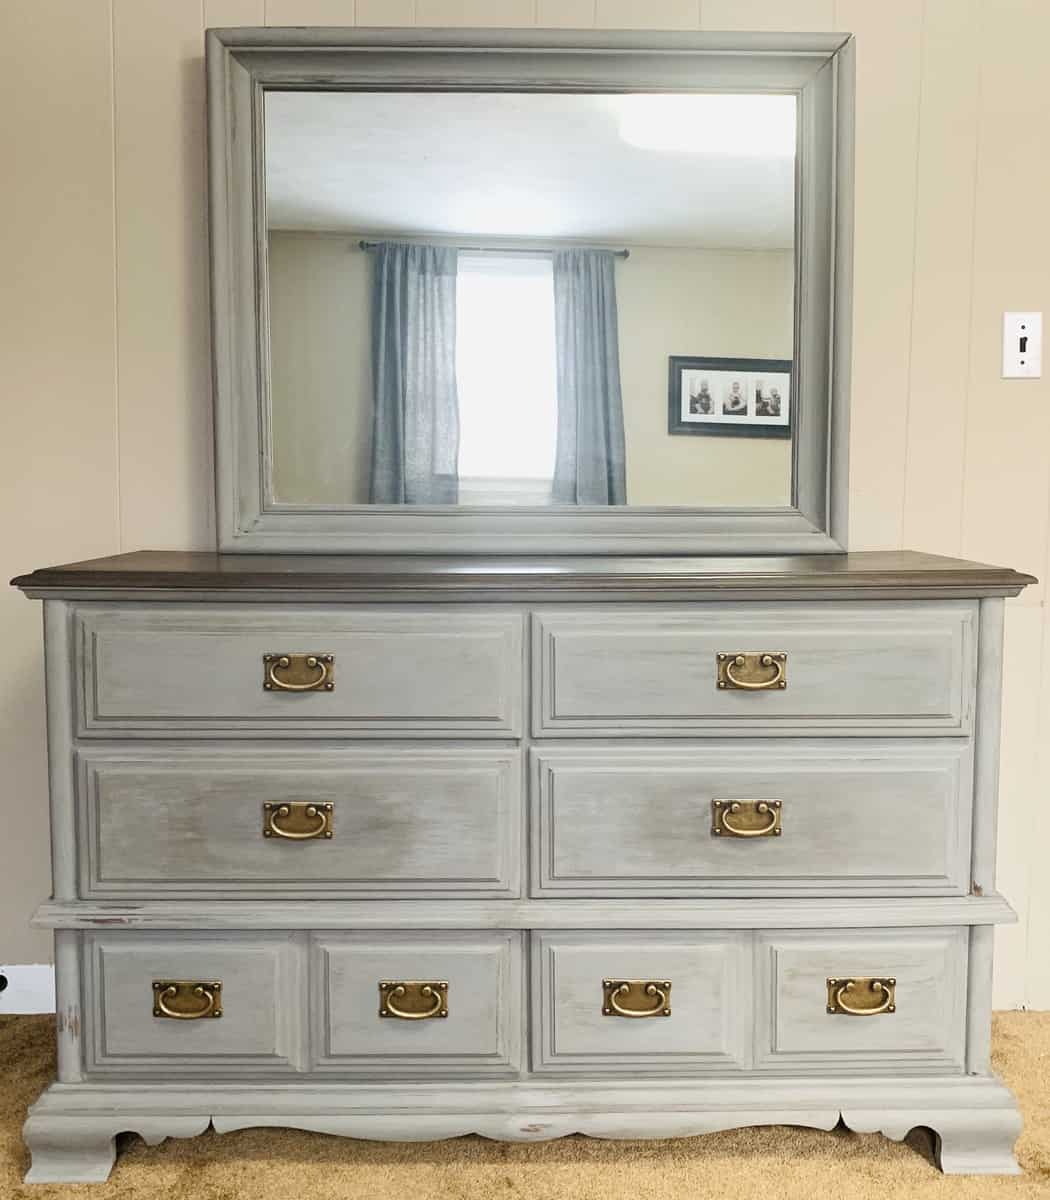
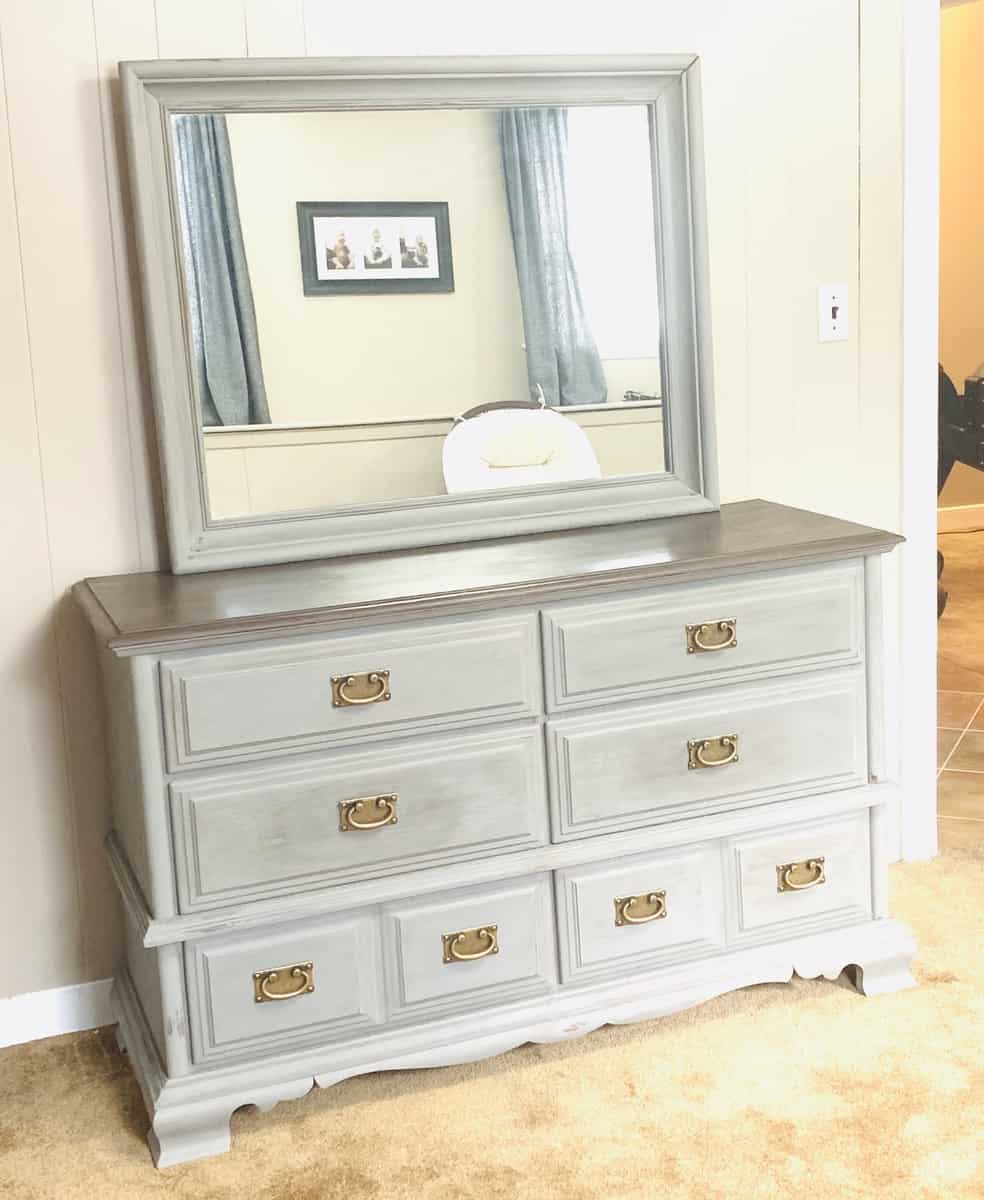
Vintage Dresser Refresh Using Chalk Paint
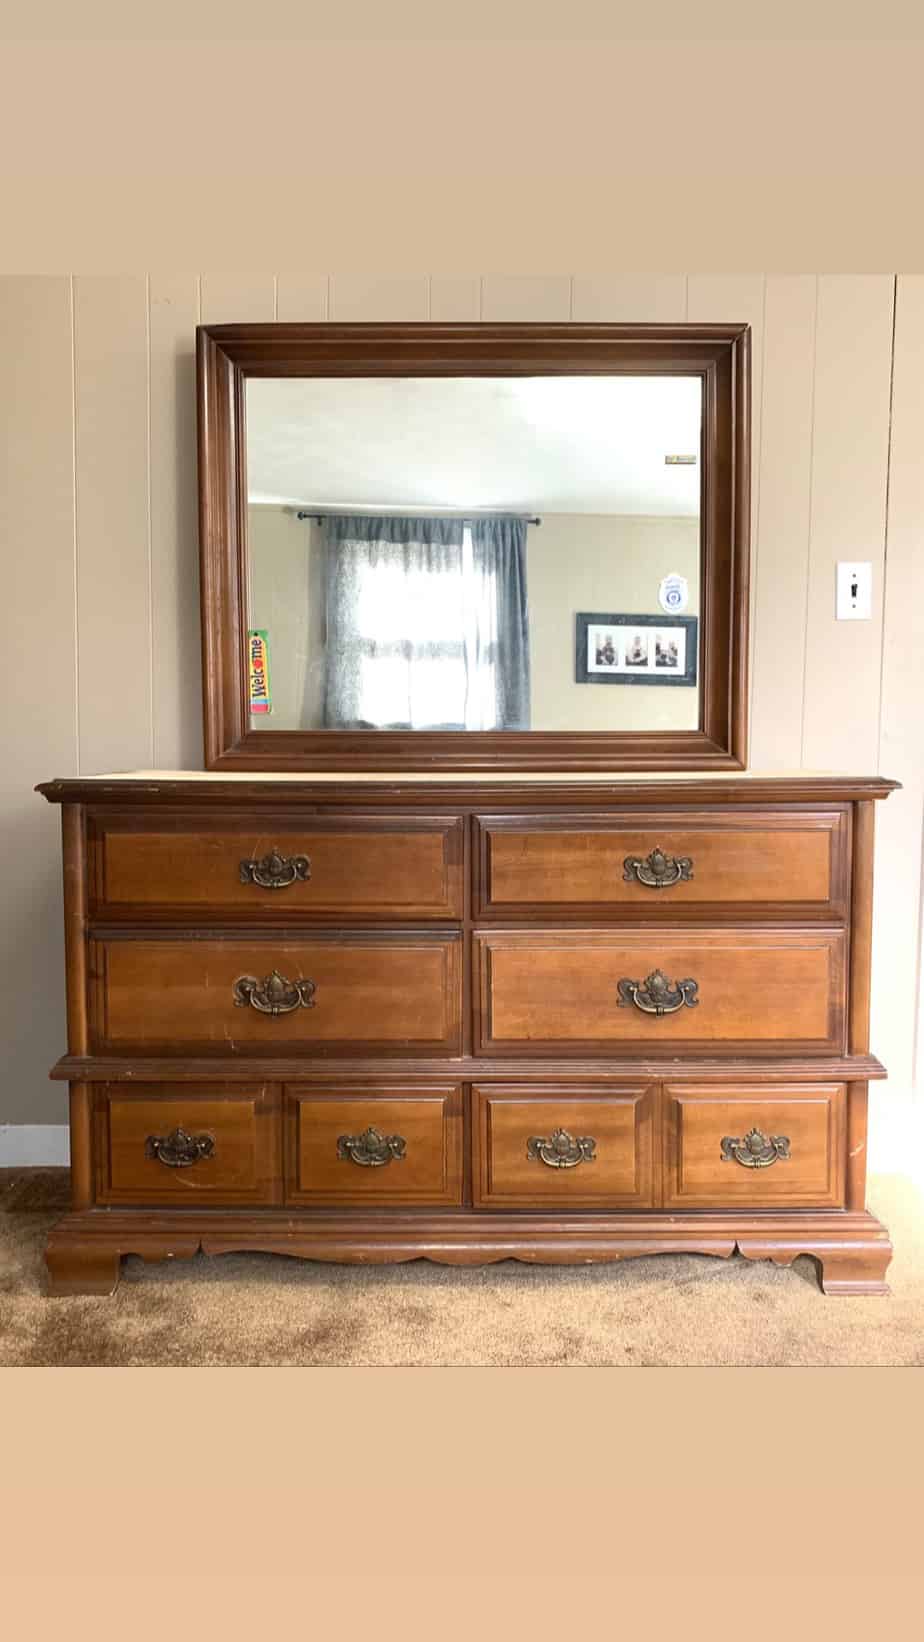
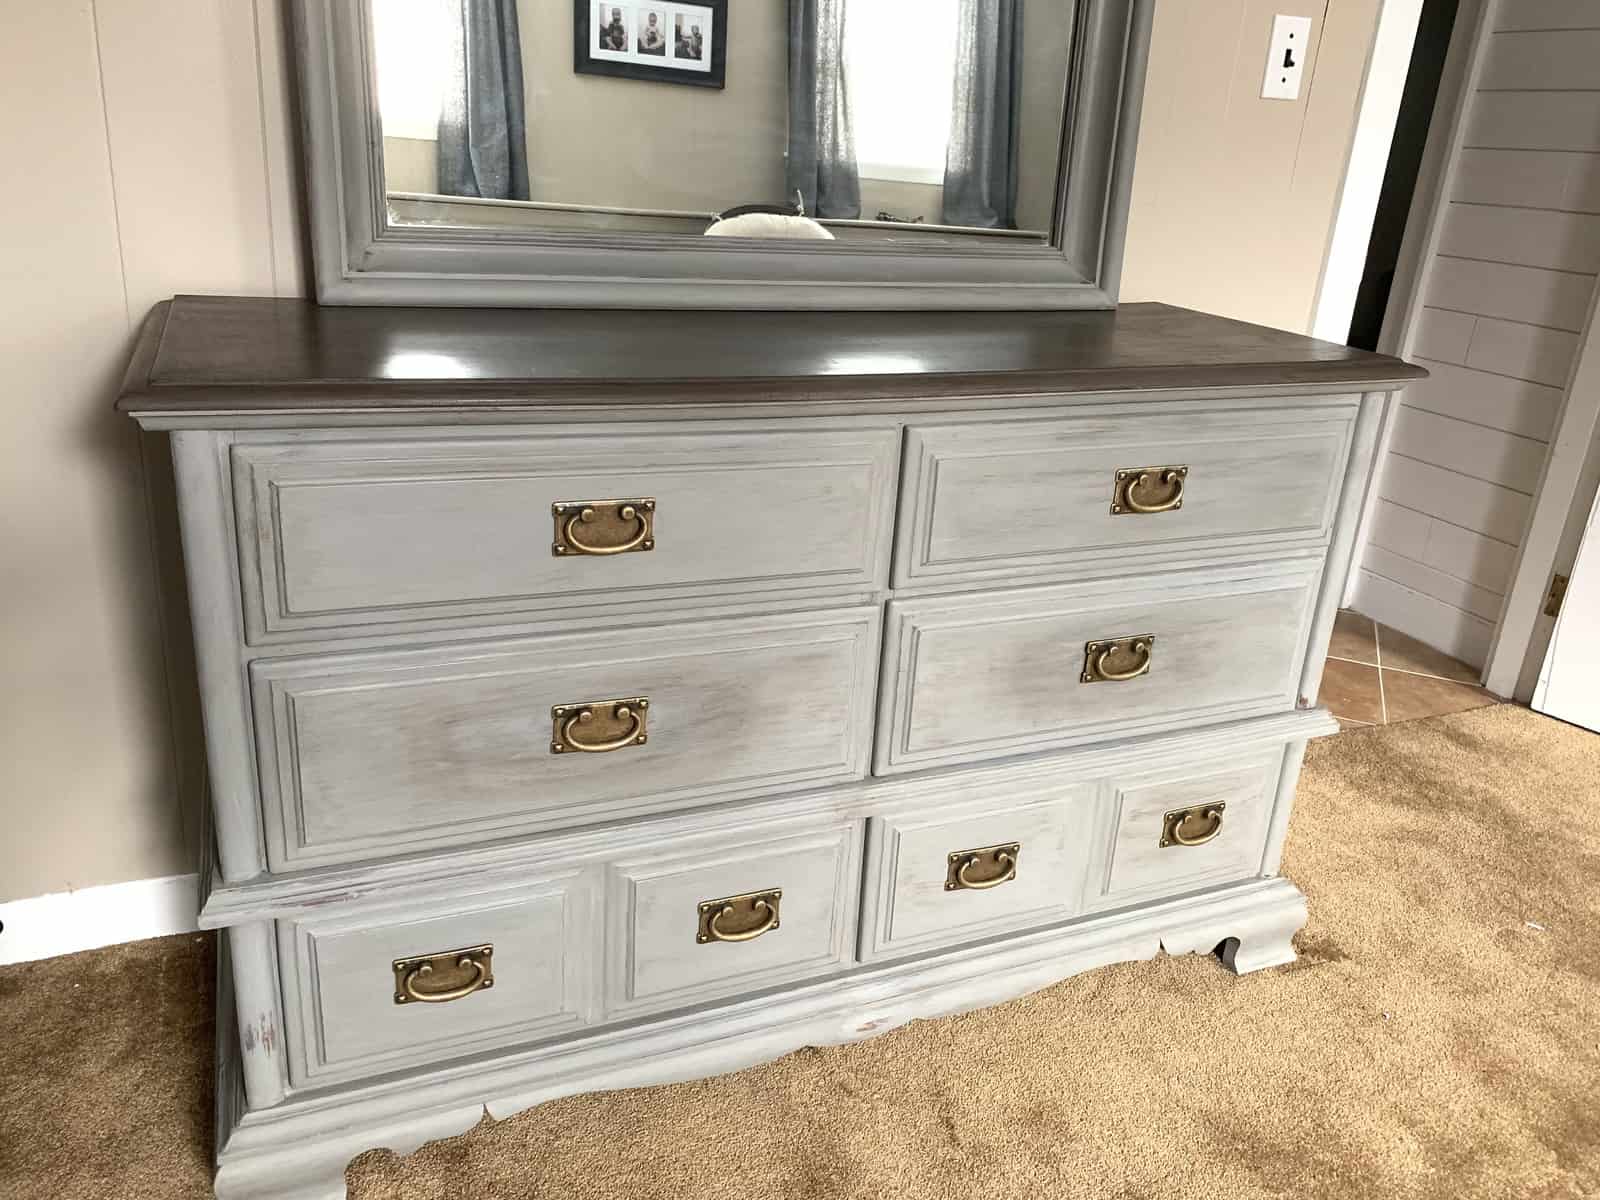
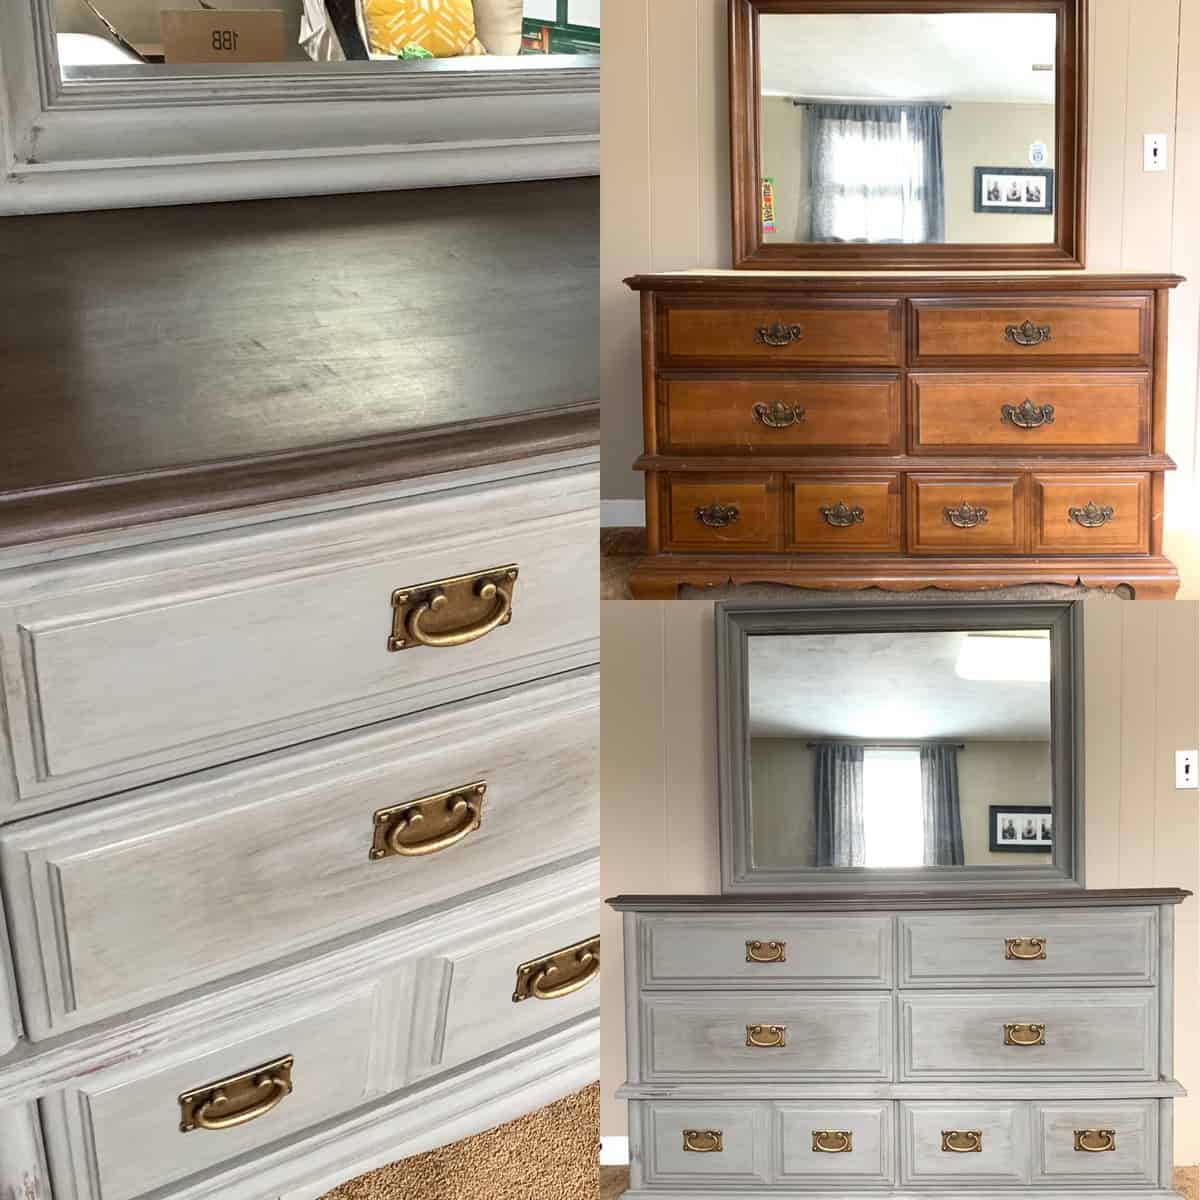 As much as I love building things from scratch, I equally love refinishing and refurbishing old furniture to give it a new life. It is a bit of a rush to find an old piece for a great price that just needs a little love. This vintage dresser was an amazing find and I had so much fun refreshing it with chalk paint, dark wax, and a new stain on the top.
Disclaimer: In the name of full transparency, please be aware that this blog post contains affiliate links and any purchases made through such links will result in a small commission for me (at no extra cost for you). As an Amazon Associate I earn from qualifying purchases.
Getting Started
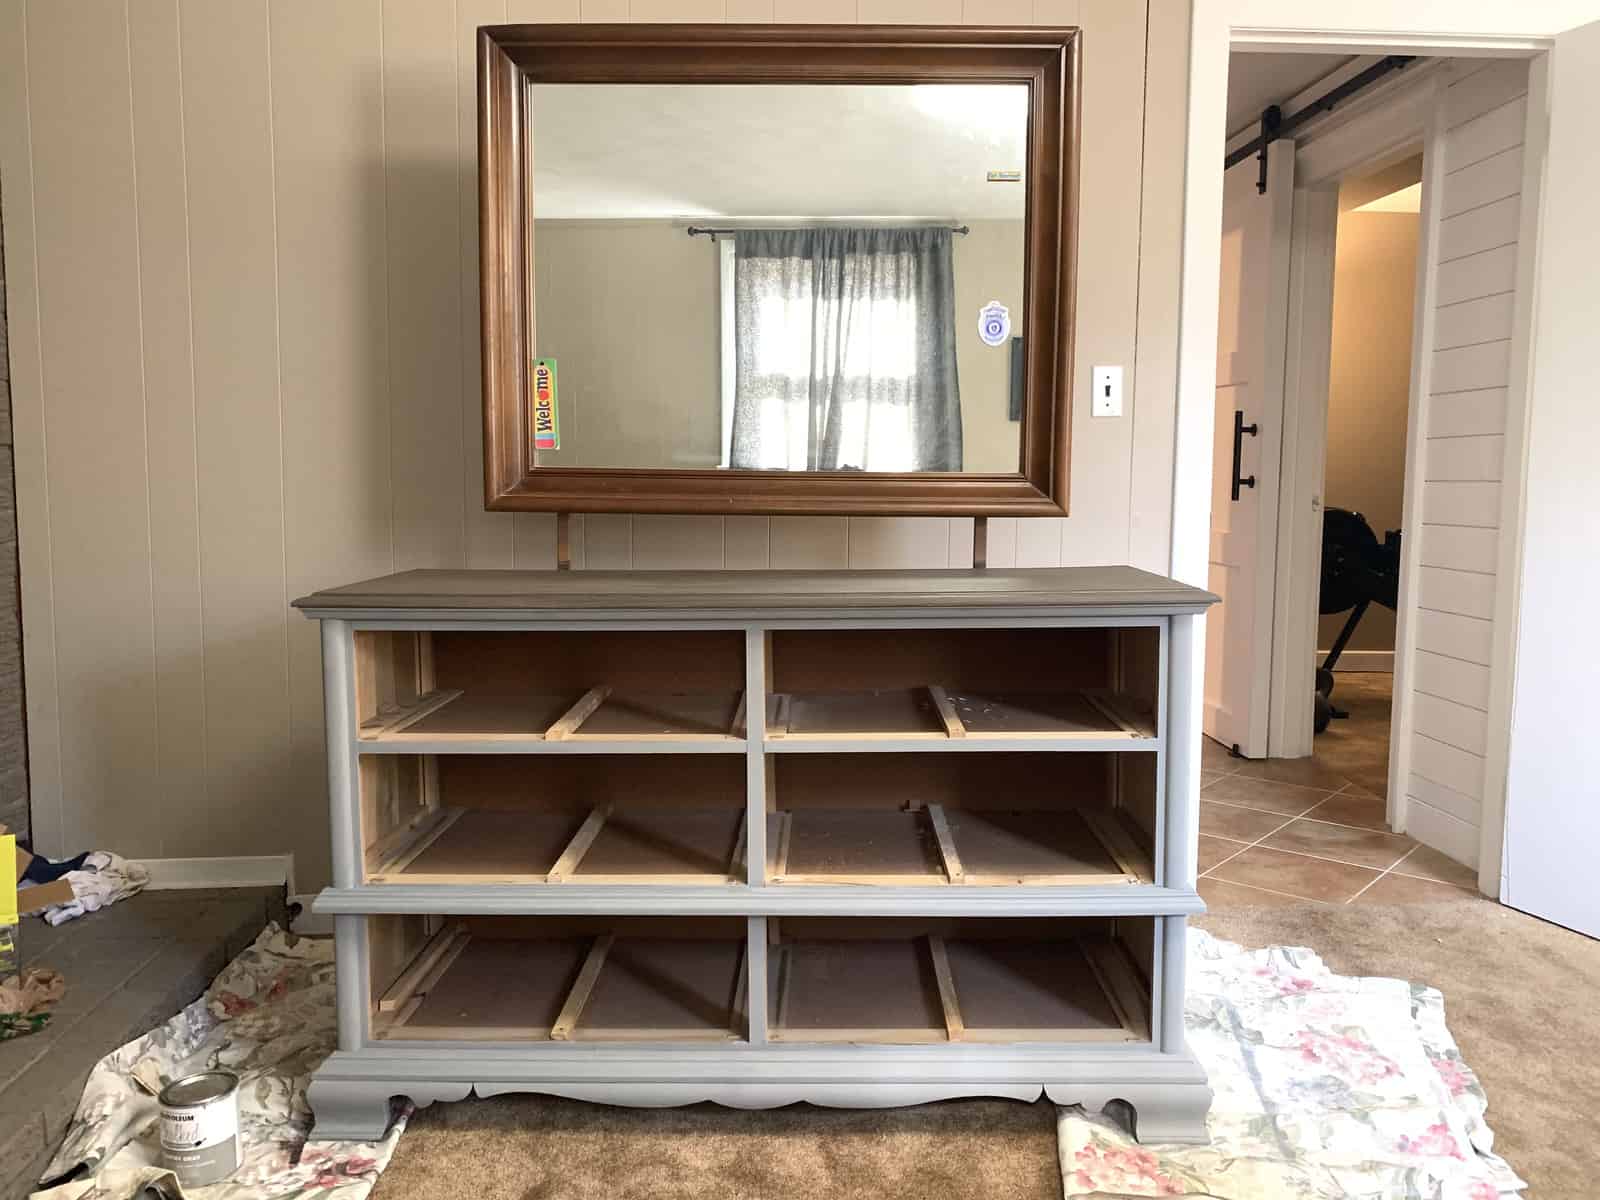
This dresser was found on Facebook marketplace and it was a steal! I scored it for $20. No lie. It really was just too good to pass up! And it was really amazing because I had been on the lookout for a dresser with a mirror for my guest room for several months. When this popped up not too far away, I knew I had to have it.
Supplies
- Rustoleum chalk paint (Country Gray):
- Americana decor clear cream wax
- Retique It Dark Furniture wax
- Liberty 3 Inch Drawer Pull
- Total cost: about $90 (I already had the cream wax on hand, so just over $75 for supplies)
How to Prep the Piece
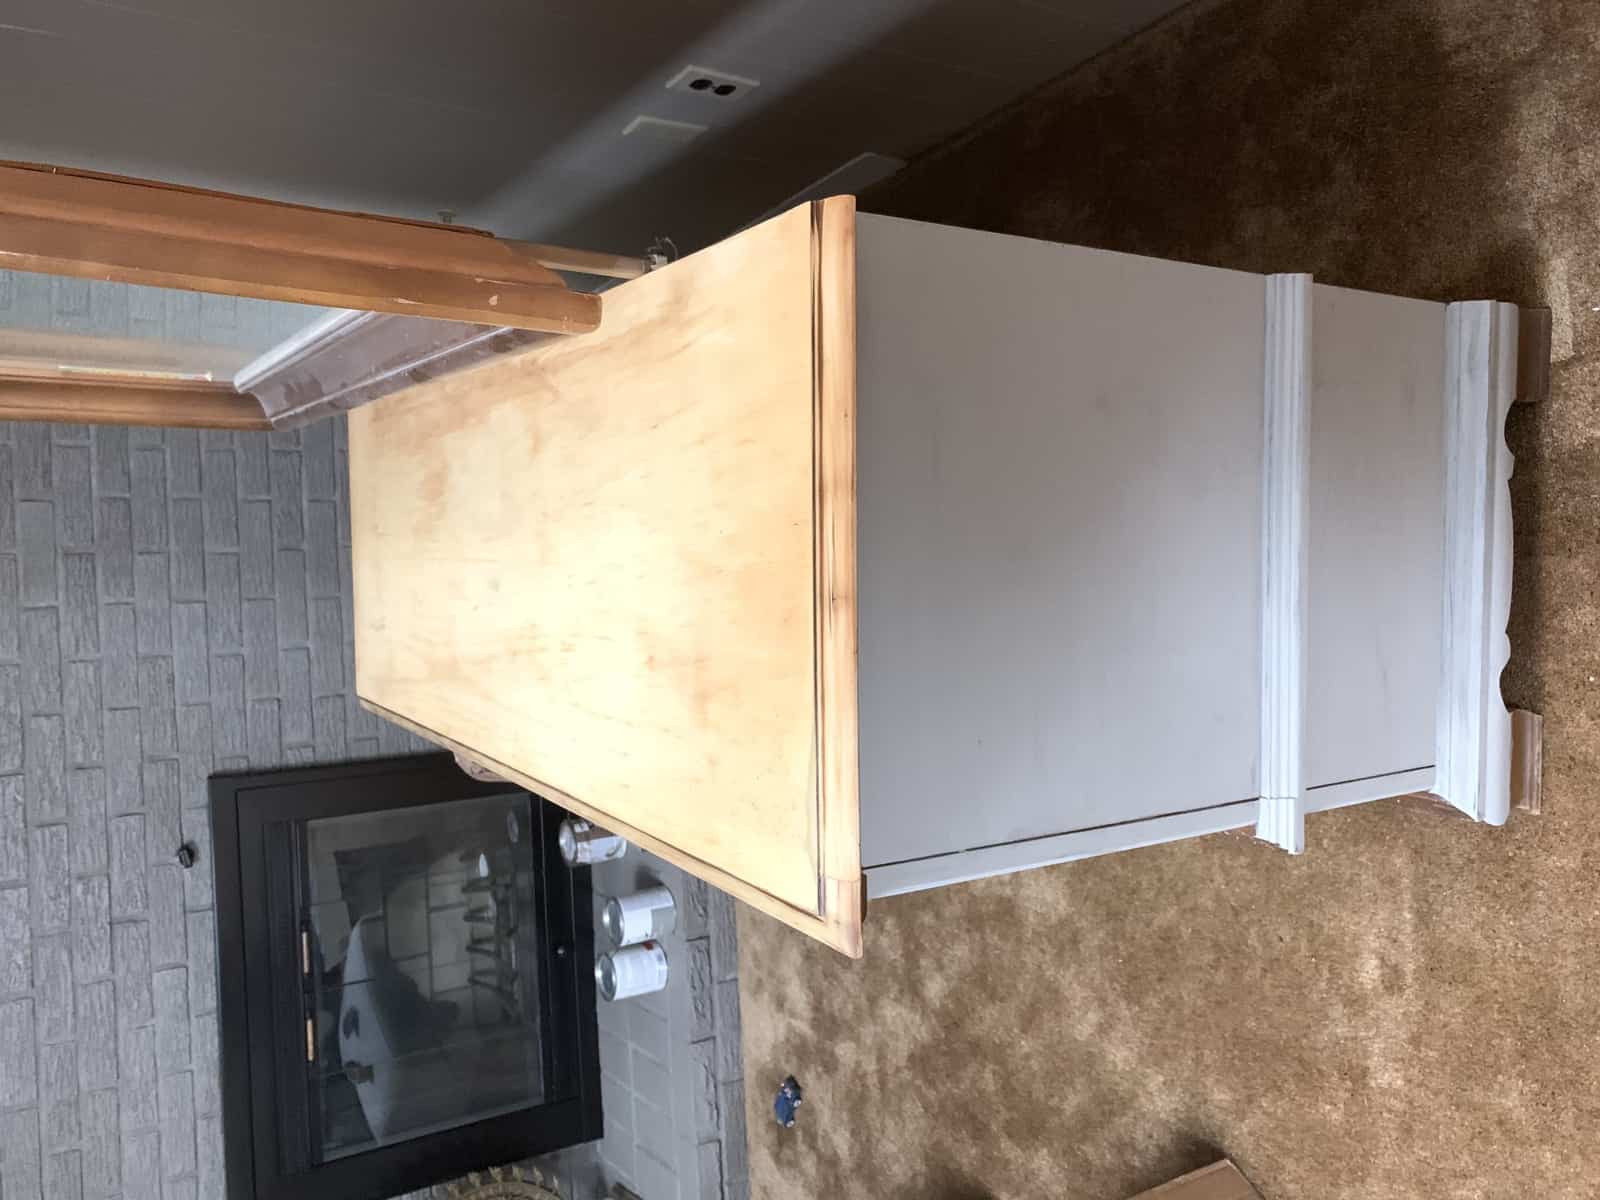
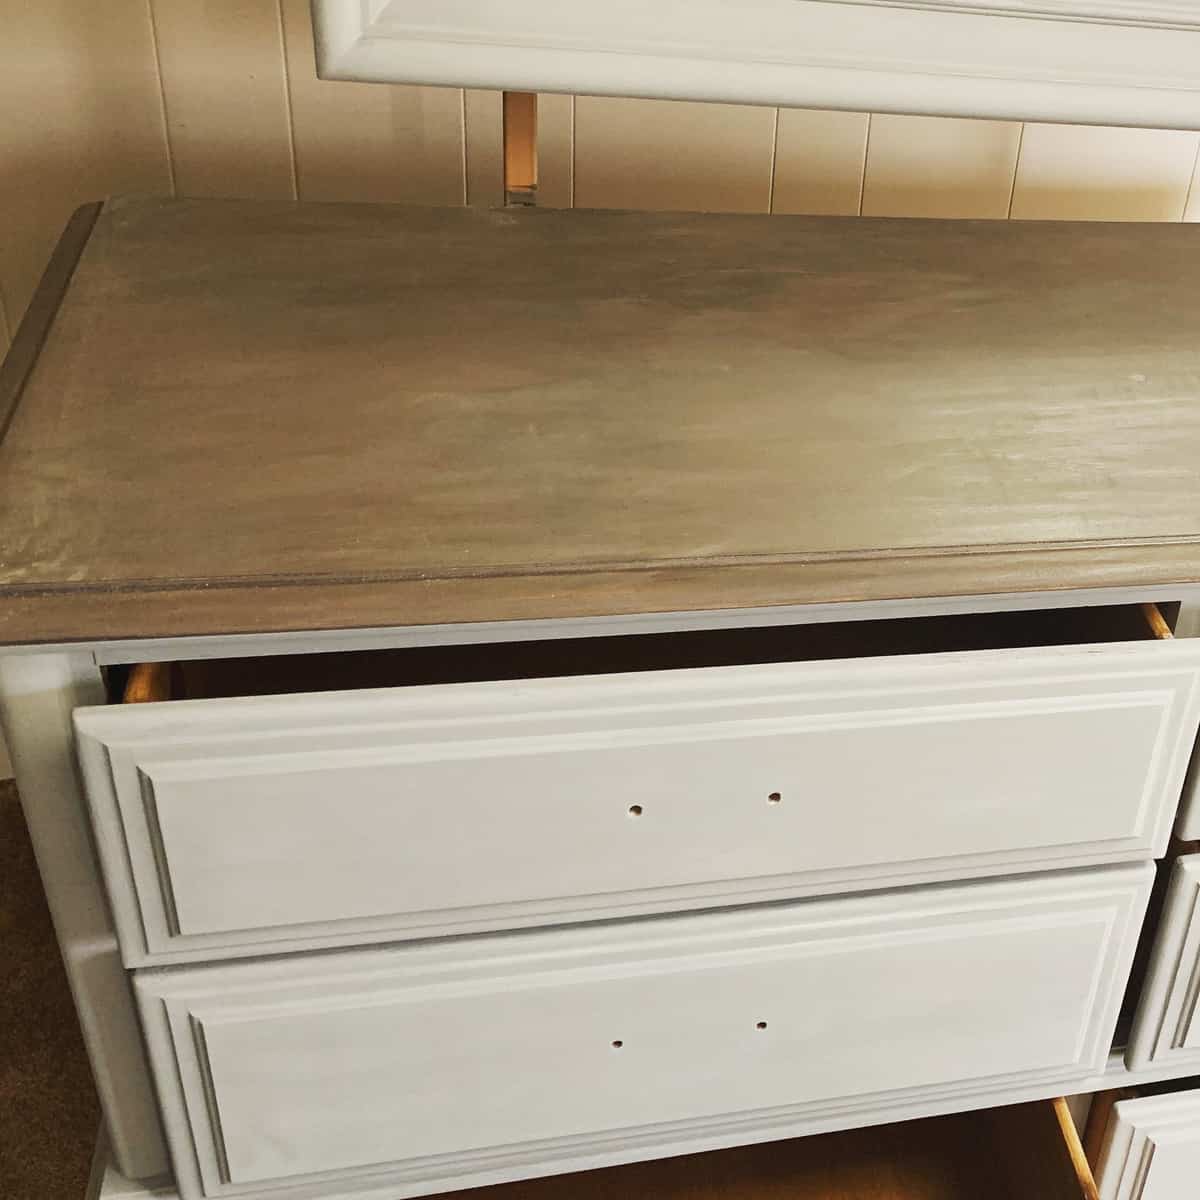
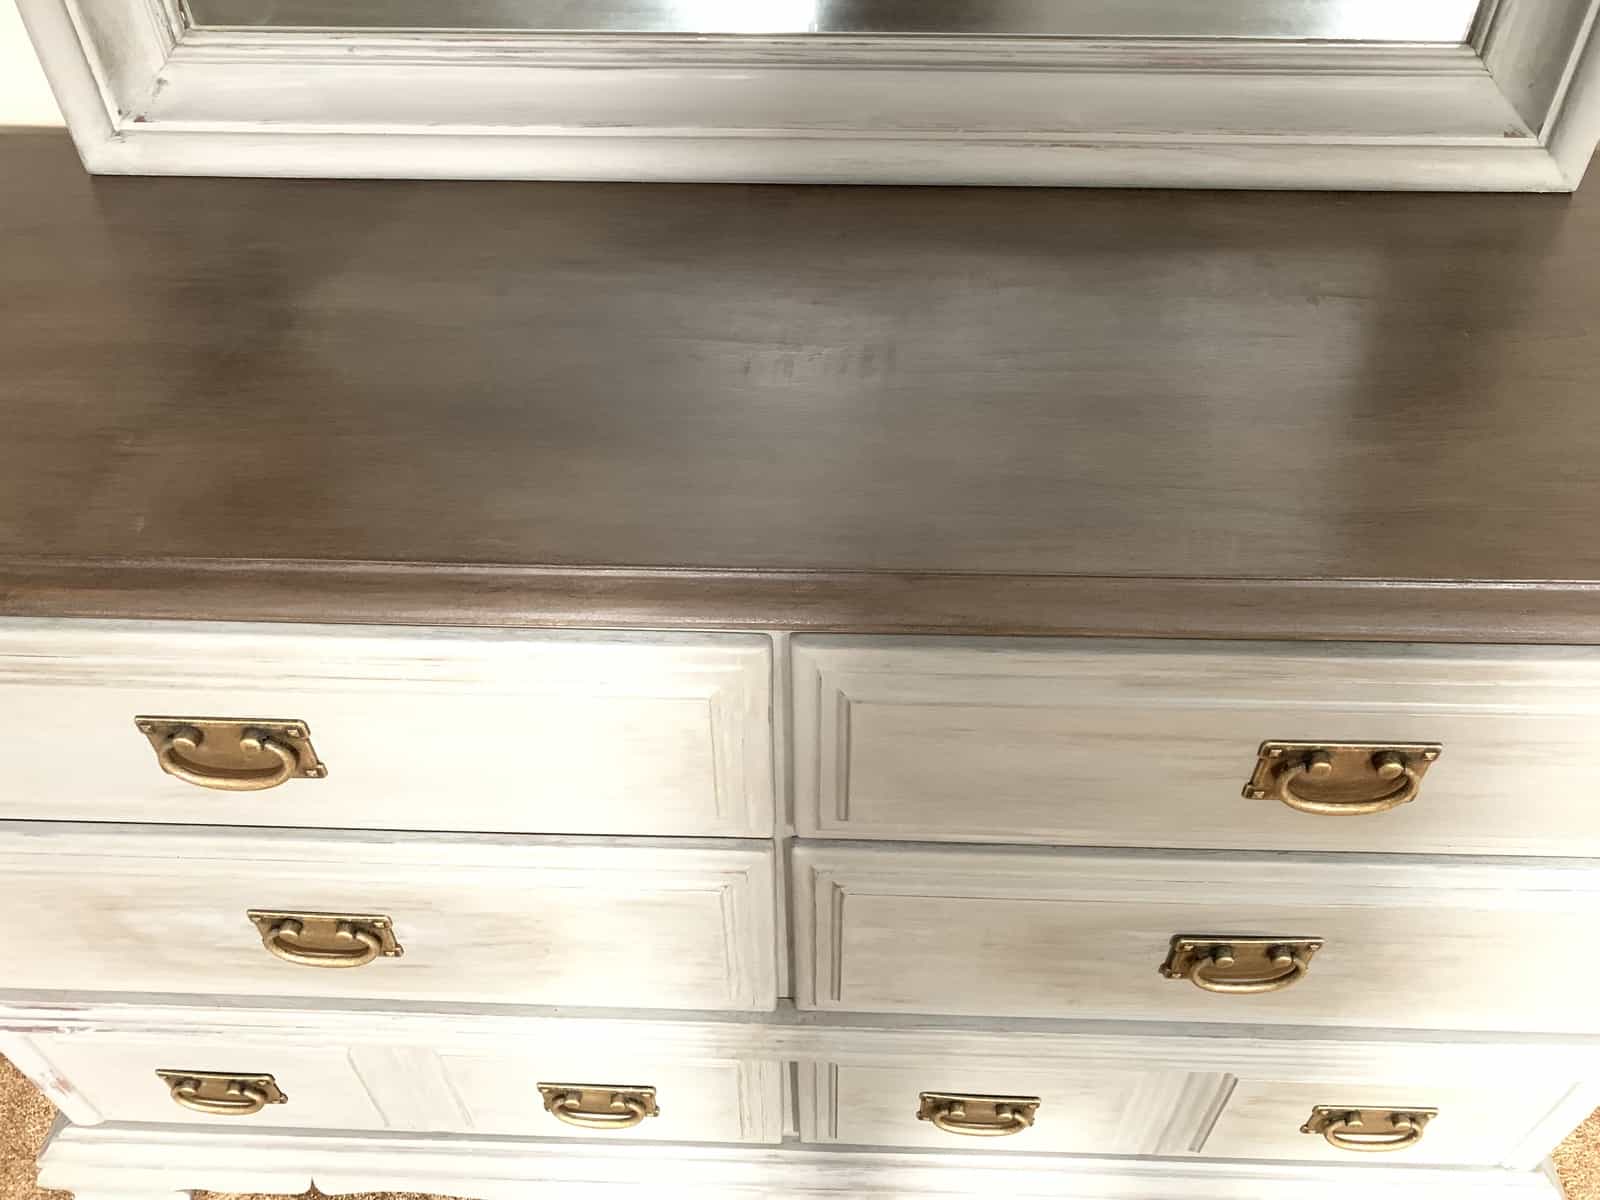
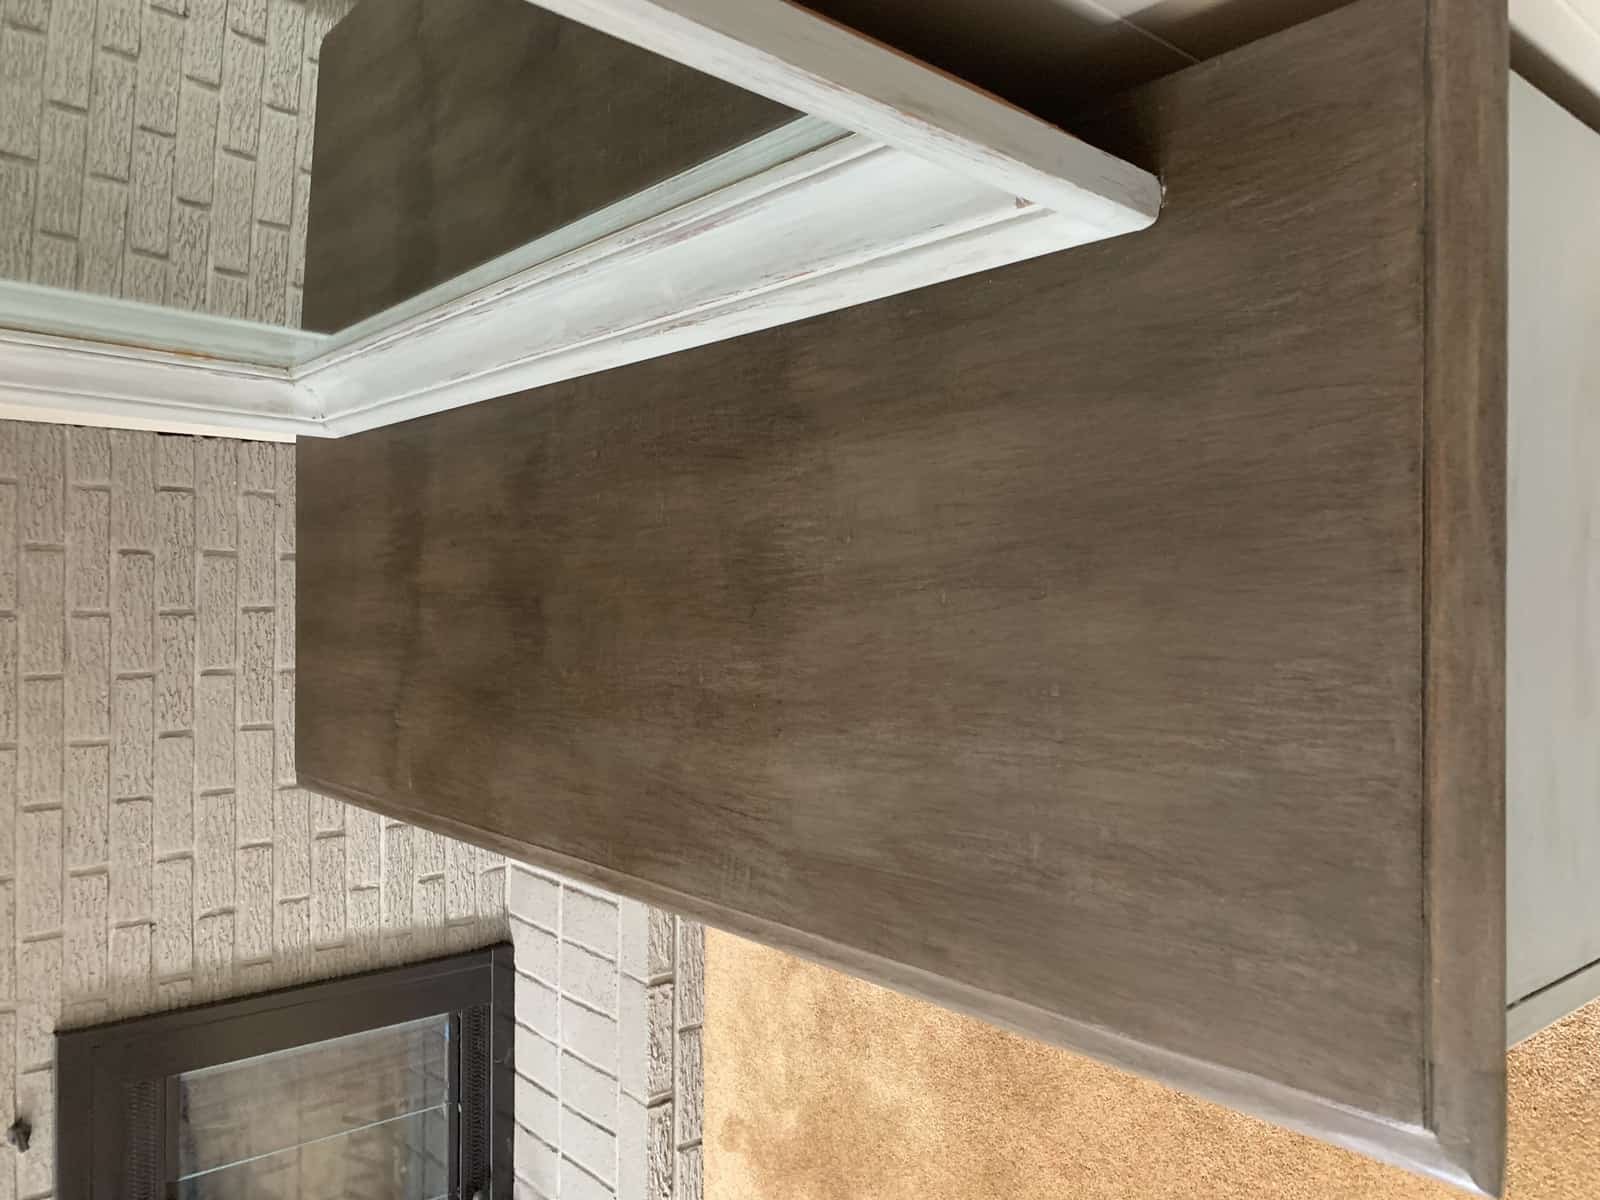
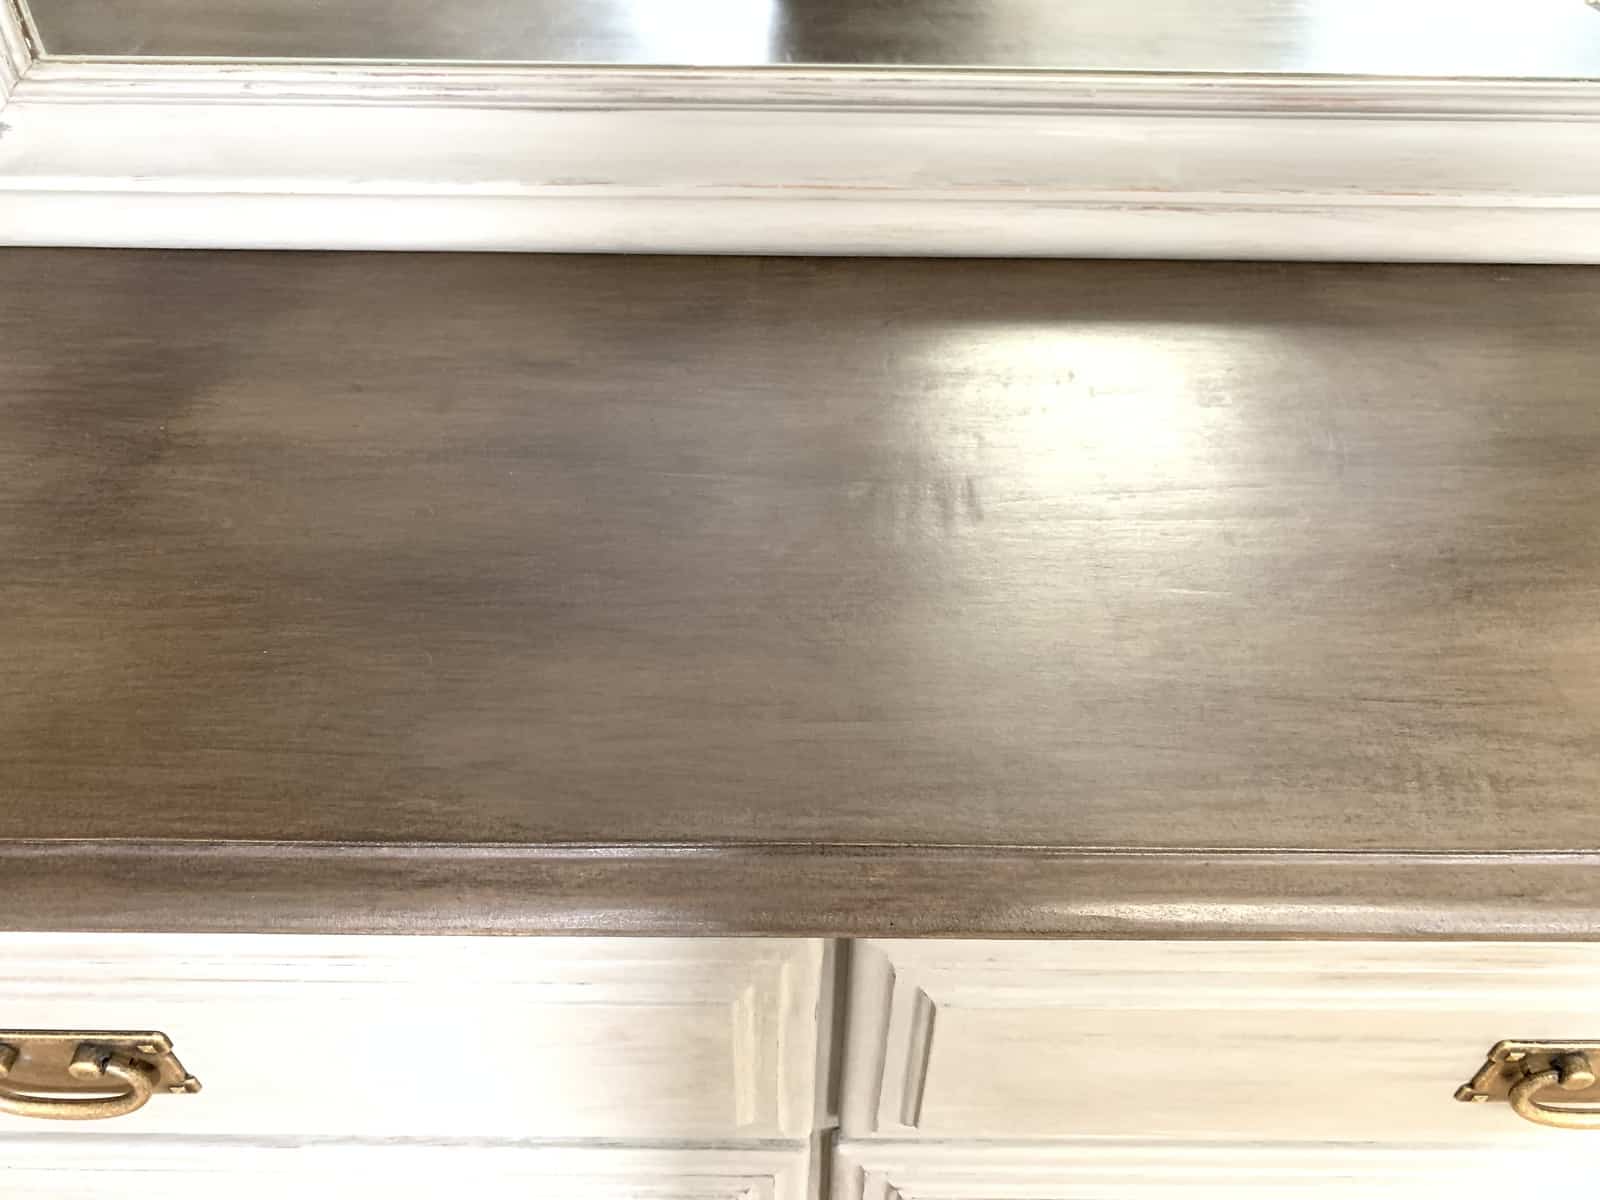
Once I got it home, I pretty immediately went to work! The top was a little beat up so I went to it with my belt sander and then followed up with my orbital sander. The goal was to remove as much of the old stain as possible so that I could re-stain the top.
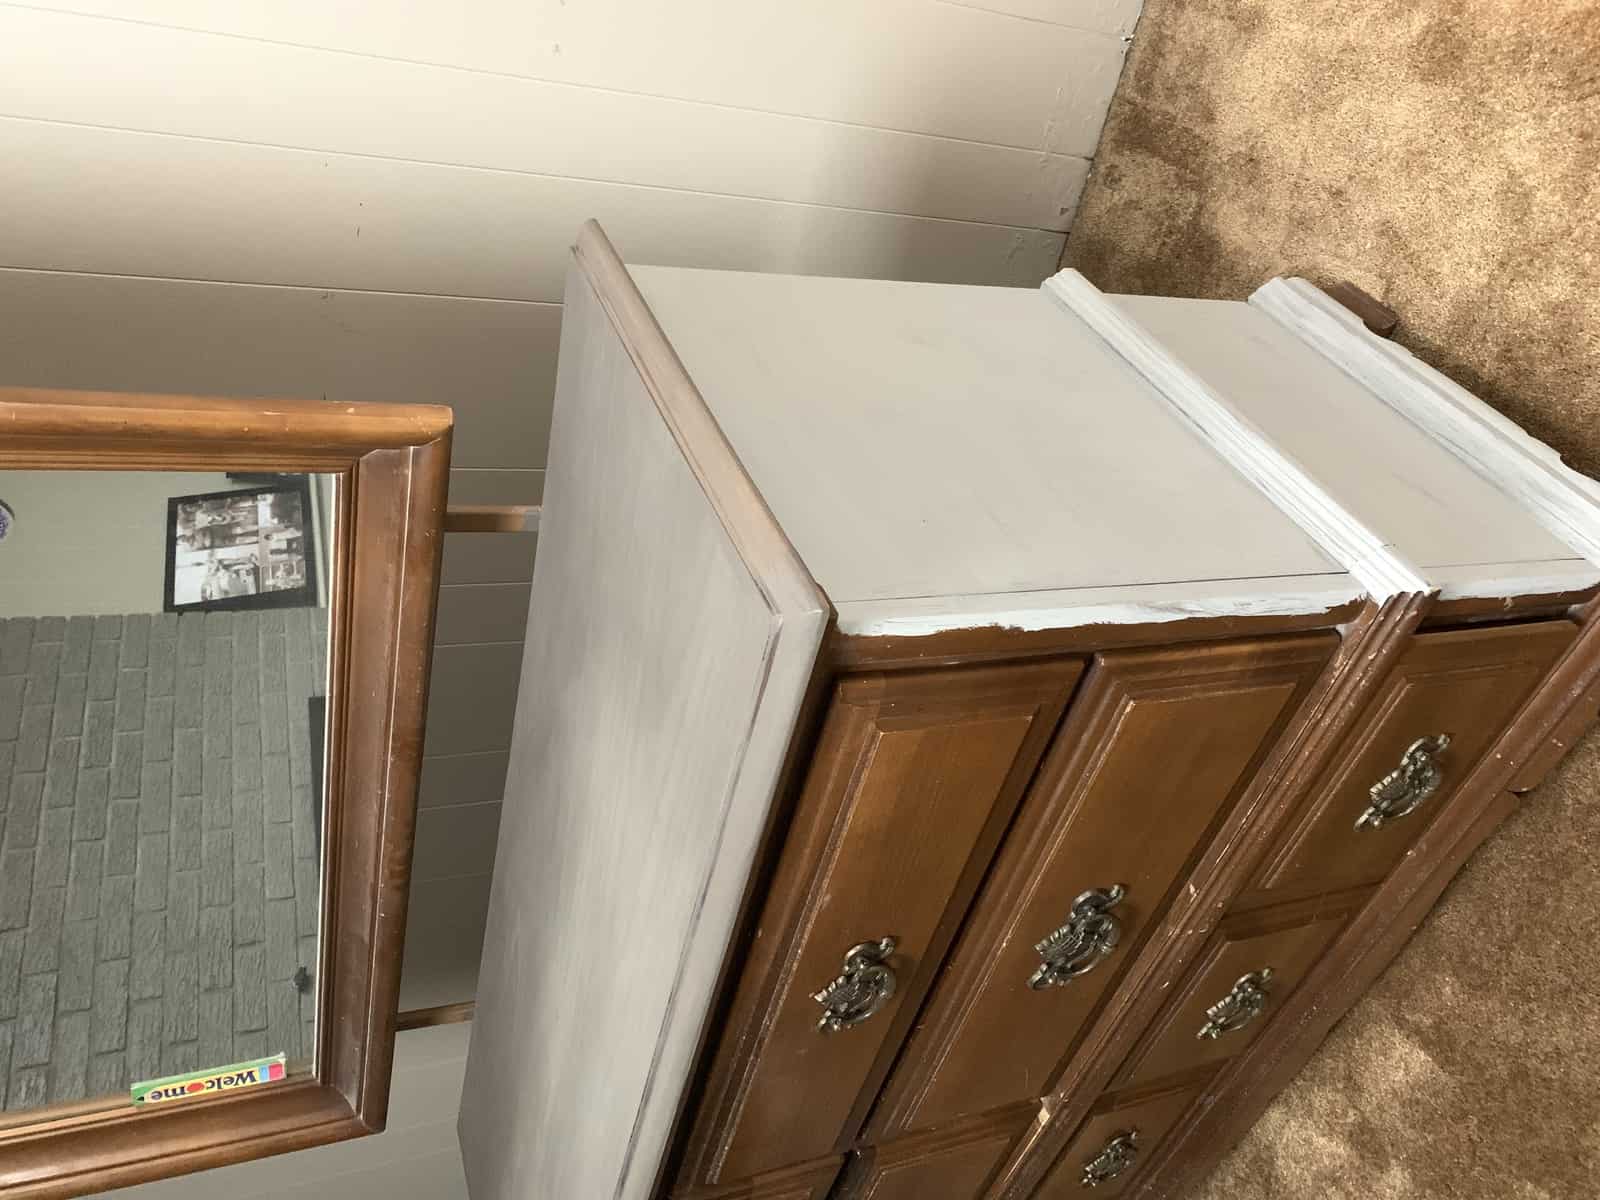
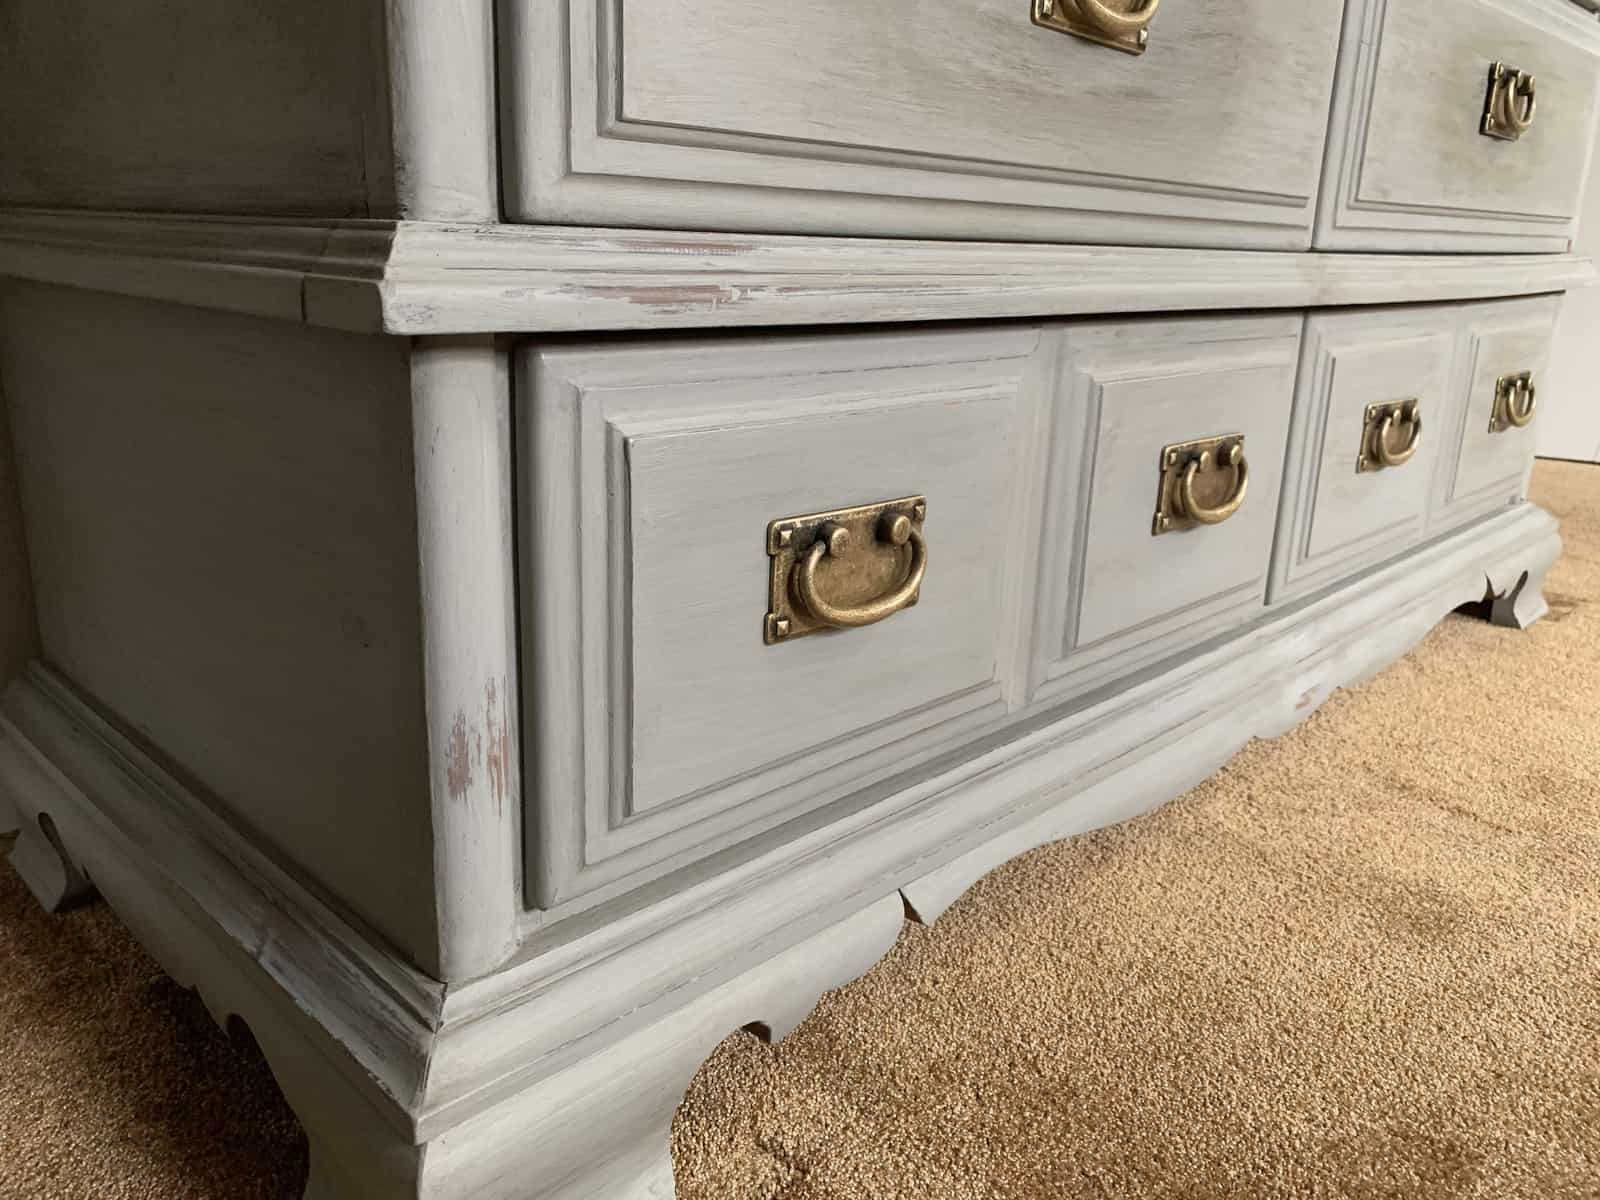
I did not, however, want to deal with stripping or sanding the bottom half of the dresser or the mirror. The plan for those pieces was to paint with chalk paint. So the bottom half of the dresser was cleaned and the drawer fronts were given a very light sanding with a sanding block (actually my 4 year old did this part, that is how seriously I took it). Otherwise, I did absolutely zero prep for the bottom half of the piece.
Application of Paint and Wax
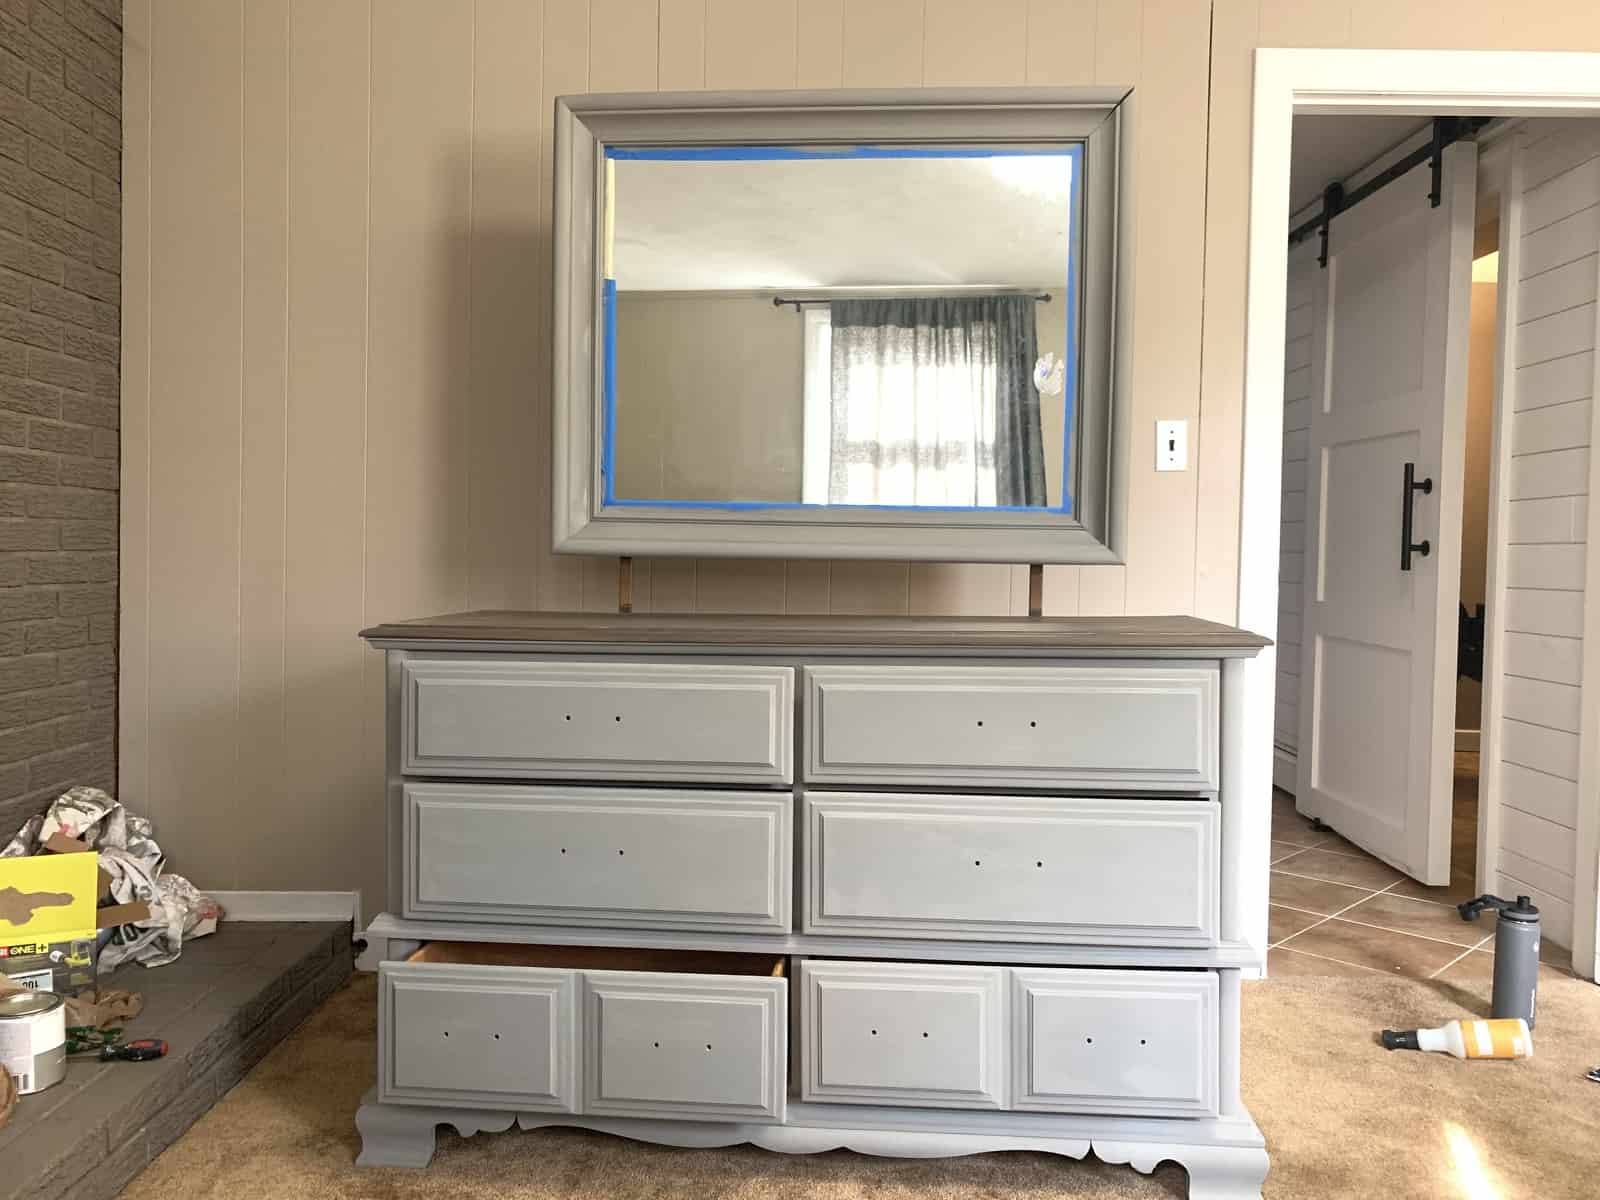
Chalk paint was used to paint both the mirror frame and the bottom half of the dresser and drawer fronts. You can find more tips on how to apply chalk paint in a previous post I wrote about updating furniture with chalk paint and gel stain!
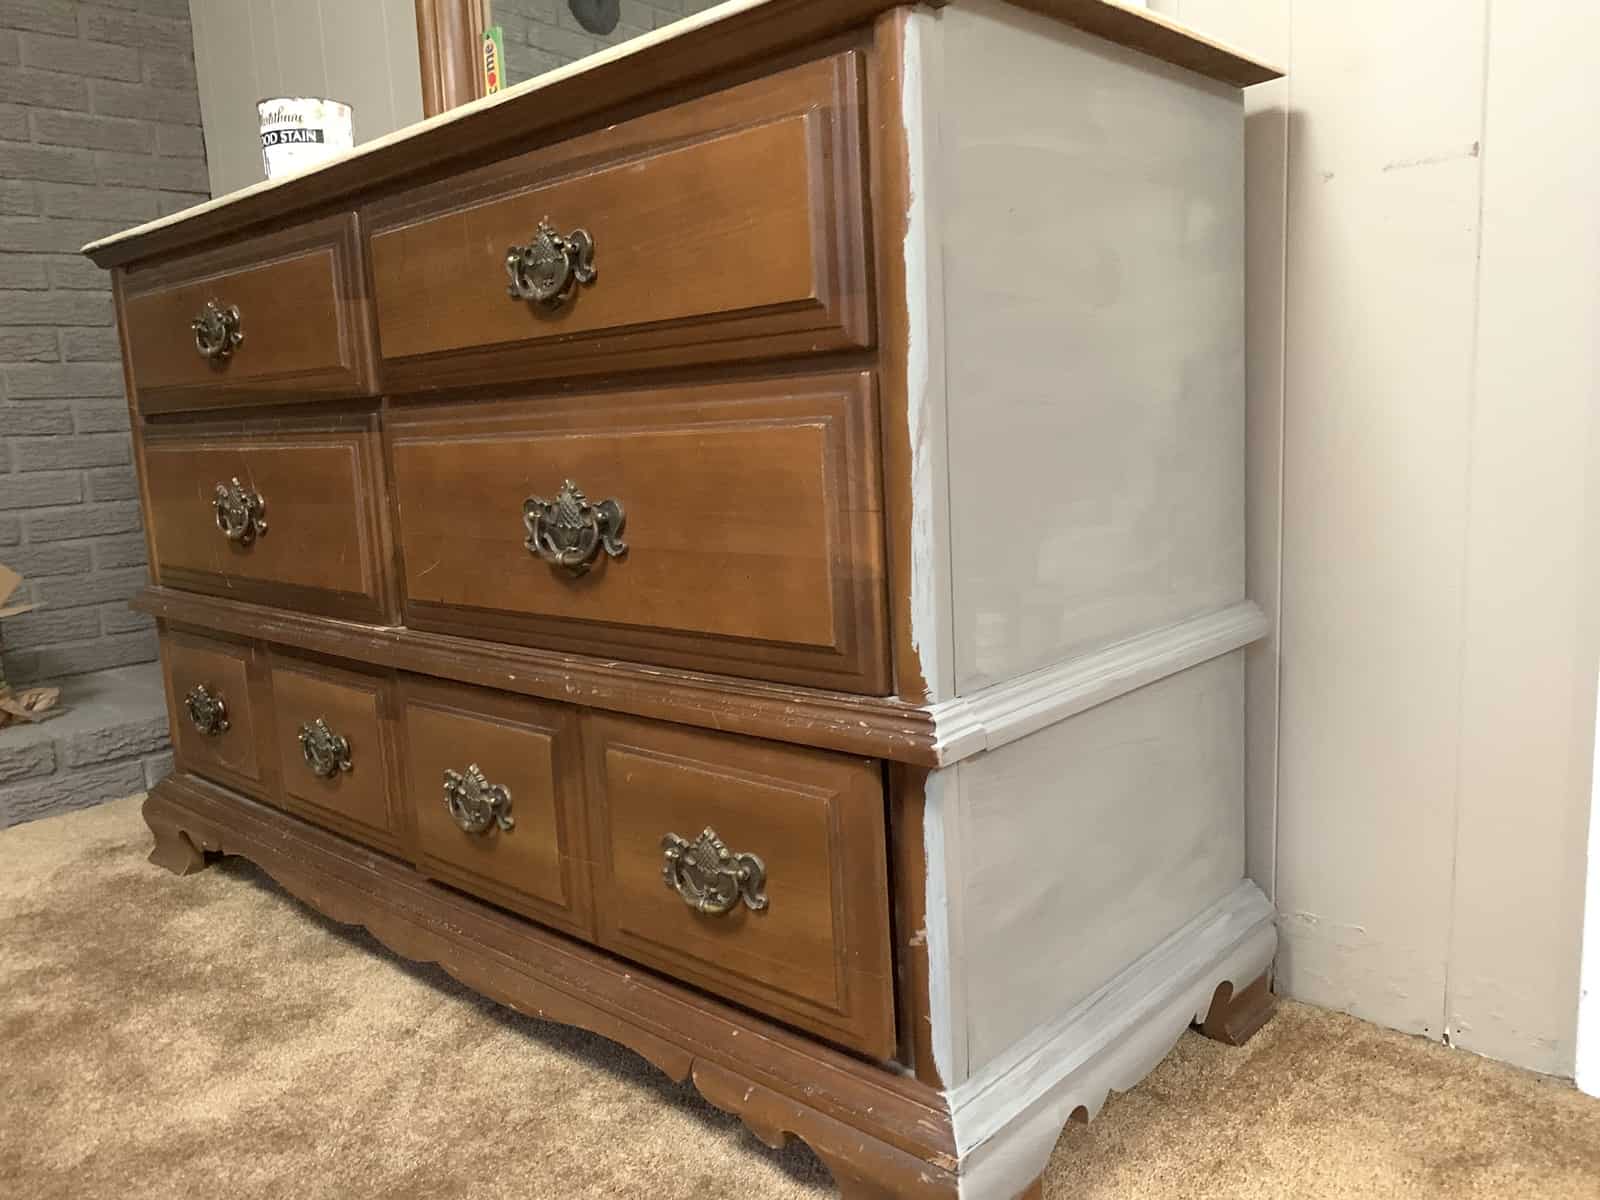
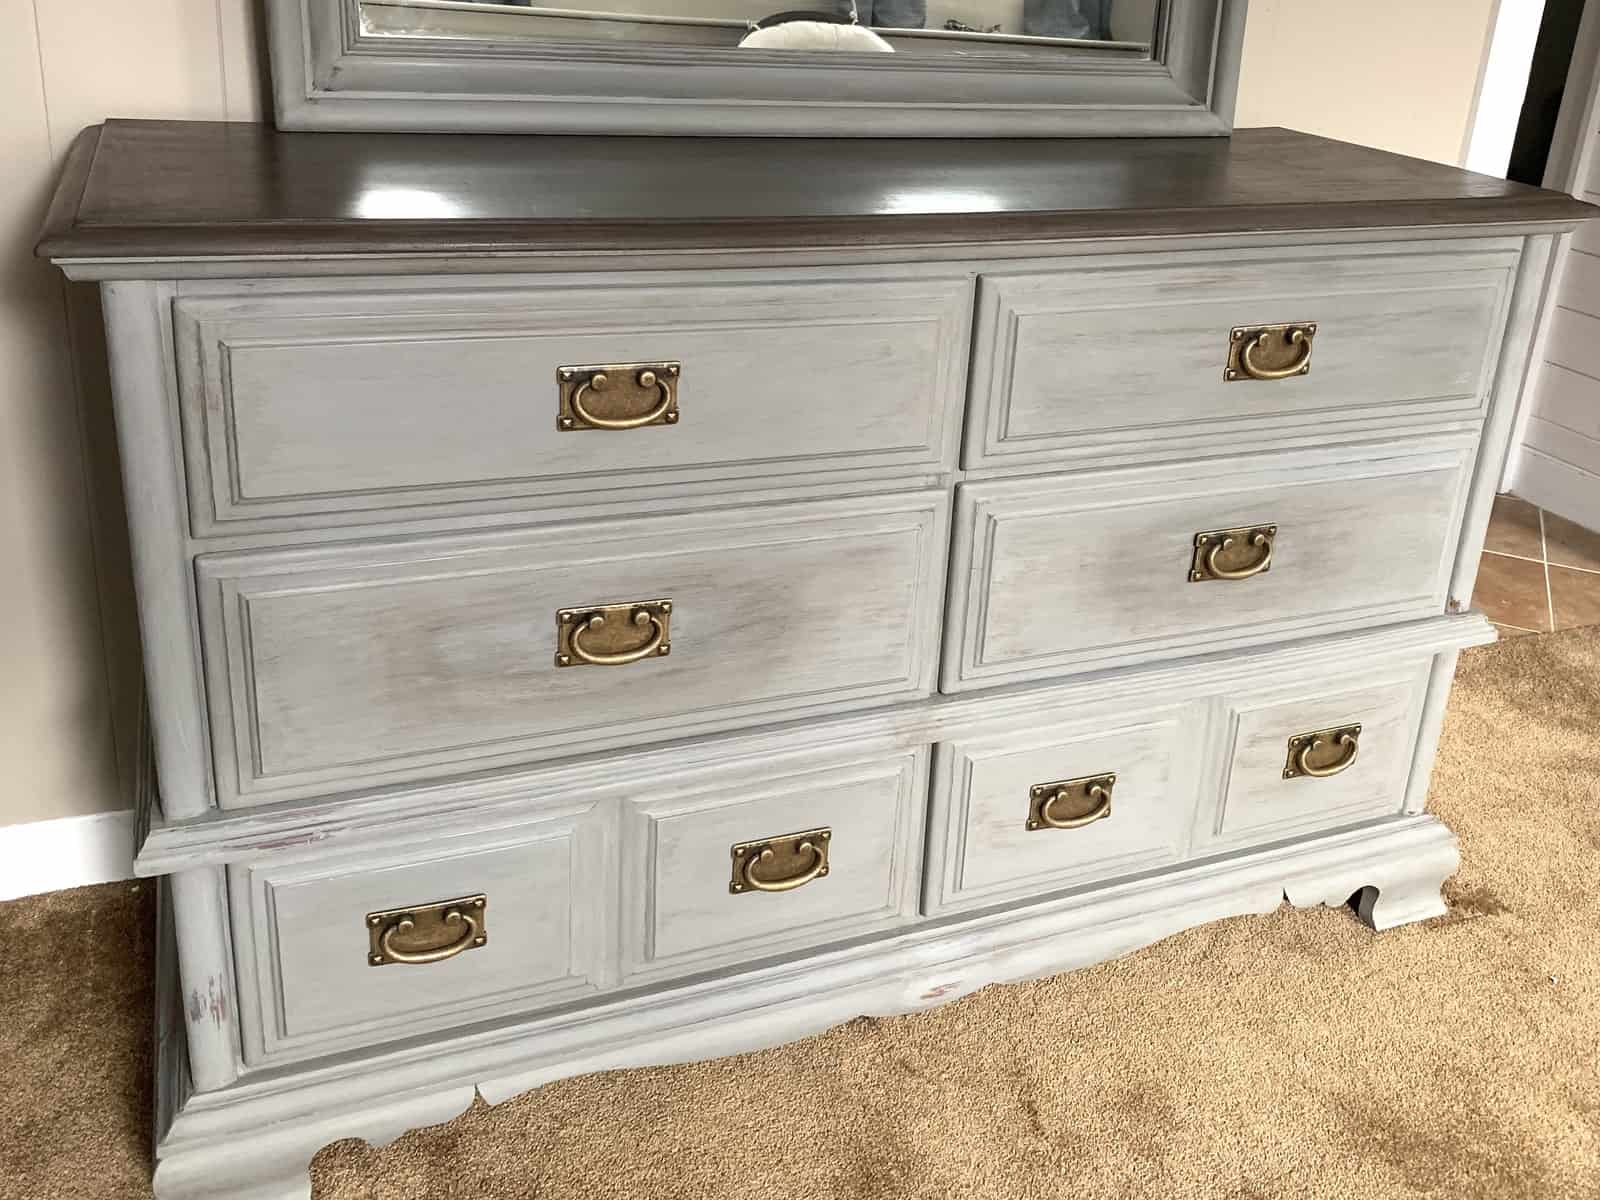
However, once it was all painted with two coats of chalk paint, I felt it looked a little flat and bland. It reminded me of a pastel easter egg. So I decided to add a little dark wax to antique it, add a little depth to the color, and pull out some of the details to create interest.
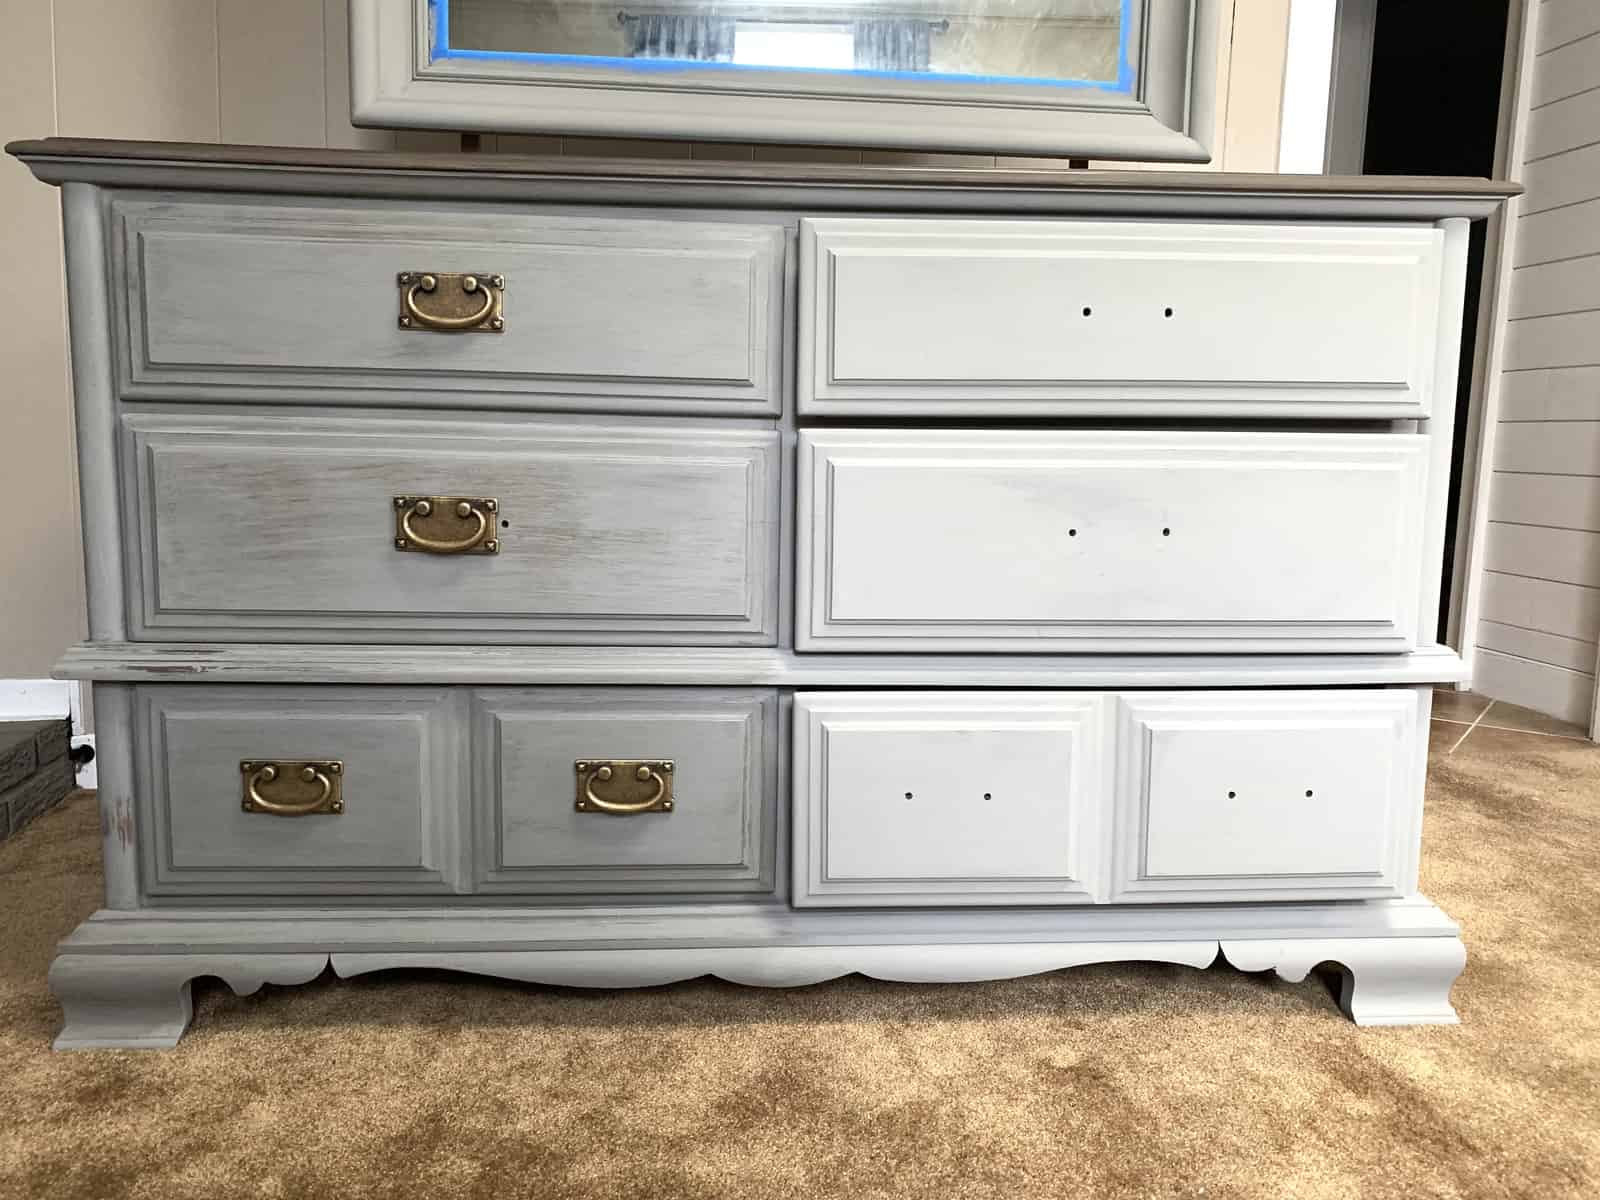
This was my first time working with dark wax and there is a bit of a learning curve. You need to work it in small sections, apply a clear wax first, and while that is still wet apply the dark wax to the top. You then almost immediately wipe it away using a clean lint free cloth. This helps prevent too much of the dark wax from sticking and clinging to the paint. Too much wax makes the finish look dirty. So you really just want a little to stick for a more natural finish.
For the dresser top I used Varathane Briarsmoke stain. However, once this was complete I also felt that it looked a little too light and a little too flat. I added a couple coats of the dark wax to this as well which deepened the finish giving a richer color. Again, the wax is a bit difficult to work with so the finish isn’t perfectly uniform. But I do really love how it make the color look so much richer!
Once you are all done applying wax, you need a clean cloth to buff it out to create a smoother satin sheen and finish. Again, I don’t work with wax a lot, so I was pleasantly surprised at the finish it created.
Finishing Touches
Lastly, I added these amazing new drawer pulls that I had found on Amazon. Aren’t they just the best? They still have an antique feel but look a lot more modern than the original pulls did. They also come in three colors. I chose the antique brass, but there is a flat black and an antique pewter color as well.
All in all, I spent about $75 for new handles and paint supplies. We can round that up to an even $100 to include the cost of the dresser and any miscellaneous items I may have forgotten. Overall, I would say this was well worth it for this beautiful vintage dresser refresh. Don’t you?? And it is SO easy. Something I would definitely recommend you try yourself! Best wishes!