How to Make a DIY Diamond Tufted Headboard
I don’t know about you, but my bedroom has always been my happy place. It is where I go to cozy up with a book, watch a movie on my laptop, and of course sleep. Needless to say, I spend a ton of time in there. So it wasn’t even a question when we moved into our new house that the bed would be a top priority. This DIY diamond tufted headboard was a much needed addition to our room and really created the upscale vibe we were going for!
Disclaimer: In the name of full transparency, please be aware that this blog post contains affiliate links and any purchases made through such links will result in a small commission for me (at no extra cost for you). As an Amazon Associate I earn from qualifying purchases.
Supplies
- 1/2″ plywood or MDF
- 2×2 board (for legs)
- 2″ foam
- Spray adhesive
- Batting
- Fabric- I chose a wheat colored linen from fabric.com
- Button cover and kit
- Total cost: I like to round up for possible variations in cost and will just say about $150. I know that doesn’t sound super cheap…but just do a quick search for diamond tufted headboards. When you see that they typically range between $800-1200, you’ll be back. 😉
Why DIY?
Our previous home had a queen size bed and we upgraded to a king size upon our move. Unfortunately, we did not have a bed frame or headboard for it (picture college mattress on the ground). We looked at beds from our favorite retailers (Restoration Hardware, Pottery Barn, Crate and Barrel) and fell in love with the tufted headboards but not so in love with the price. Not to mention we had just purchased a house. So of course I was happy to give the DIY version a go! And I couldn’t be more pleased with how it turned out. At the time, I hadn’t gotten much into woodworking so I did a few other creative workarounds to make the bed base as well (which I can go into in another tutorial if there is interest).
Getting Started
But let’s start with the headboard, shall we?! Because honestly you could very easily get away with just making this one piece if you already have a metal bed frame or some other bed base. It is a tad time consuming overall, I won’t lie, but it is also really stunning and totally worth it! And it has held up really well, as I actually built this about three years ago and am just getting around to documenting it now. SMH. To be fair, I wasn’t blogging back then so it would’ve been a tad weird for me to document the whole process at the time. More in process pictures definitely would’ve been nice to have though!
Anyway, as any self respecting DIYer would do when attempting a new project, I turned to Pinterest. I found and (mostly) followed this tutorial from Handmade by Carmona and it offers some really great tips! Definitely check it out for more step by step pics.
Building the Base
First I started with a piece of 1/2 inch thick plywood the same width as my mattress. The height is totally a personal preference. I kinda eyeballed where I wanted mine to be on the wall and then made up dimensions from there. I also attached a 2×2 boards to the back side of each outer edge to create a leg (just attached straight through with screws from the back- you won’t see this anyway if it is up against a wall). Again, you can completely customize this part depending on how much height you want your headboard to have.

Add Padding
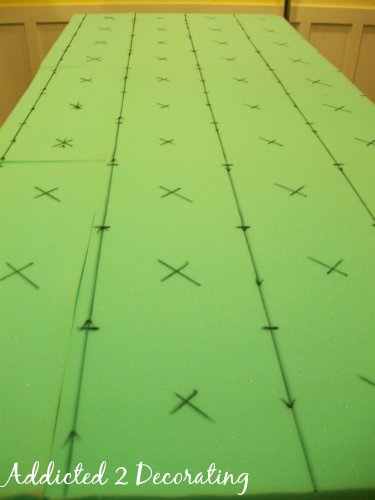
Then I placed 2 inch foam over the top of the plywood which I got from Joann’s Fabric. Find coupons for this for sure because it can be a tad pricey. Spray adhesive was applied to the board first to help the foam stick. Then using a marker I measured out and marked the spots for all of my diamond tufts. I used this lovely lady’s guide over at Addicted2Decorating for measuring, marking, and drilling out my holes and it worked beautifully.
Measure and Drill the Diamonds
Once all the measurements are done, a drill bit was used to drill directly through the foam and through the wooden backing. That said, the drill bit likes to try to get caught up in the foam. You can either work through it or hollow out a bit of the foam first to make it easier to drill through (either way, you’ll hollow out a bit before or after). After all the holes have been drilled and the foam hollowed out a bit around the holes (allowing the button to sink a bit deeper and give those deep tufts), you will cover the foam with batting which is then attached to the back with staples.
Add Fabric and Buttons-Tufting
Now, the fun stuff begins. You will need to pick out your fabric and make sure you have a decent bit of excess (like an extra 18″ per side). You need extra because as you are tufting and folding, the fabric will pull in and you need to make sure to have enough to go back and secure the sides at the end.
With the fabric you choose you will also need to cut an edge of scrap to cover your buttons that will go in the middle of the tufts. This is a tad tedious but really looks nice in the end! That said, if you have some fun buttons you like or want something with contrast you can really do it however you want. I used this Dritz button cover kit and it worked great!
Again, refer to the above tutorials in regards to how to fold the fabric. But essentially you will need to start in the top row, center hole first. The top row has vertical folds. Do this as you go to help make sure you have enough slack in between each section. Try your best to get tight folds here. You can see below that mine definitely are not perfect. The linen was thin and a tad hard to work with.
Use a long upholstery needle threaded with strong upholstery thread to come through from the back. You need this thread to be attached to something so it doesn’t pull all the way through your drilled hole. One of the above tutorials recommends using buttons on the back side. I did try that and it worked, for a while. But with time several of those buttons have popped and needed to be replaced. Therefore, I recommend using metal washers to keep it nice and strong and save you the headache down the road.

Staple the Edges
Once you have all of your buttons pulled through and tied, (which is by far the most tedious part of the project), you then need to staple the edges of the fabric to the backside of your plywood board. At this point I also carefully stained the legs and bottom of the plywood. I used general finishes Java gel stain (you could also do this ahead of time…whatever works). I then stapled the bottom of the fabric by folding under the edge and stapling right beneath the foam. If your headboard is shorter, you might also be able to wrap it around on the bottom. You can’t see any of this part anyway because the bed base pushed up against it here. For the top corners, I folded over the top portion to create a corner crease. This just gives a nice finished look without any sewing.


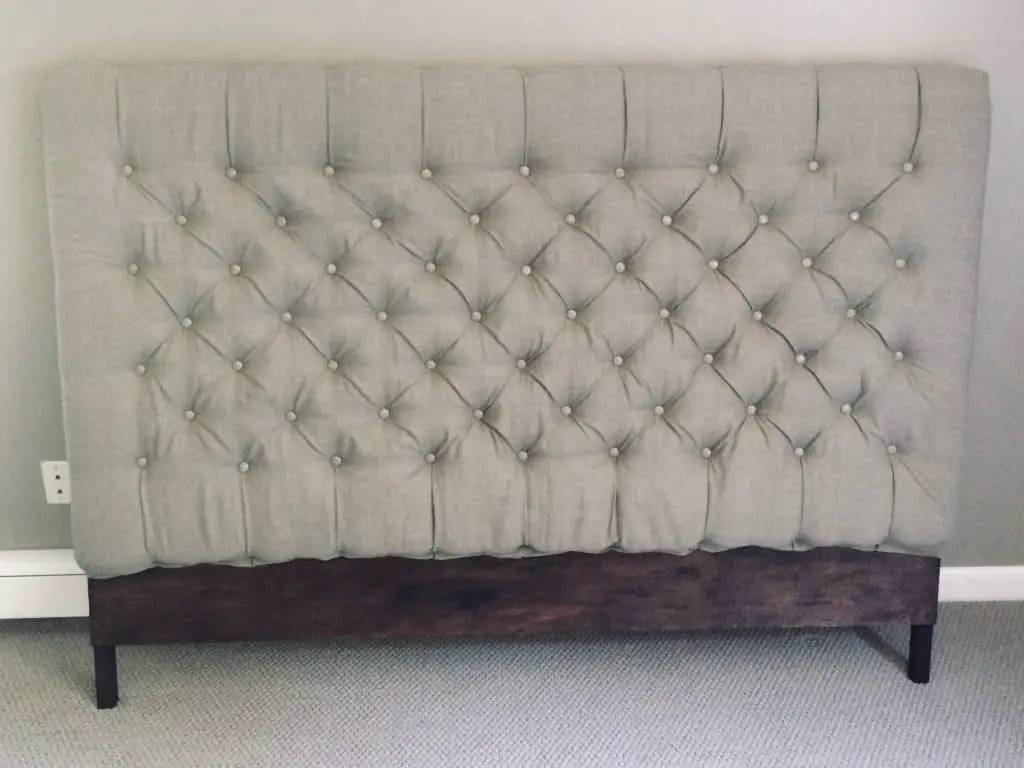
Finished Diamond Tufted Headboard
There you have it, a DIY diamond tufted headboard! I hope this post gives you some good resources for getting started on your own! I would love to create a full tutorial at some point to walk you through all of the steps above without sending you off to other sites. Unfortunately at the time I made this I didn’t do a very good job documenting each step and I want you to be able to see the steps as you work through them. Next time, next time. Until then, happy making!!

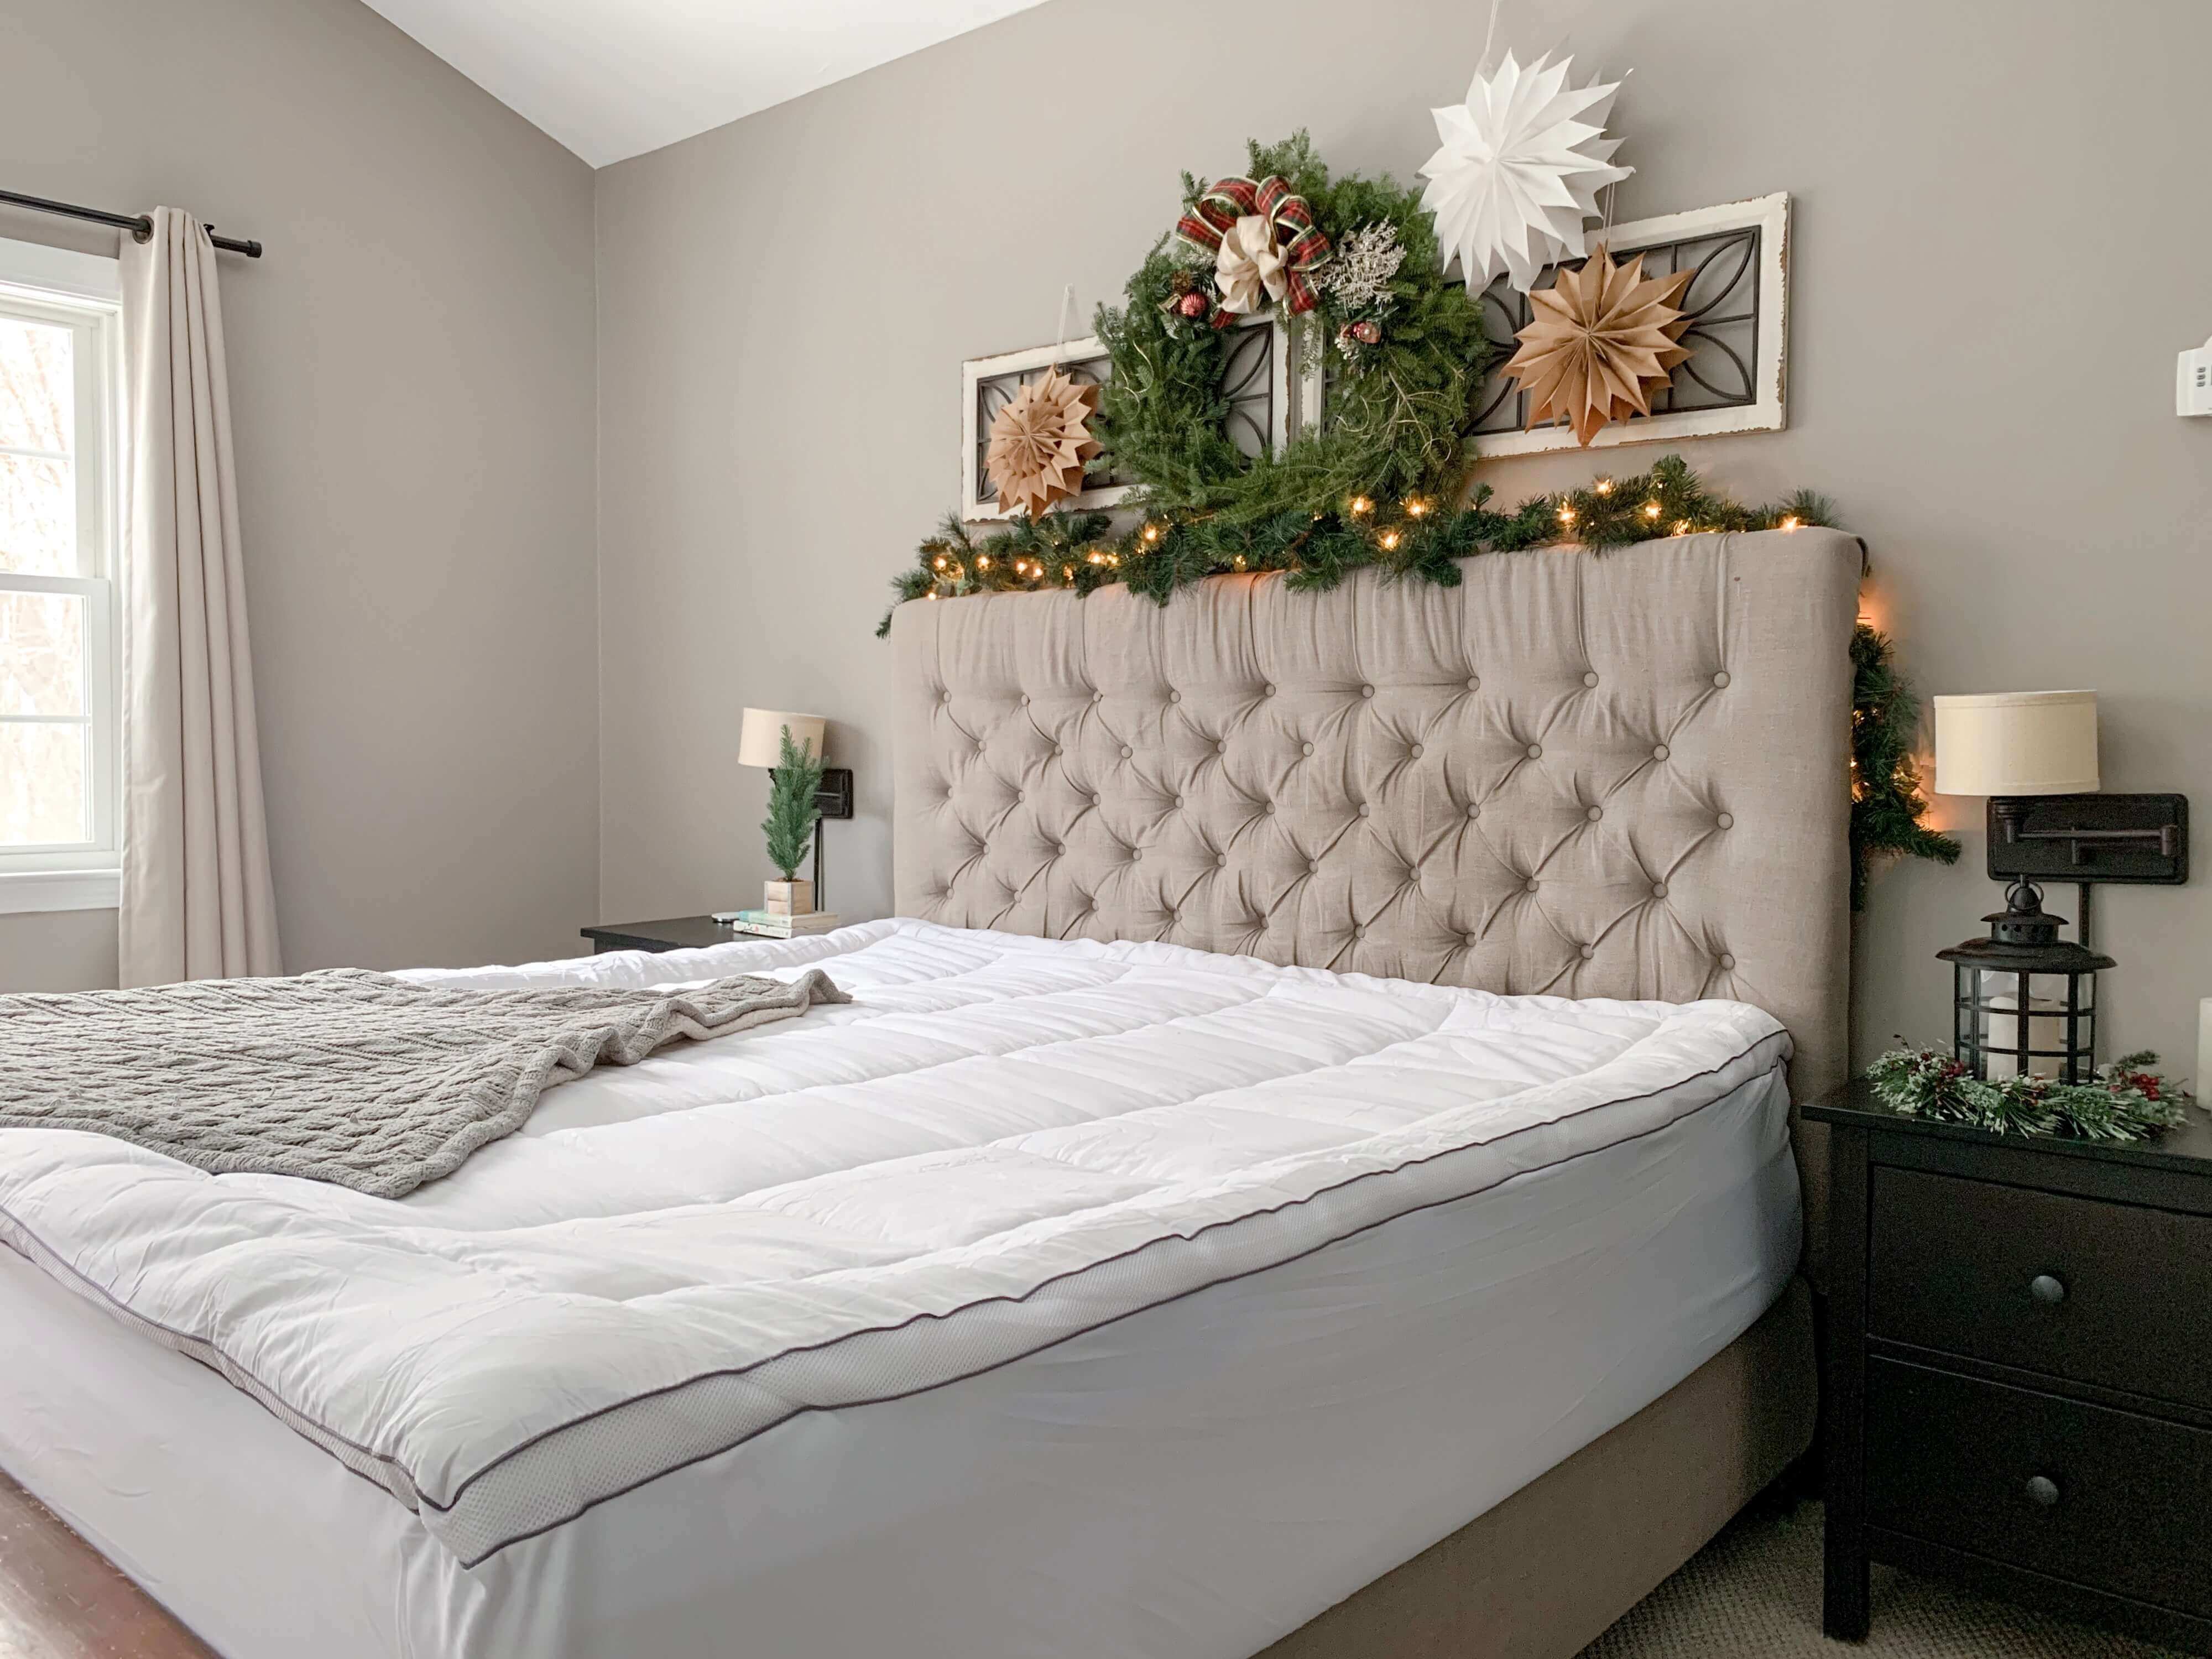
This beautiful DIY Diamond tufted headboard is pictured above with seriously THE best mattress topper I have ever tried! It is seriously more comfortable than it looks so check out the link above if you are the market for a mattress upgrade.
Looking for an easier upholstered headboard? Check out my framed upholstered headboard. Still beautiful but less tedious.