How to Create an Organized Garage Workshop
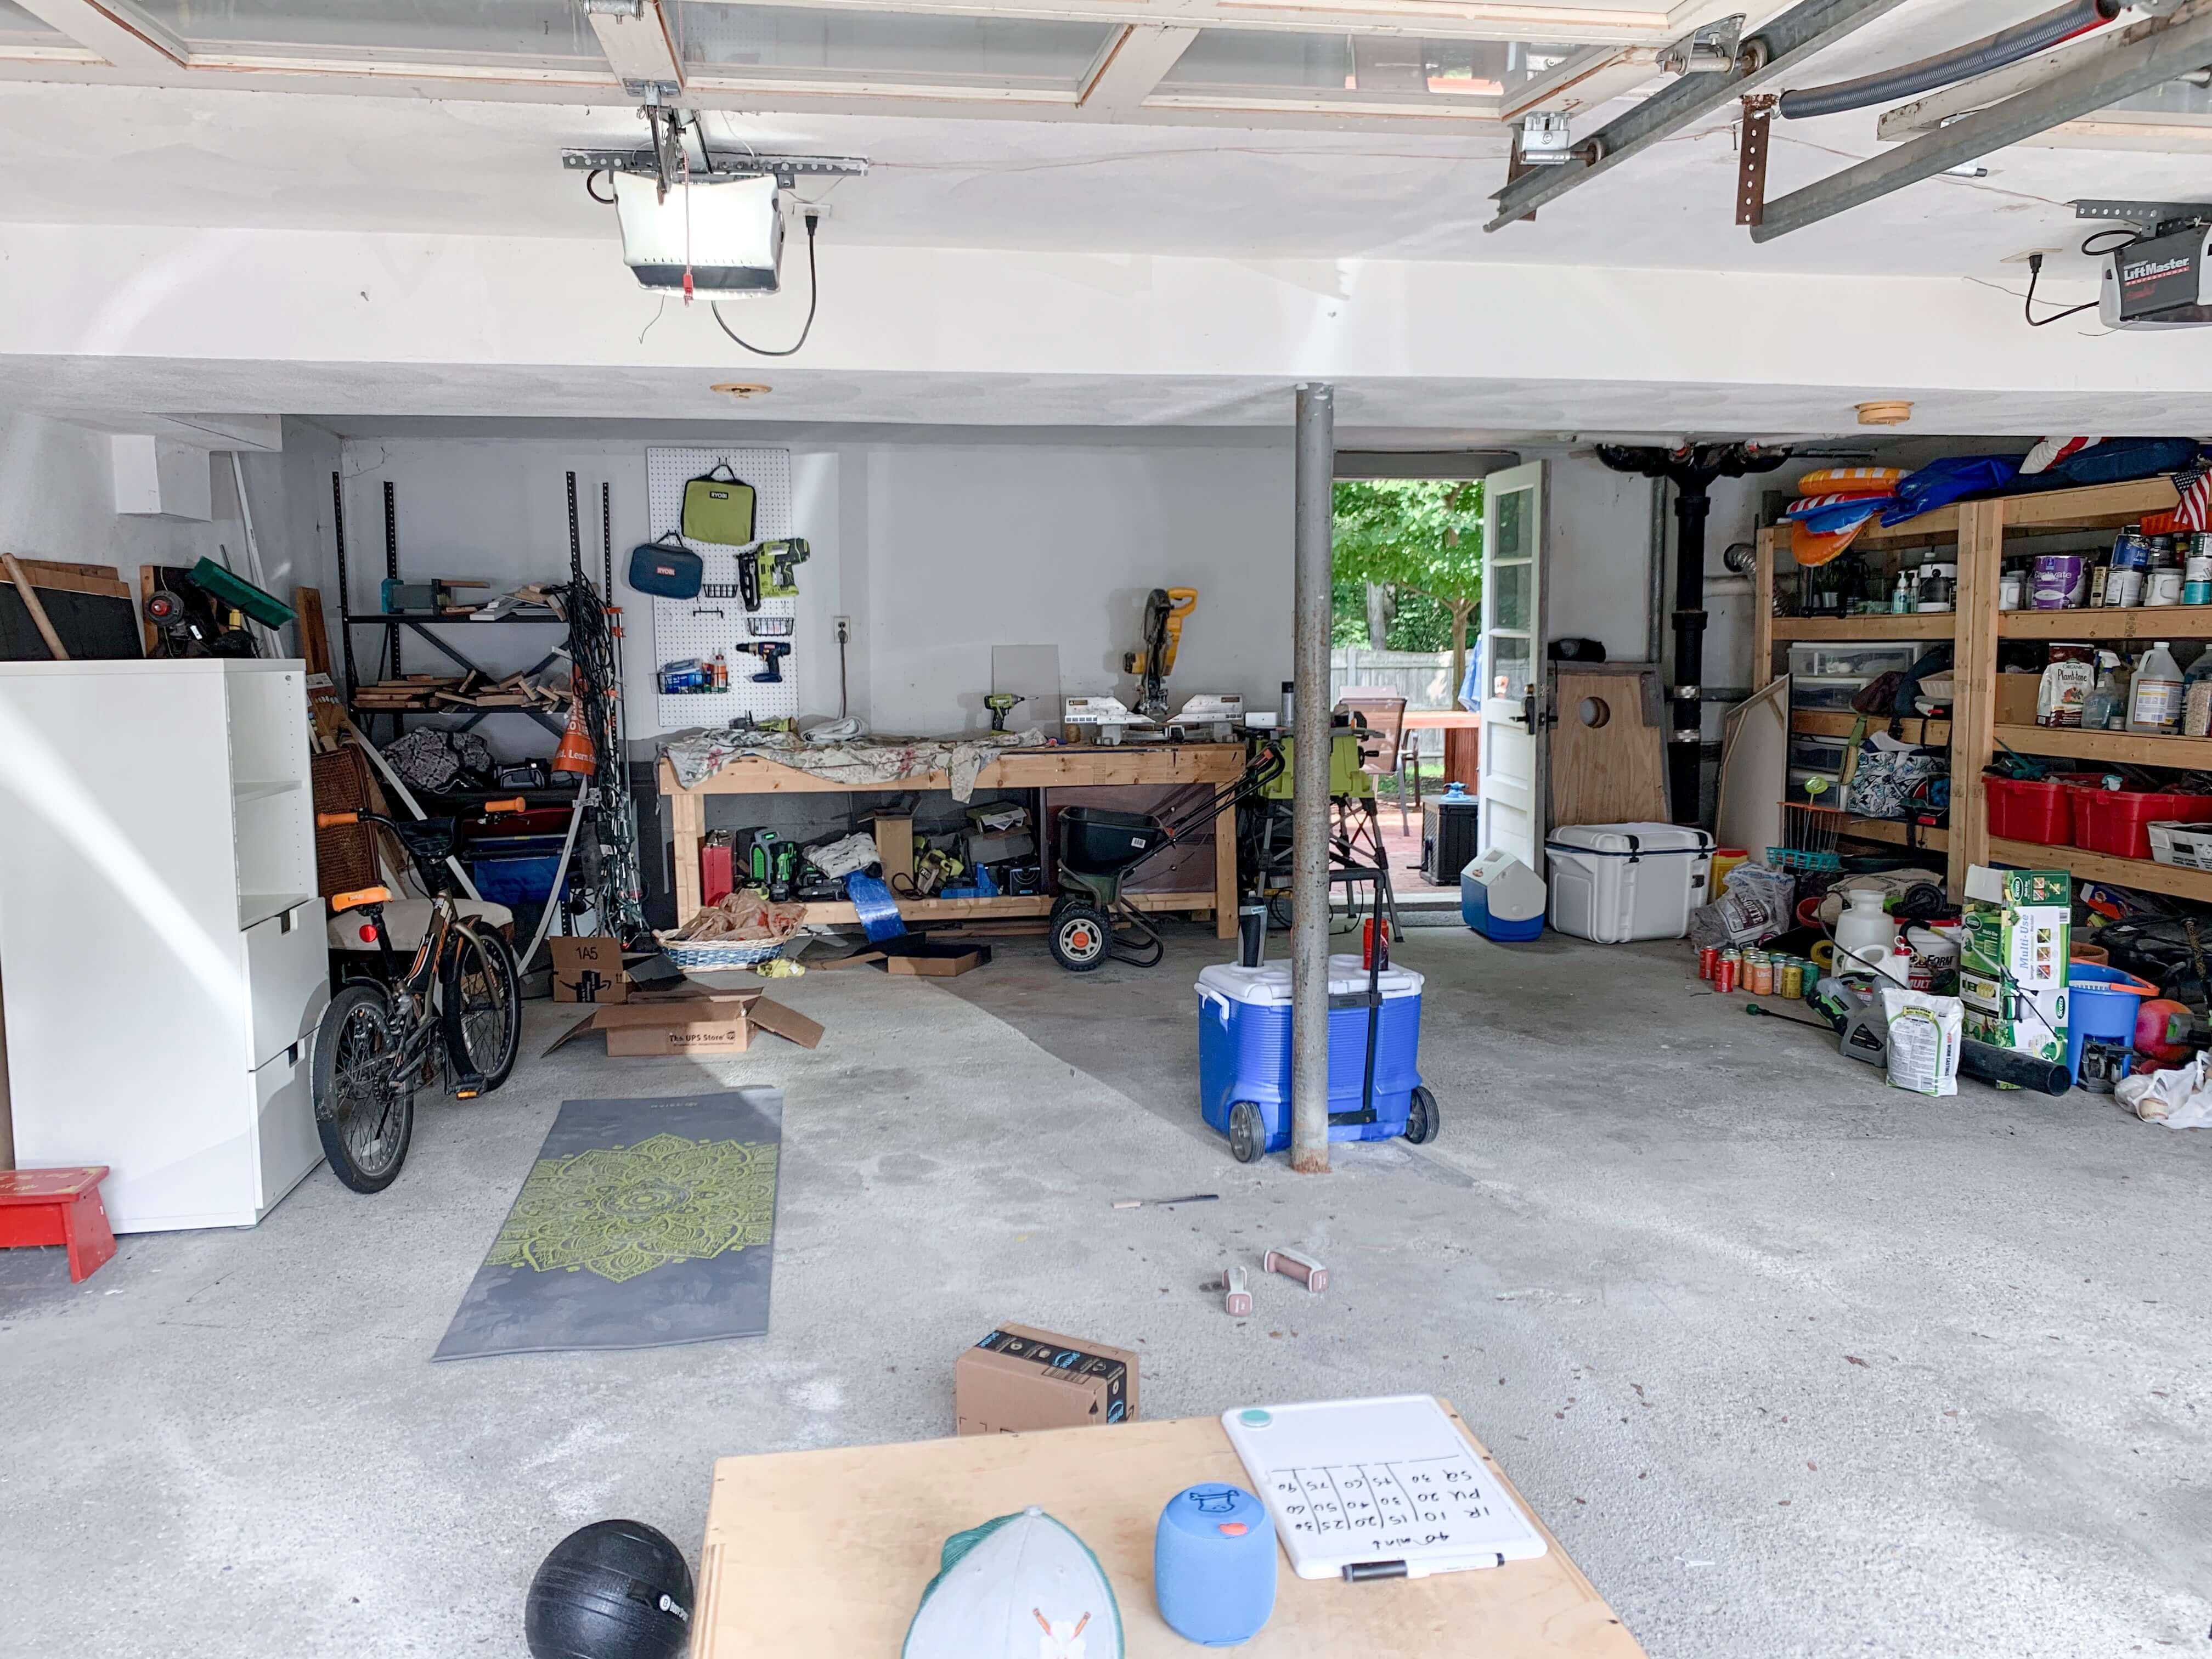
My garage is the catch all for literally everything. It is where I do woodworking projects, where we store our toys and bikes, and where we sometimes park our cars. Needless to say, it gets MESSY! So I spent a good weekend (ok, probably two) totally transforming this space to become a more organized garage space that is not only more functional but also more pleasing to look at.
Disclaimer: In the name of full transparency, please be aware that this blog post may contain affiliate links and any purchases made through such links will result in a small commission for me (at no extra cost for you). As an Amazon and Home Depot Associate I earn from qualifying purchases.
Supplies
Step 1: Clean and Sort
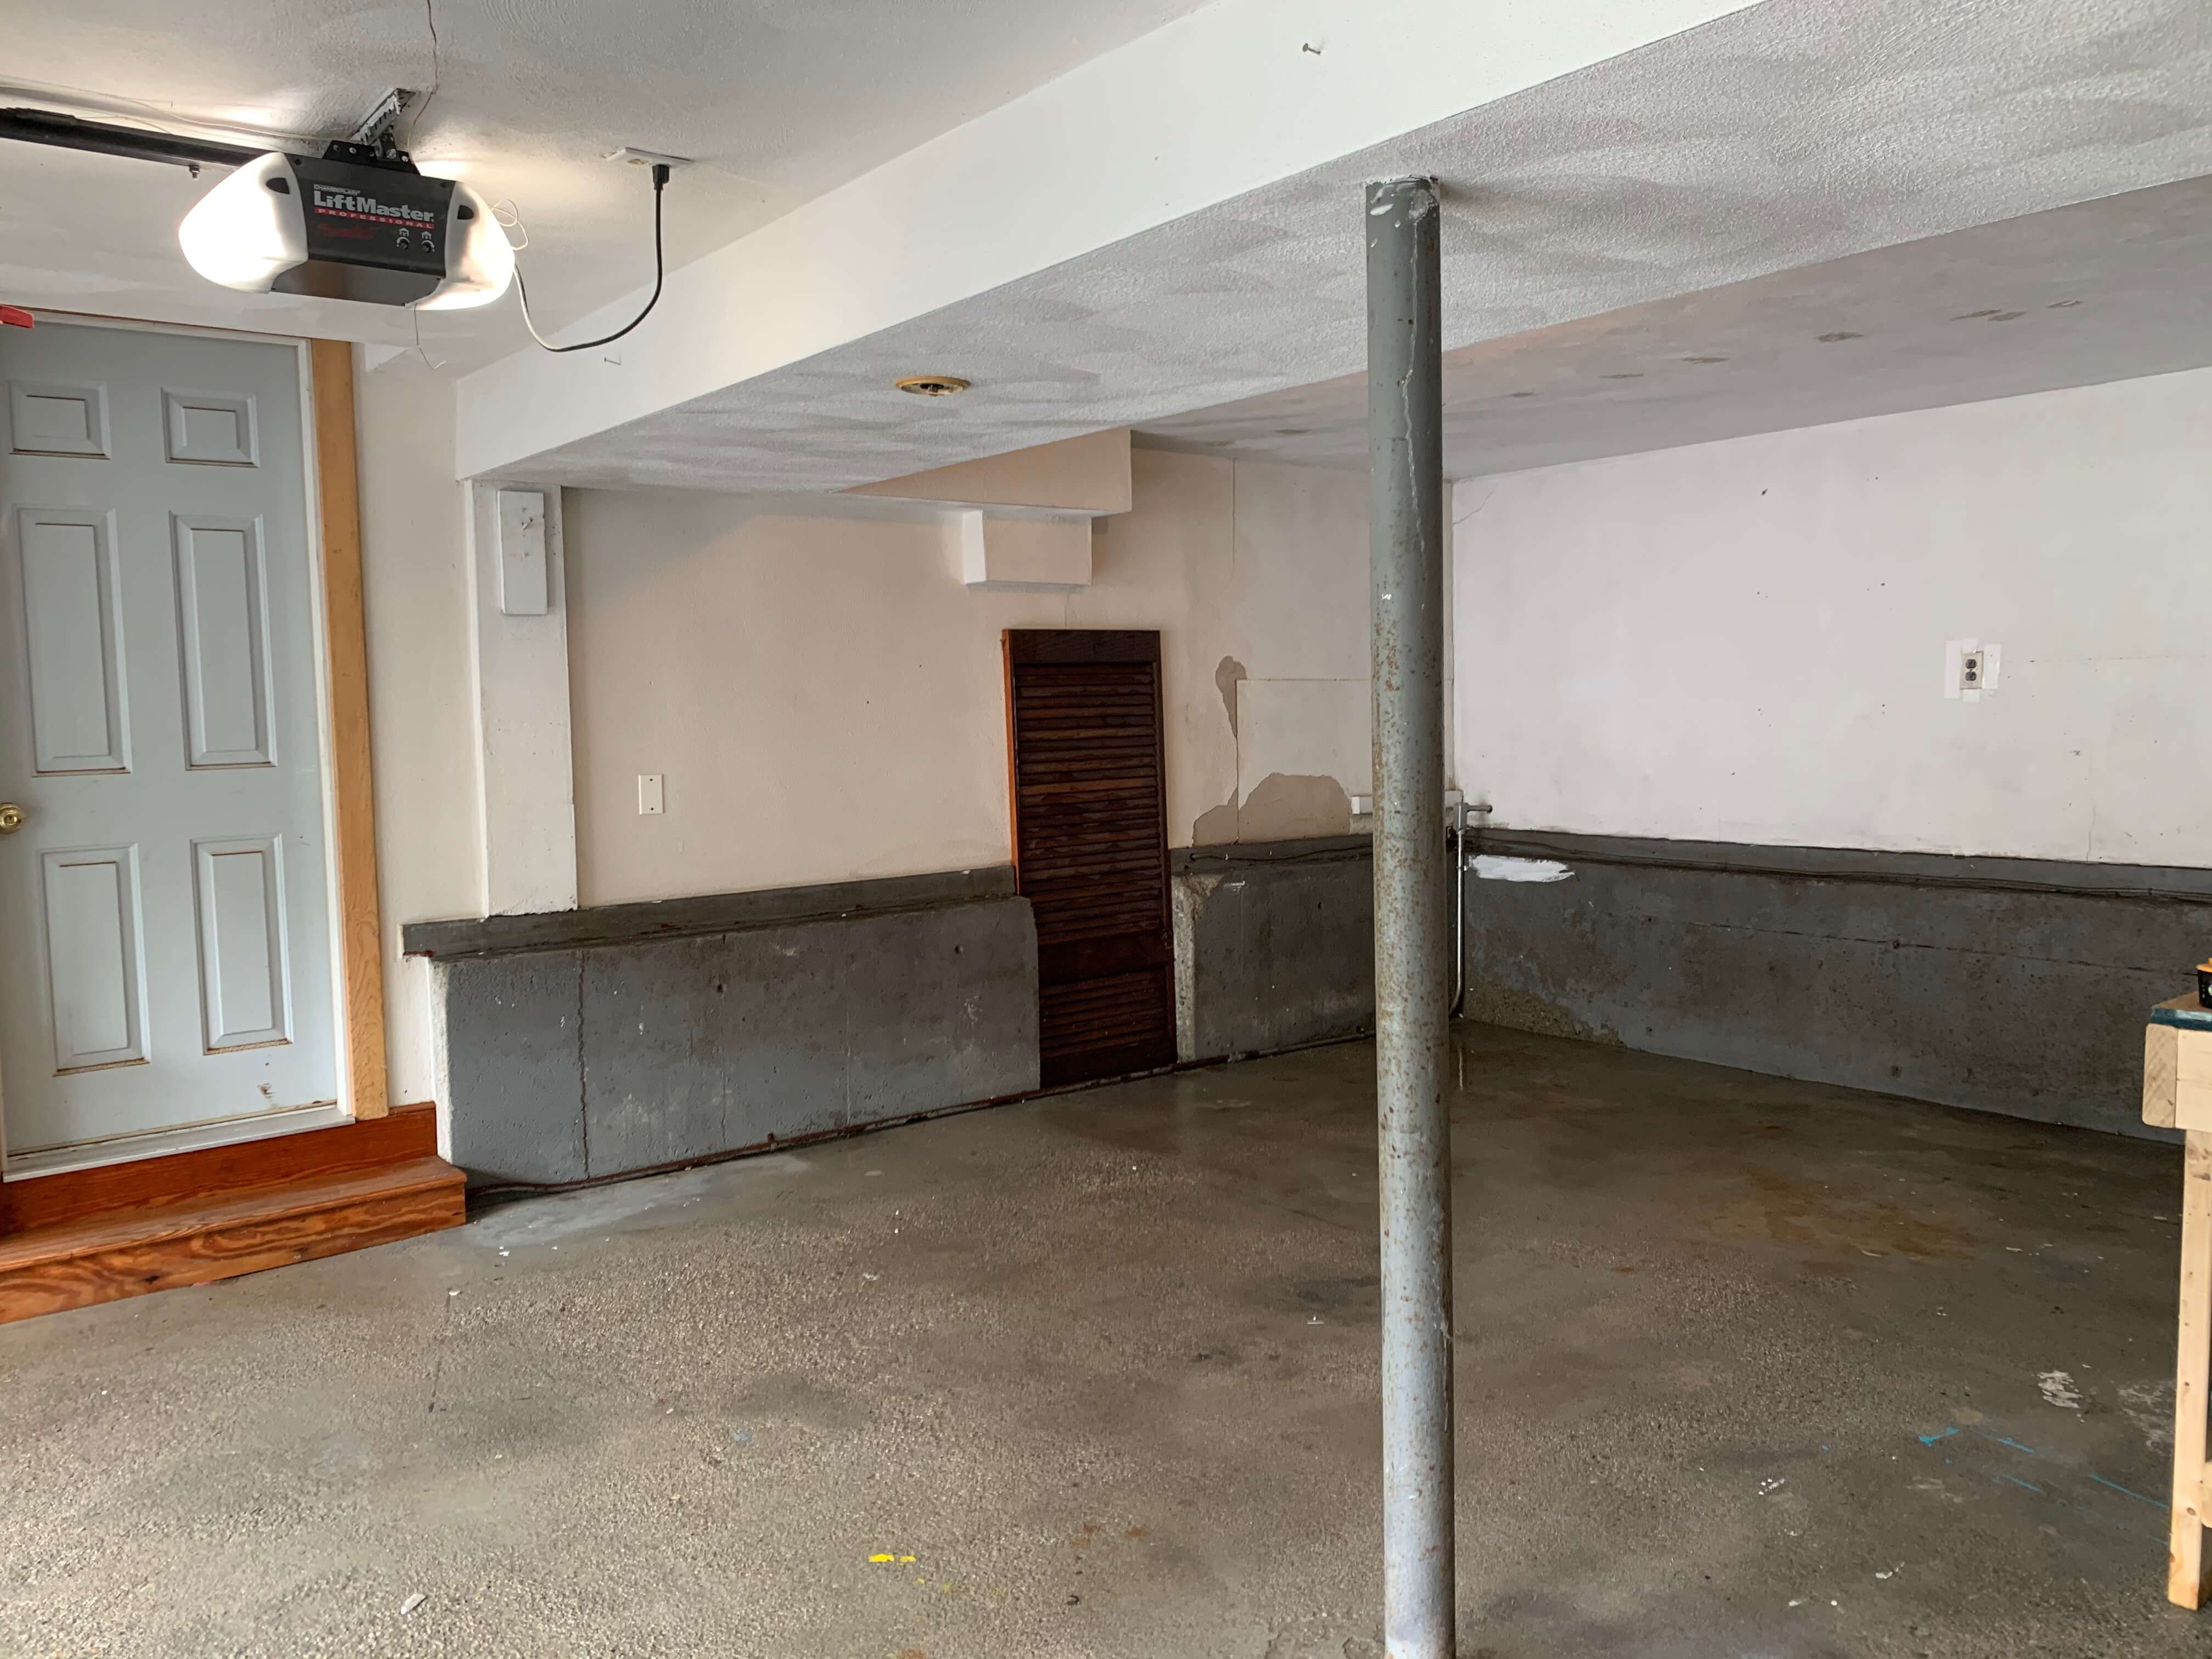
The first step to an organized garage is to literally pull everything out. Sort through what you need, what you don’t need, and organize things into categories for storage. This is a painful but necessary step. How can you clean and organize if you don’t even know what you have?!
Once everything is out it is time to clean. I started by using the blower to get out all dust and debris. Then I used the hose to wash the walls and flooring prior to repainting the walls. You may not need to repaint but my garage walls were in pretty rough shape and definitely needed some patching and a new coat of paint. I applied white paint to the walls with a paint sprayer and did very little prep as I was doing the floors next. Which leads me to my next project…
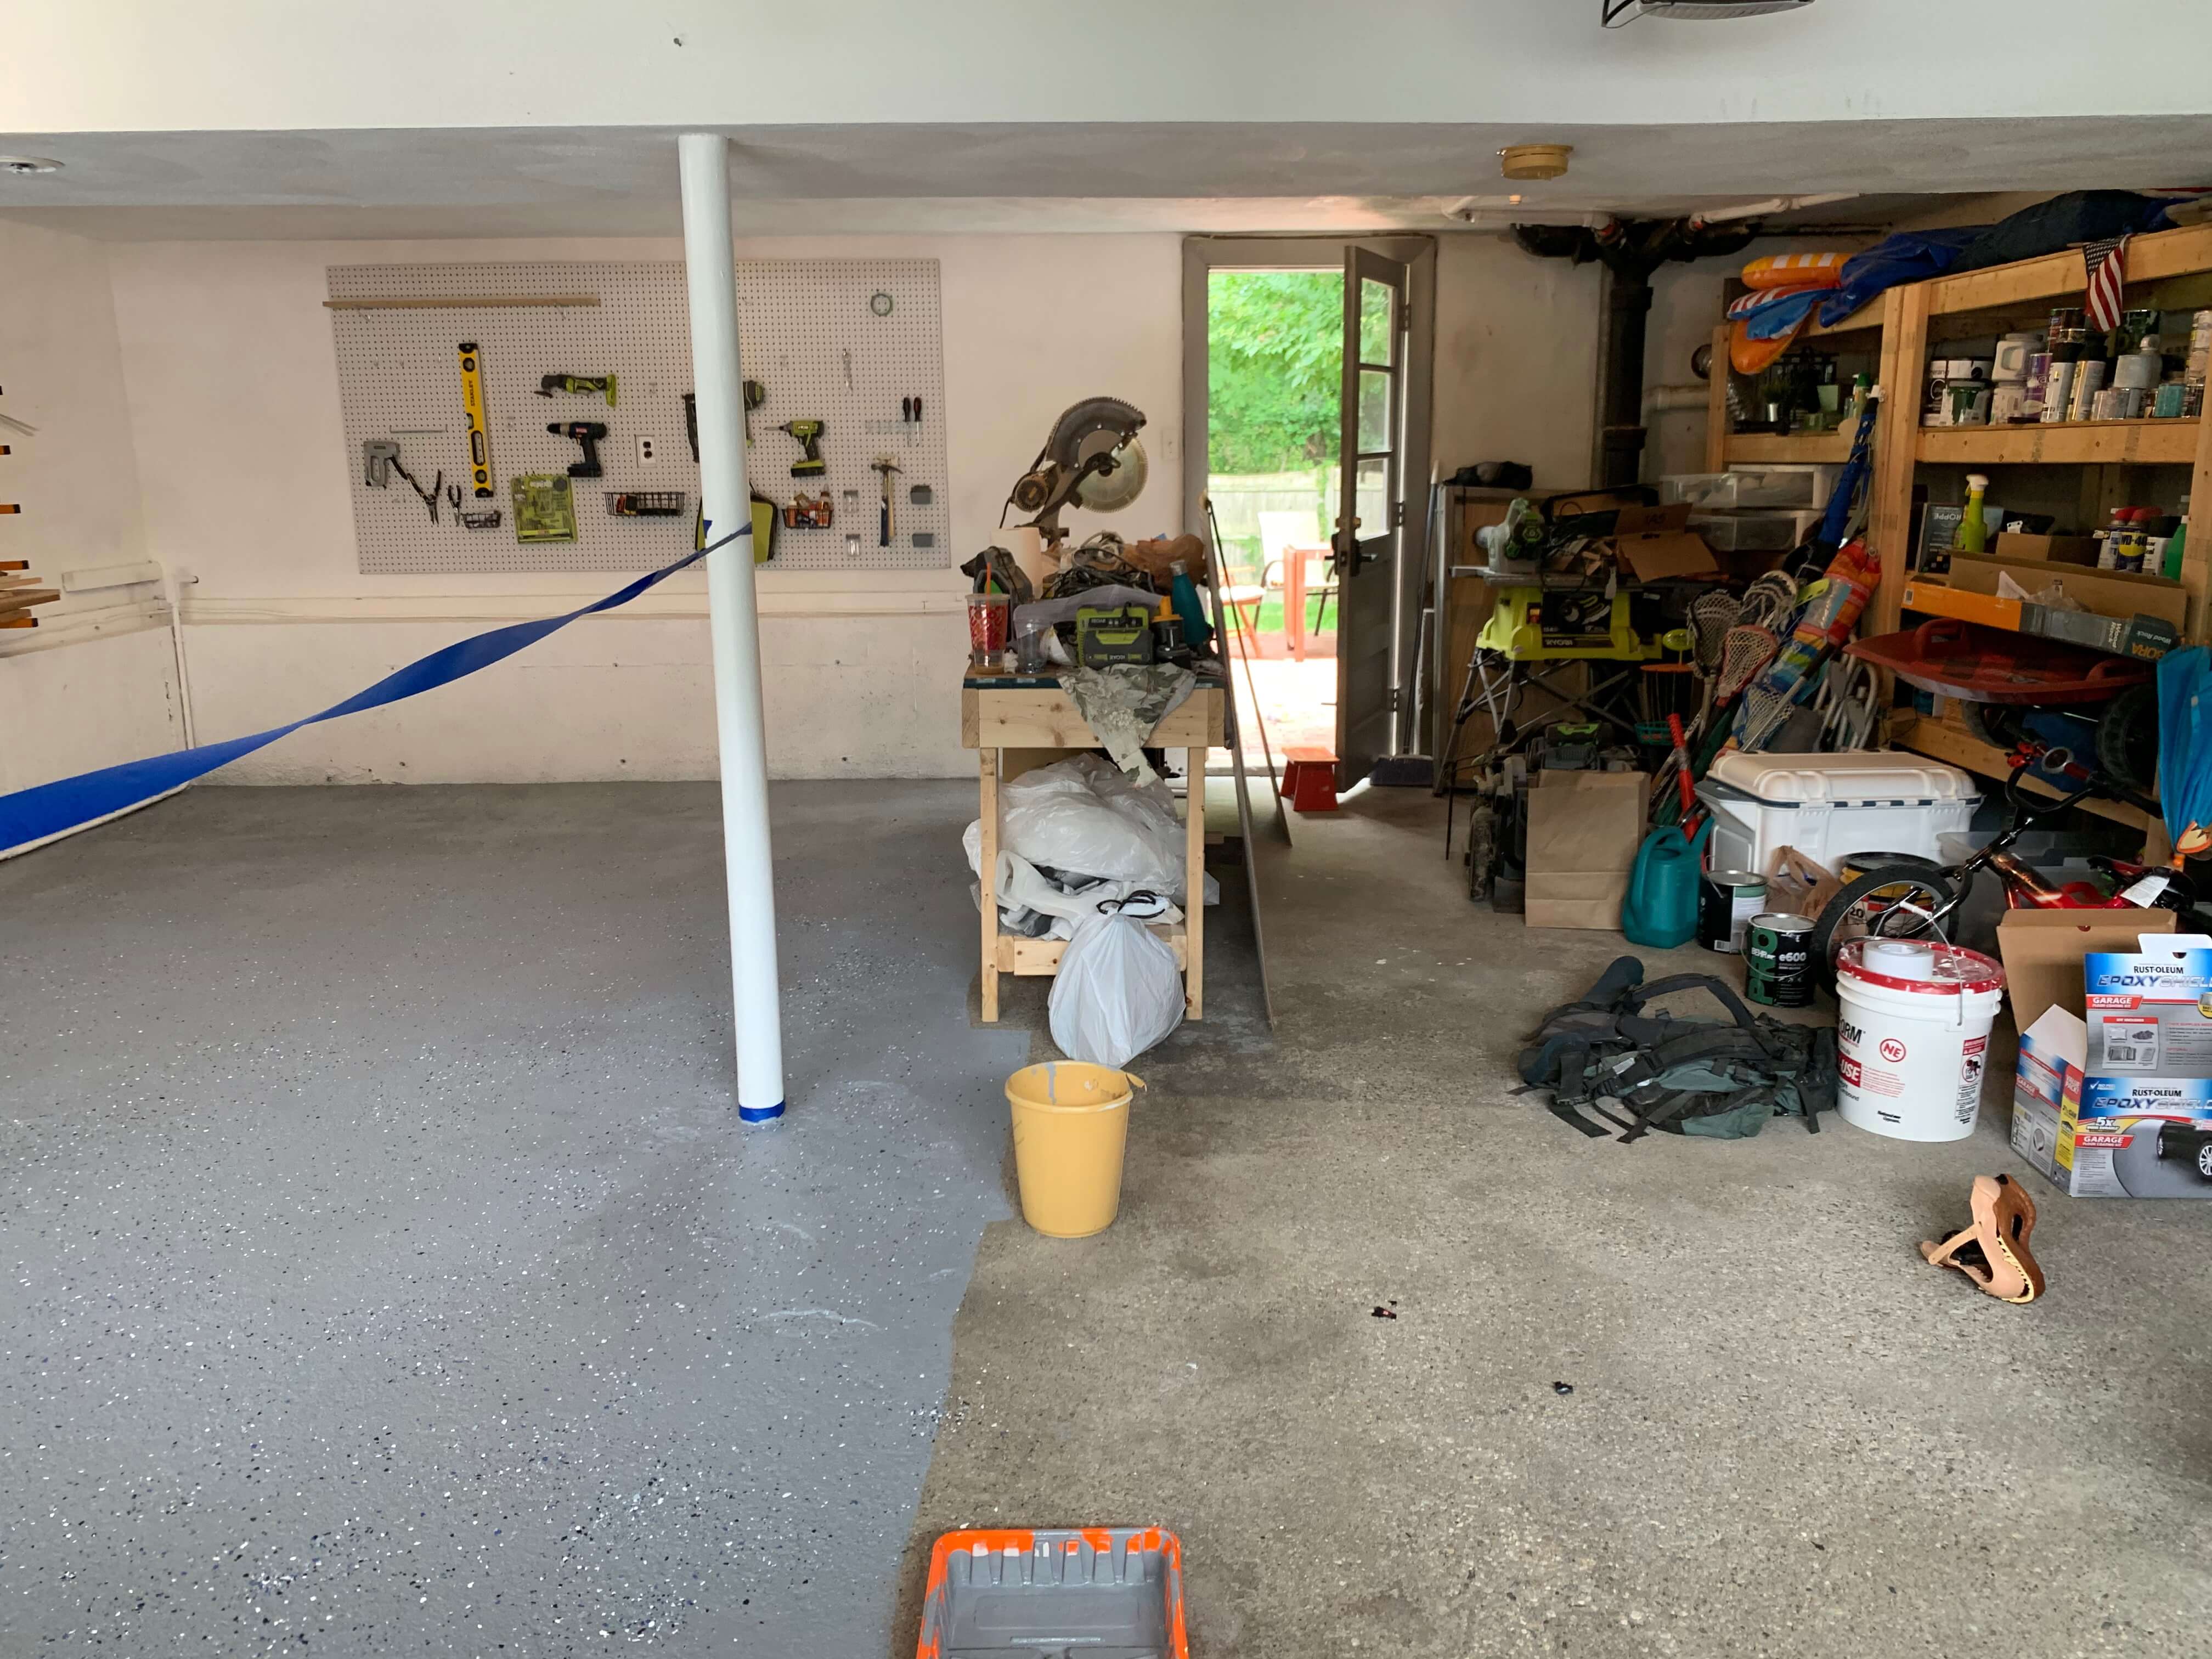
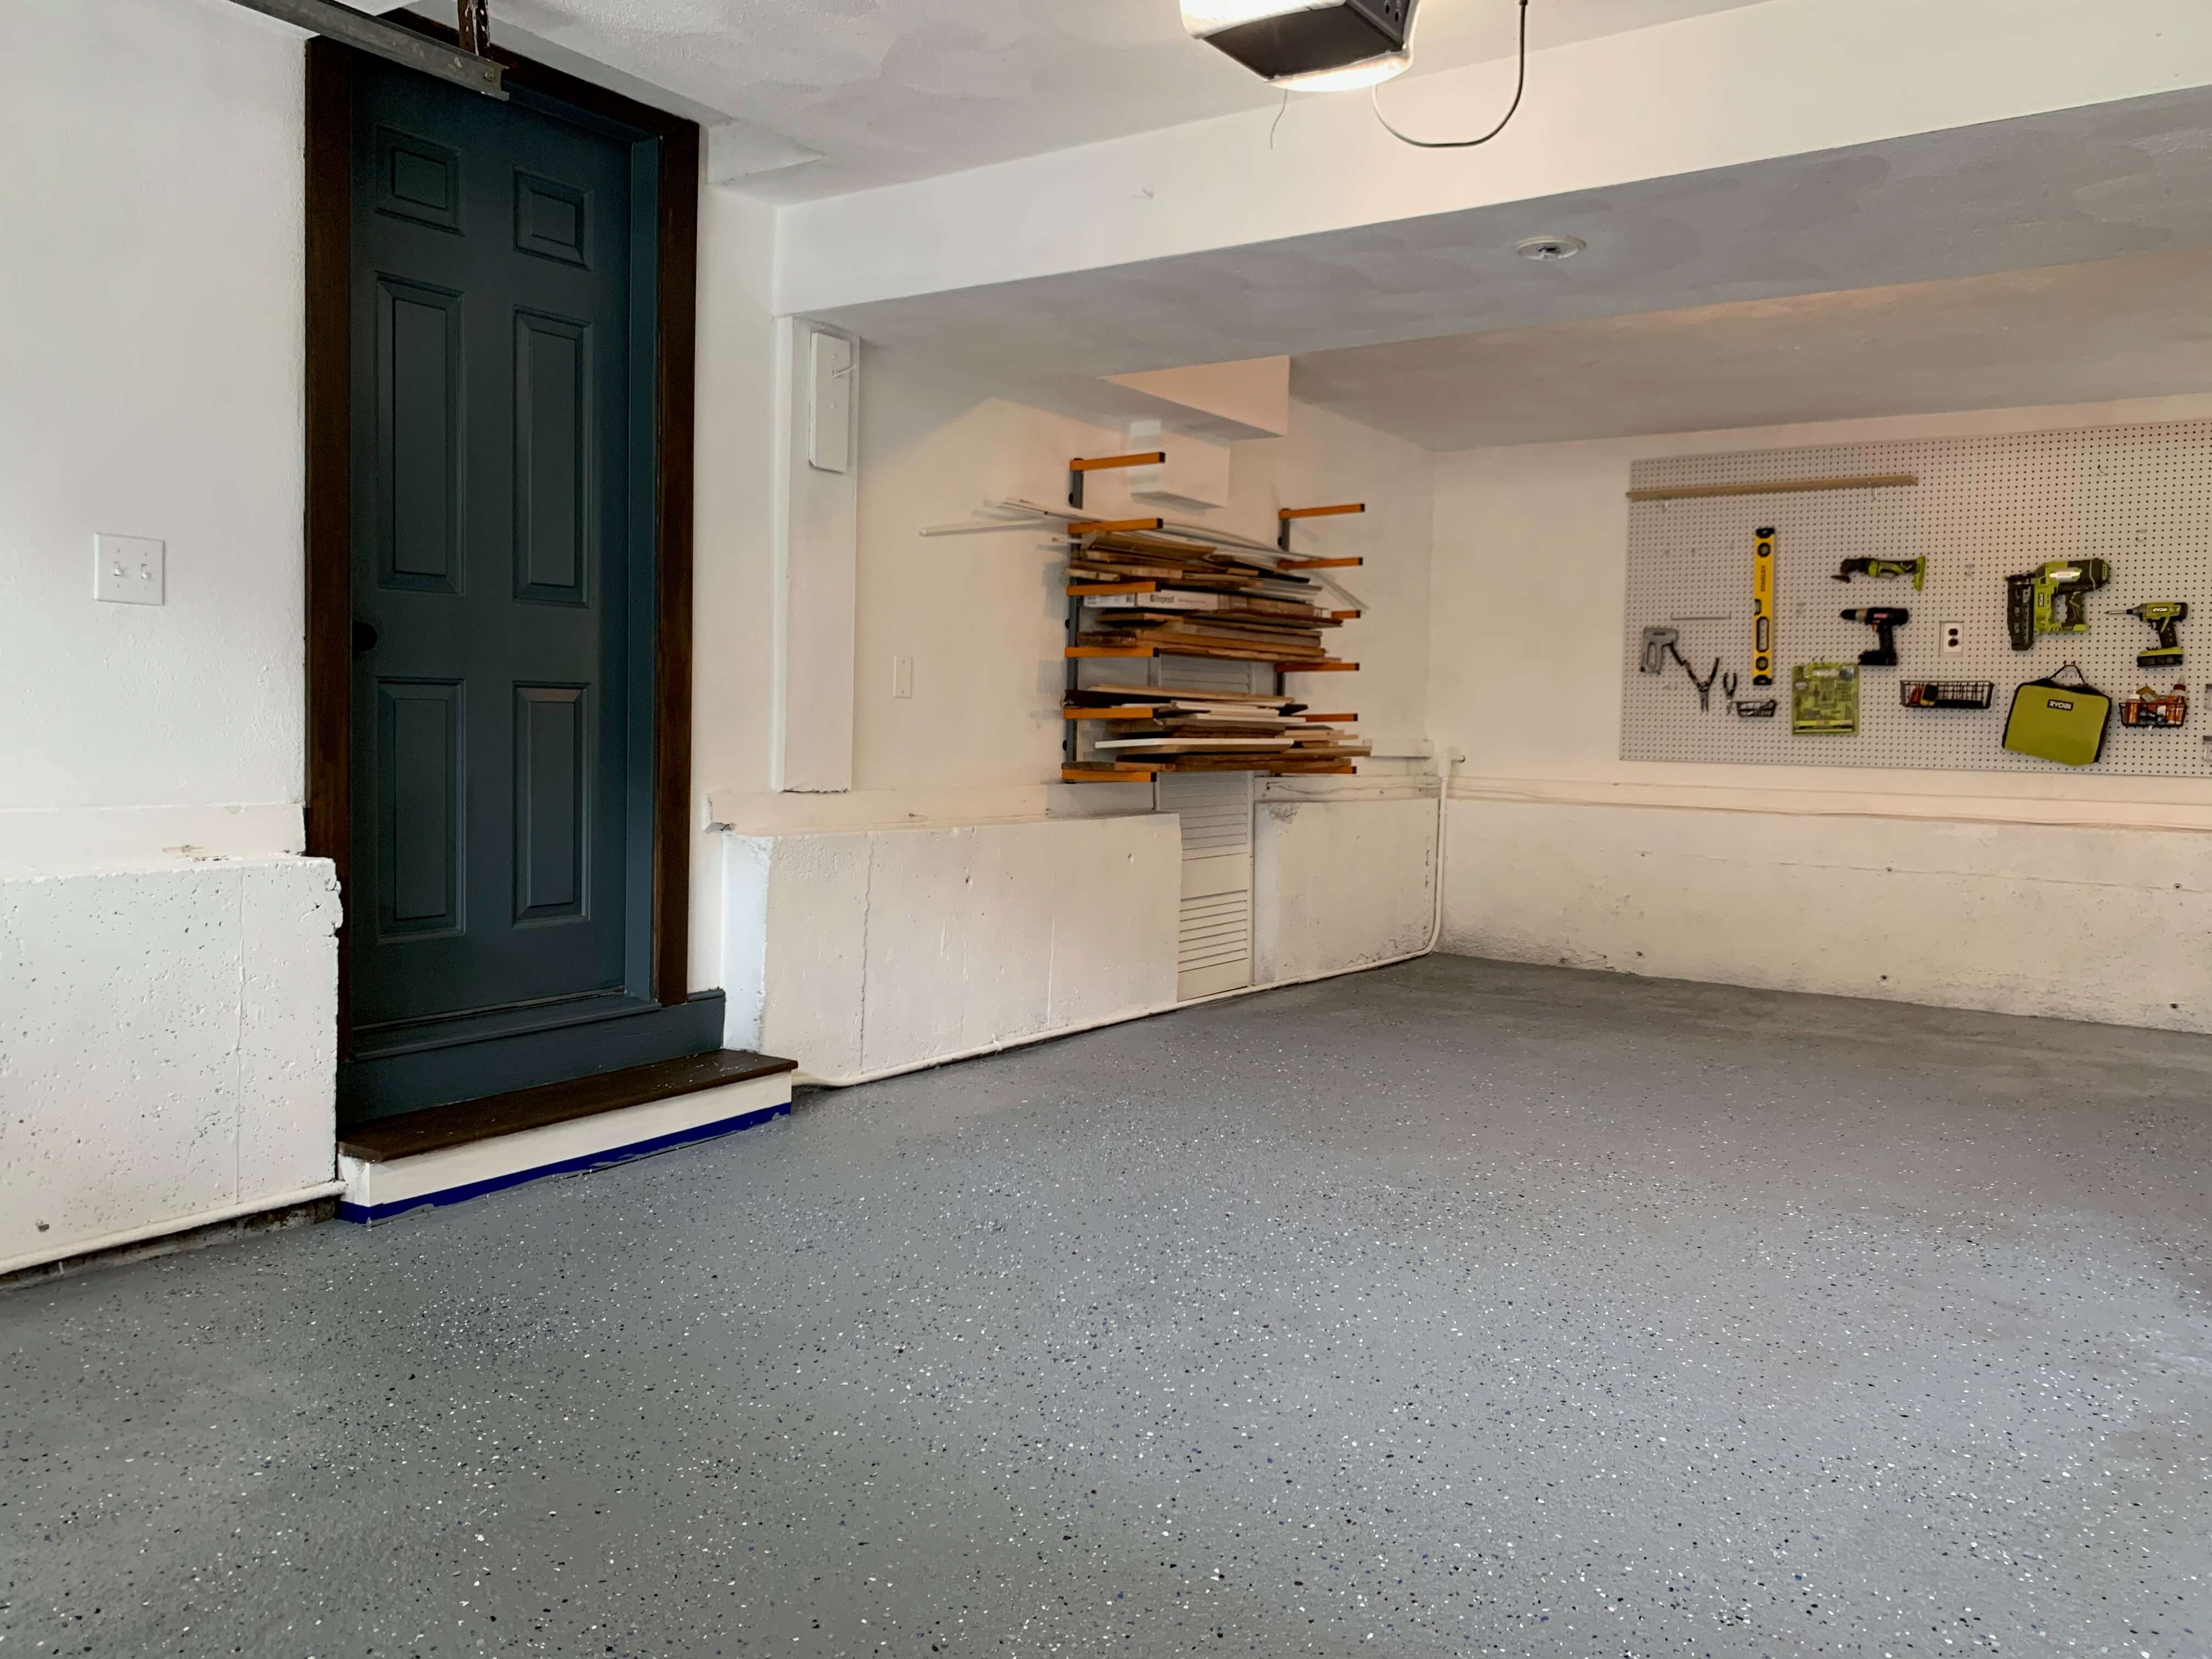
Step 2: Garage Flooring Update
Our concrete garage flooring was in pretty rough shape. It was super porous with lots of crumbling and a top layer dust. In order to help resolve these issues while also improving the appearance, I opted to apply an epoxy based paint product. The product I used is called Rustoleum Epoxy Shield, the gray kit. It rolls on like a thick paint so application is actually pretty easy (aside from the floor prep which is tedious and includes lots of washing and squeegeeing). The kit includes colored flecks that you sprinkle into the wet paint making it look more professional when done.
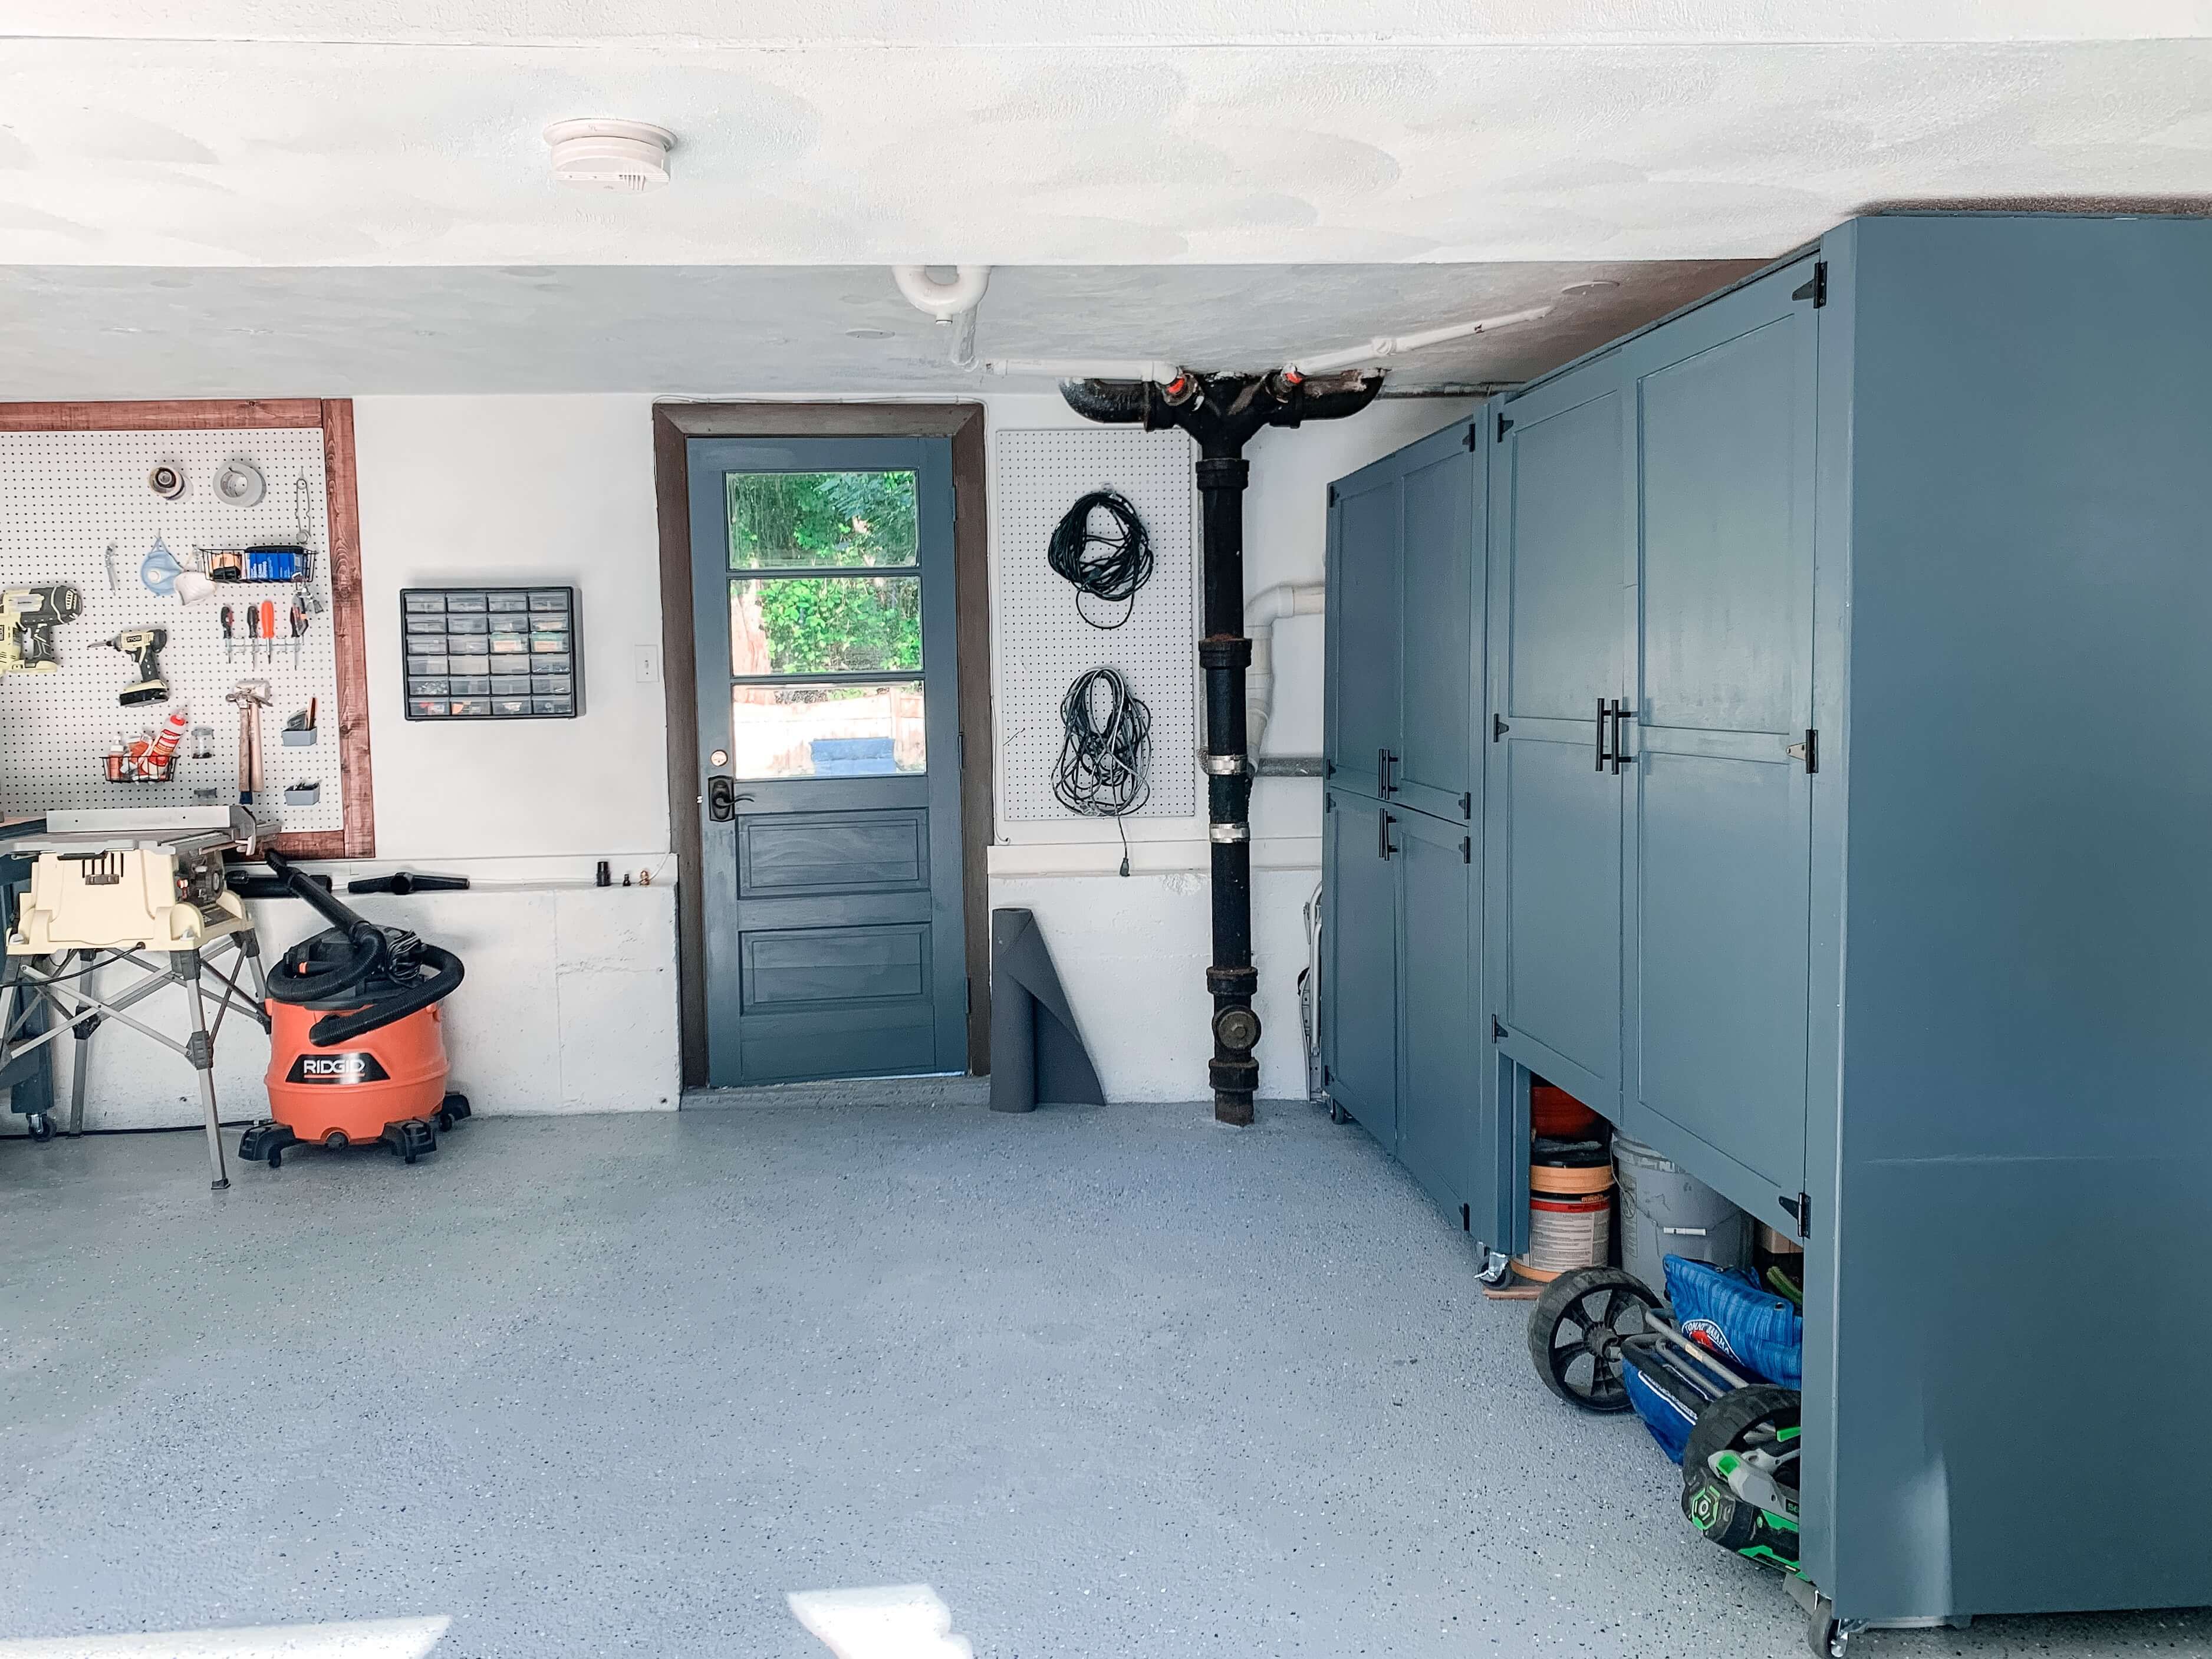
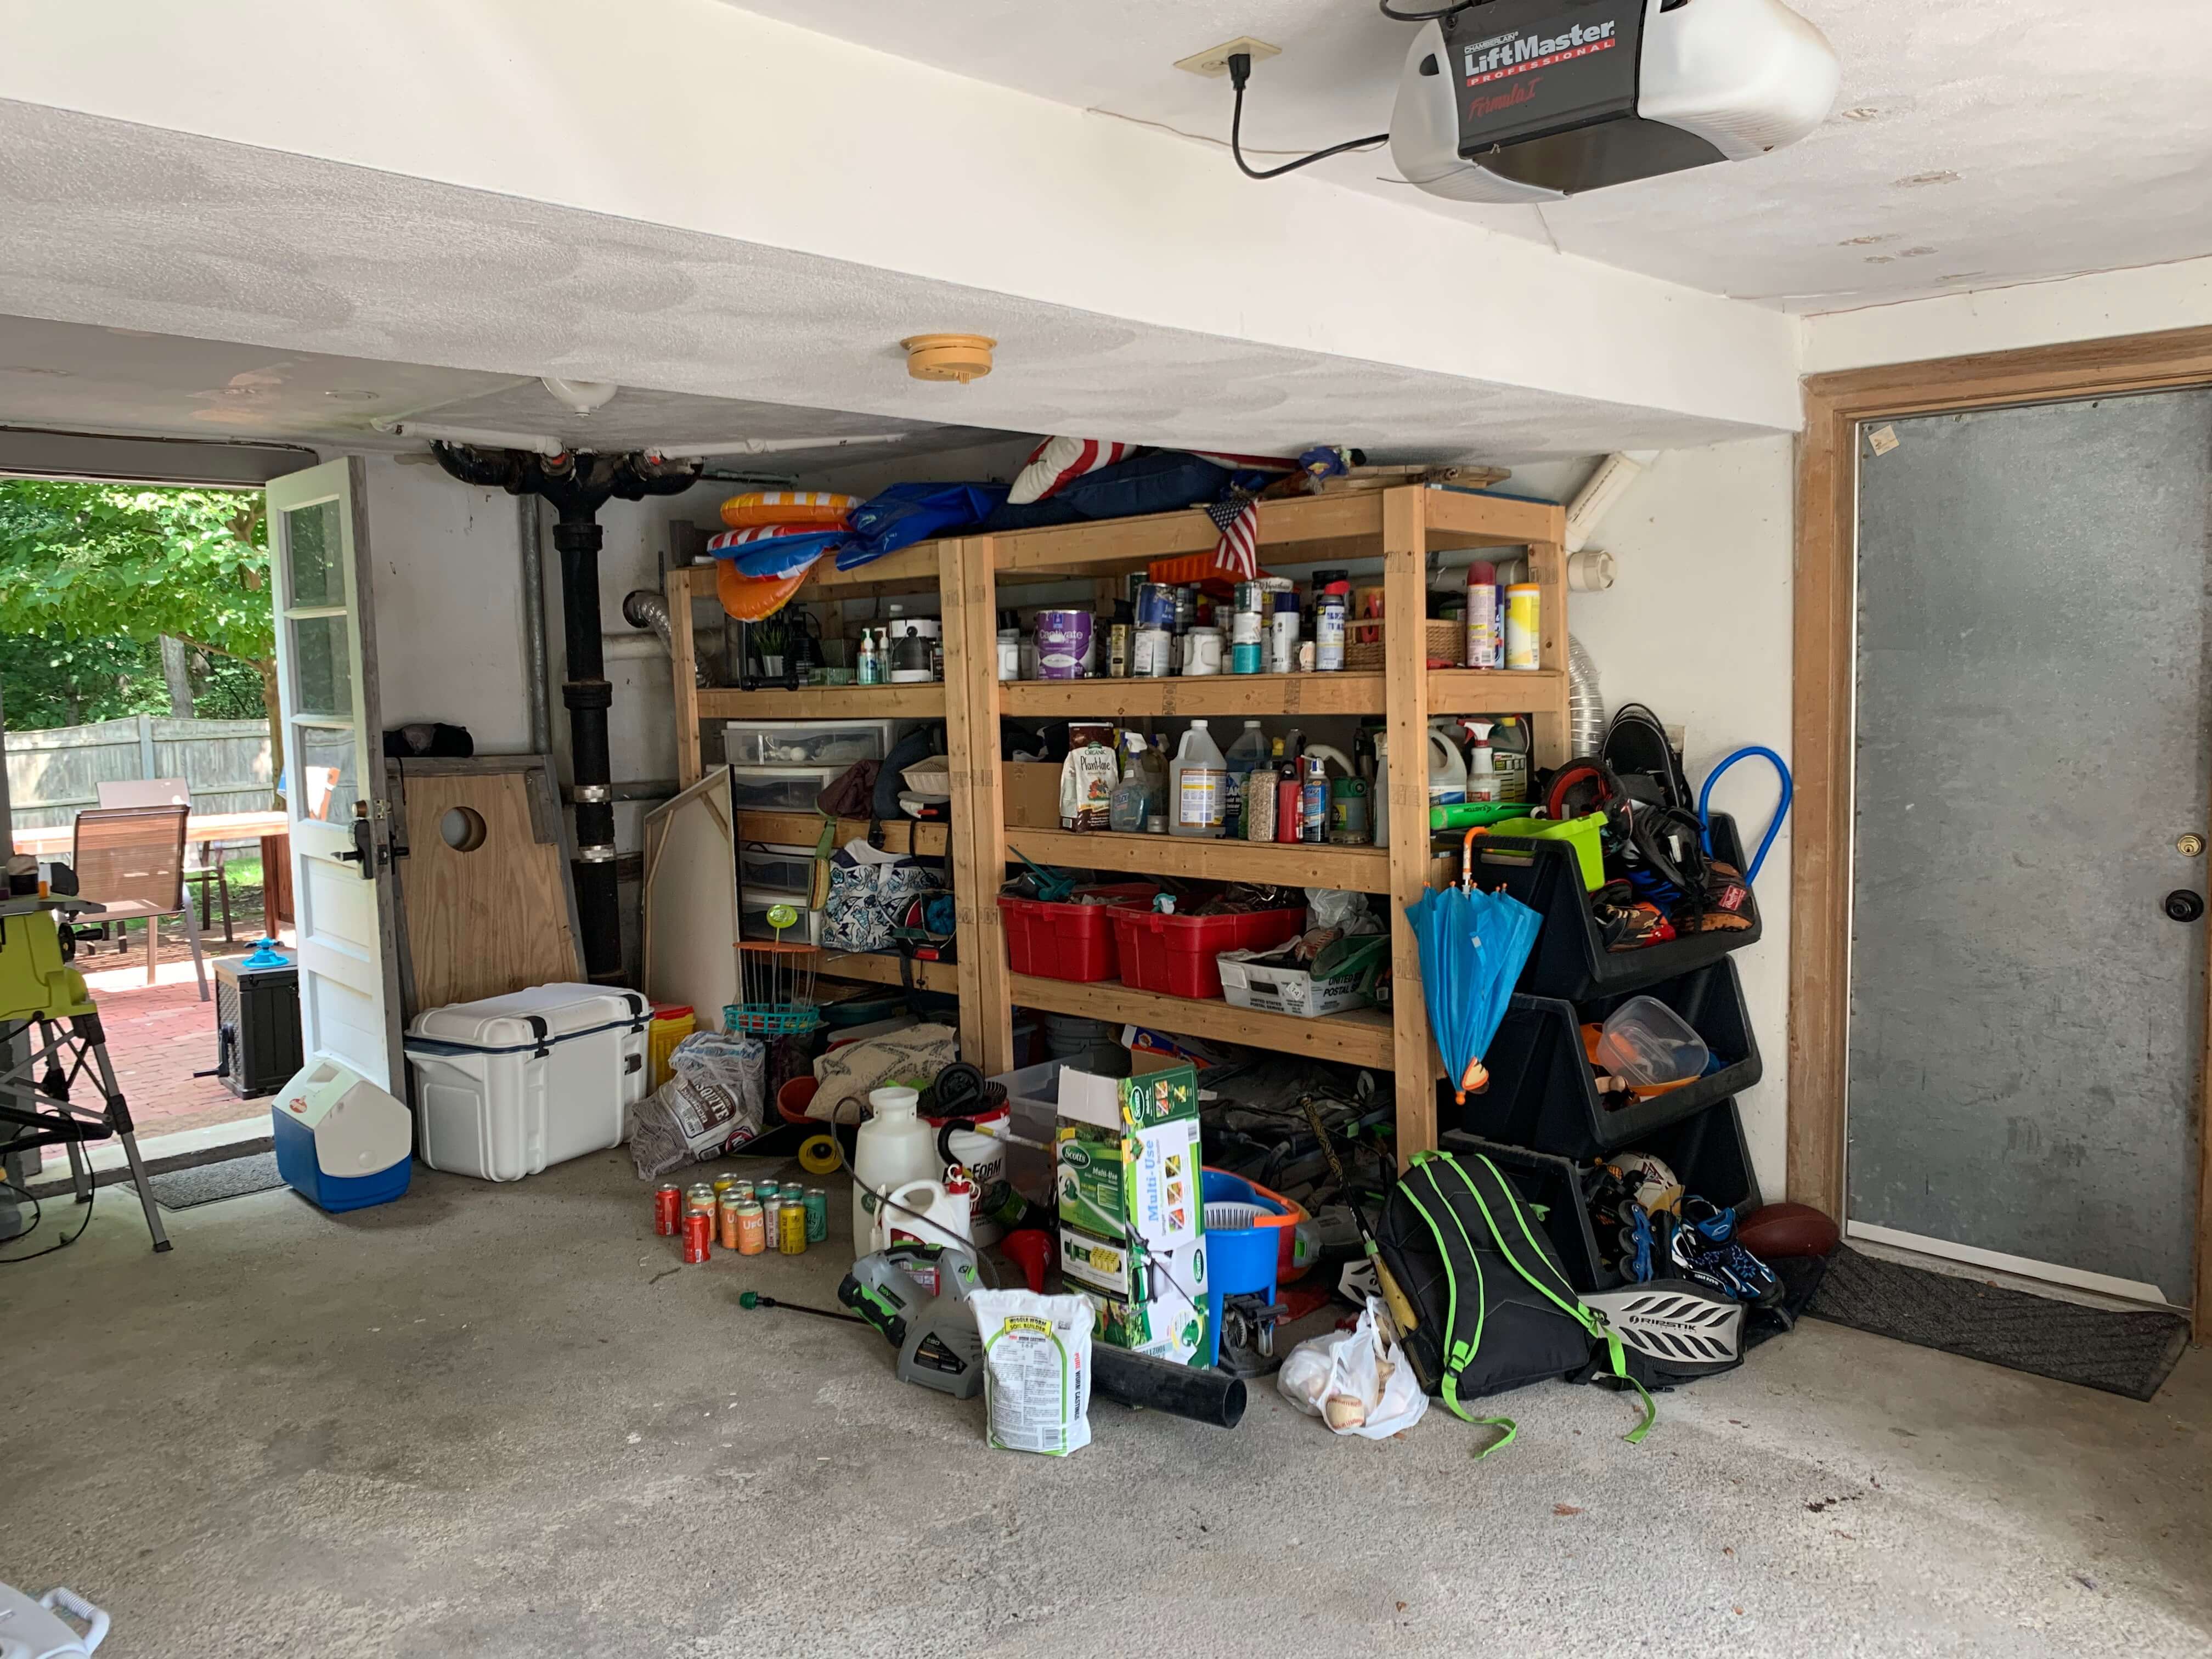
Step 3: Garage Storage and Organization
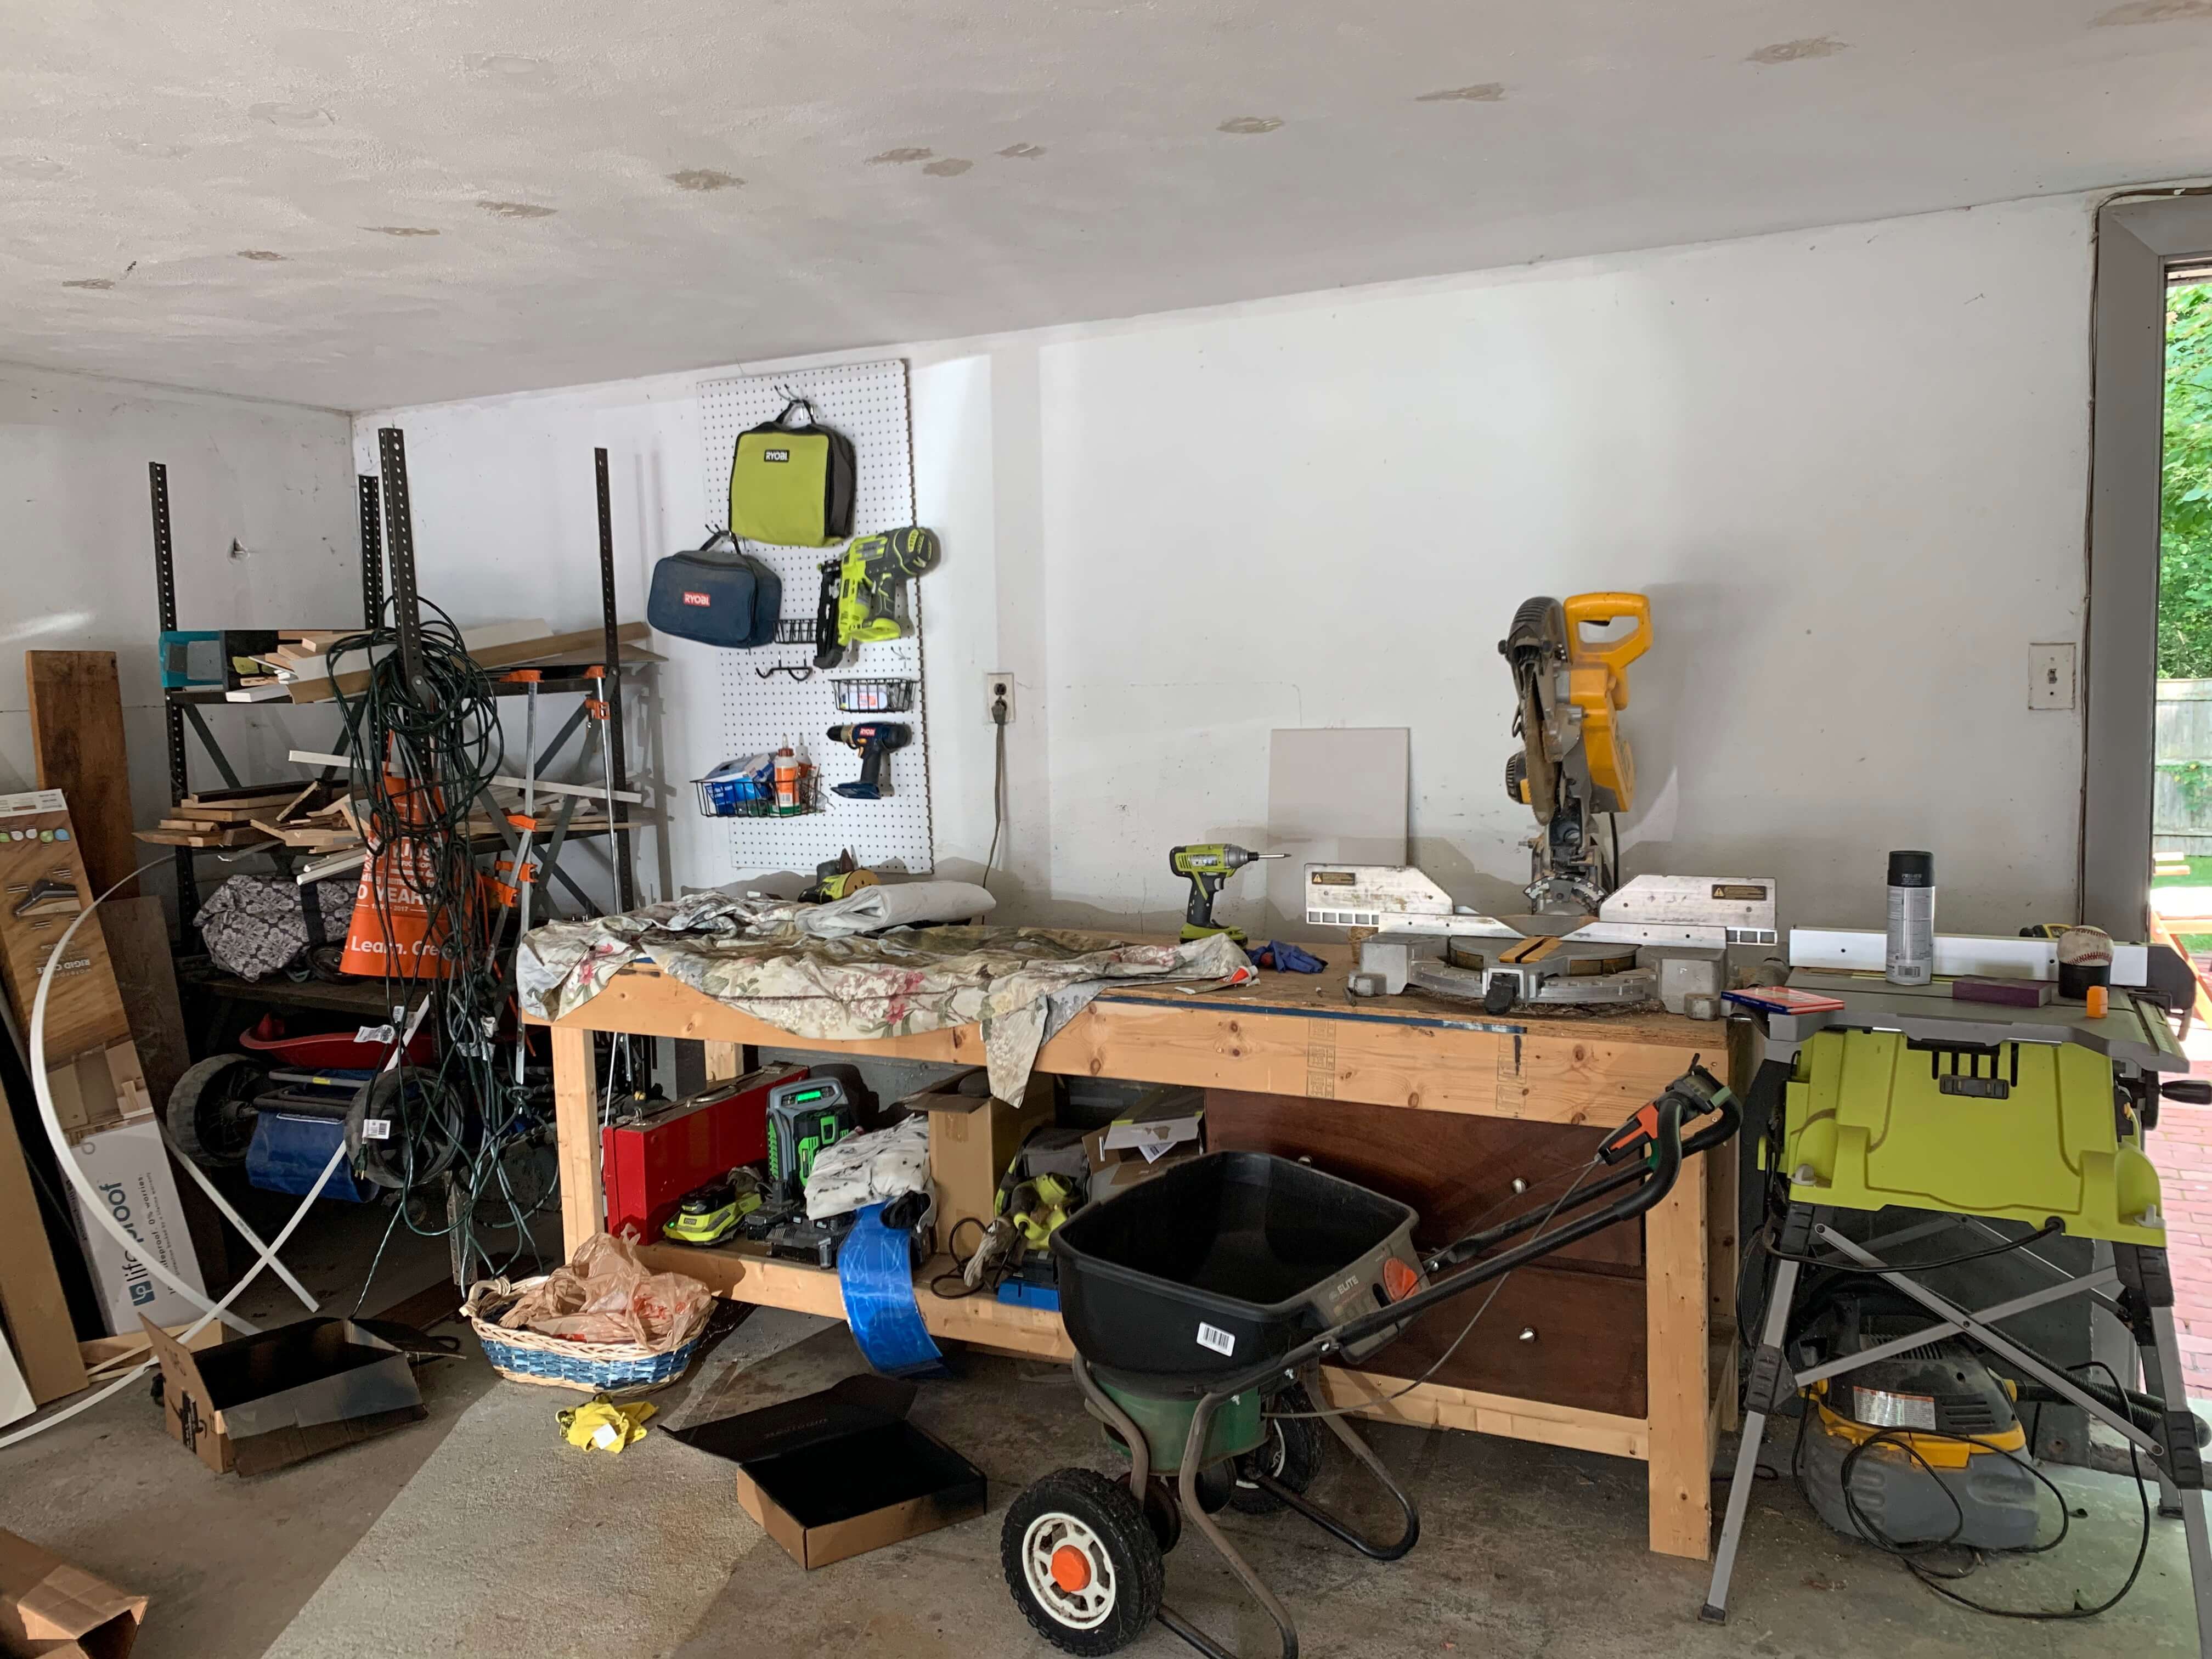
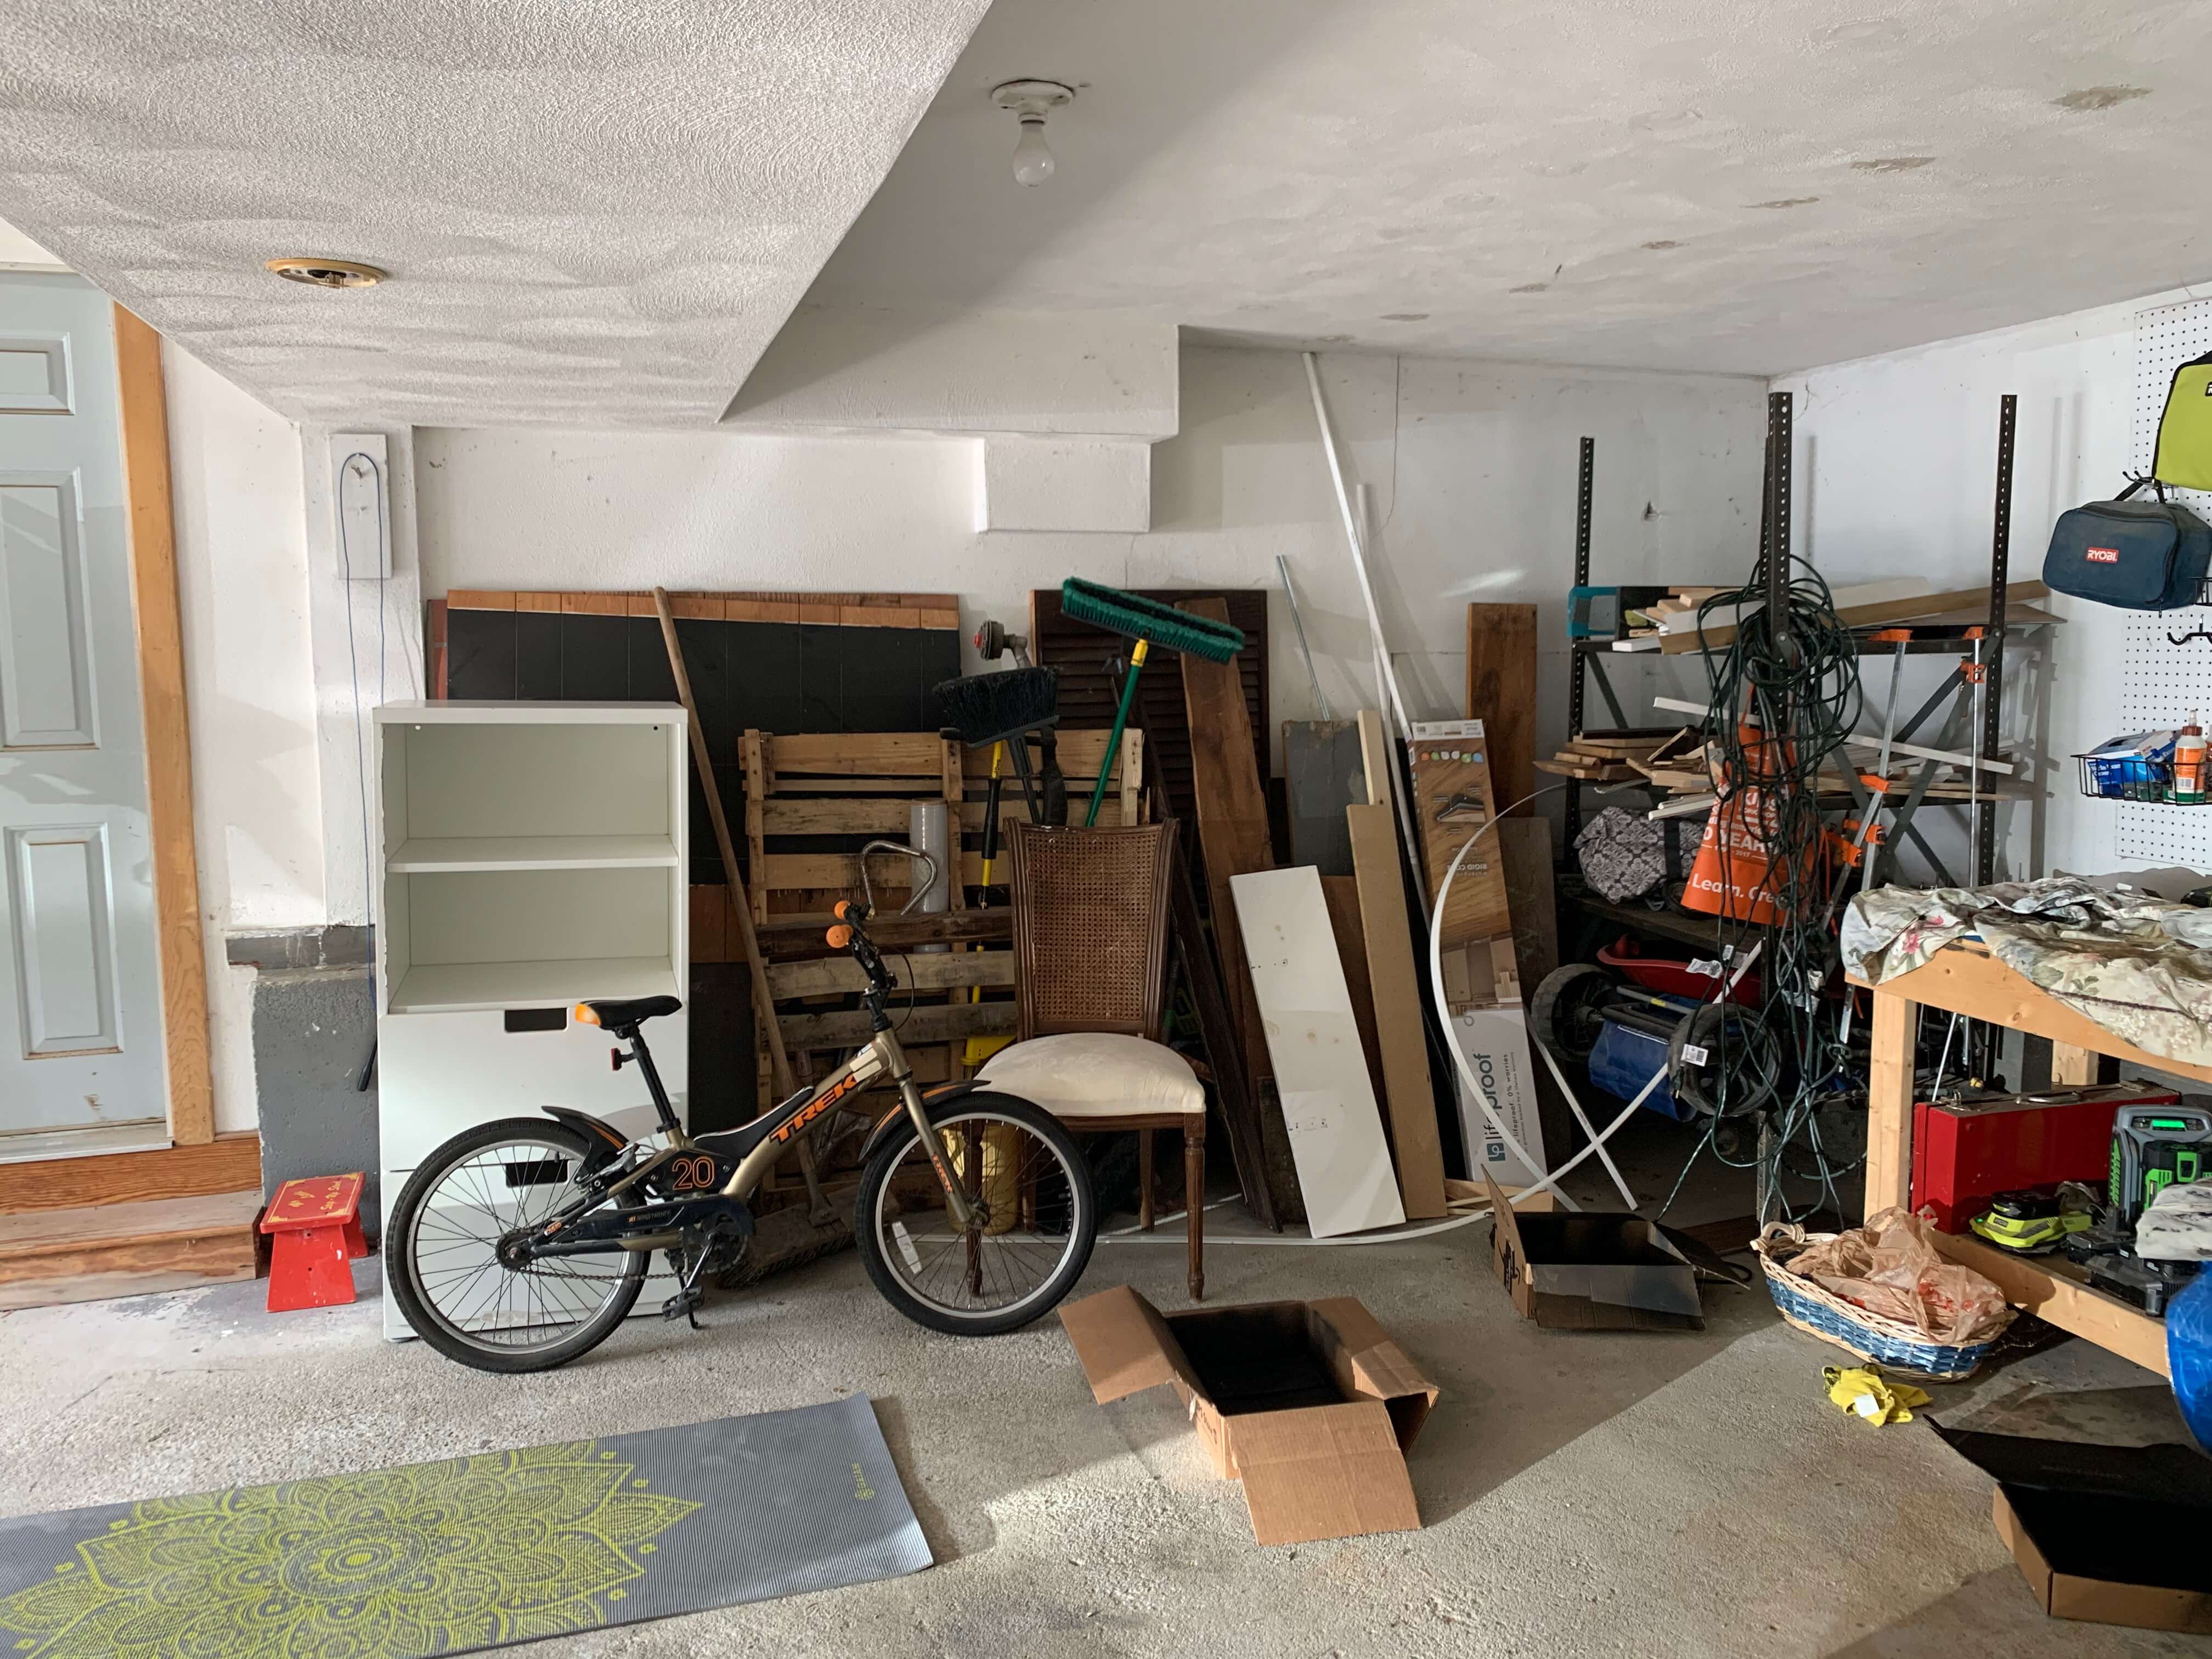
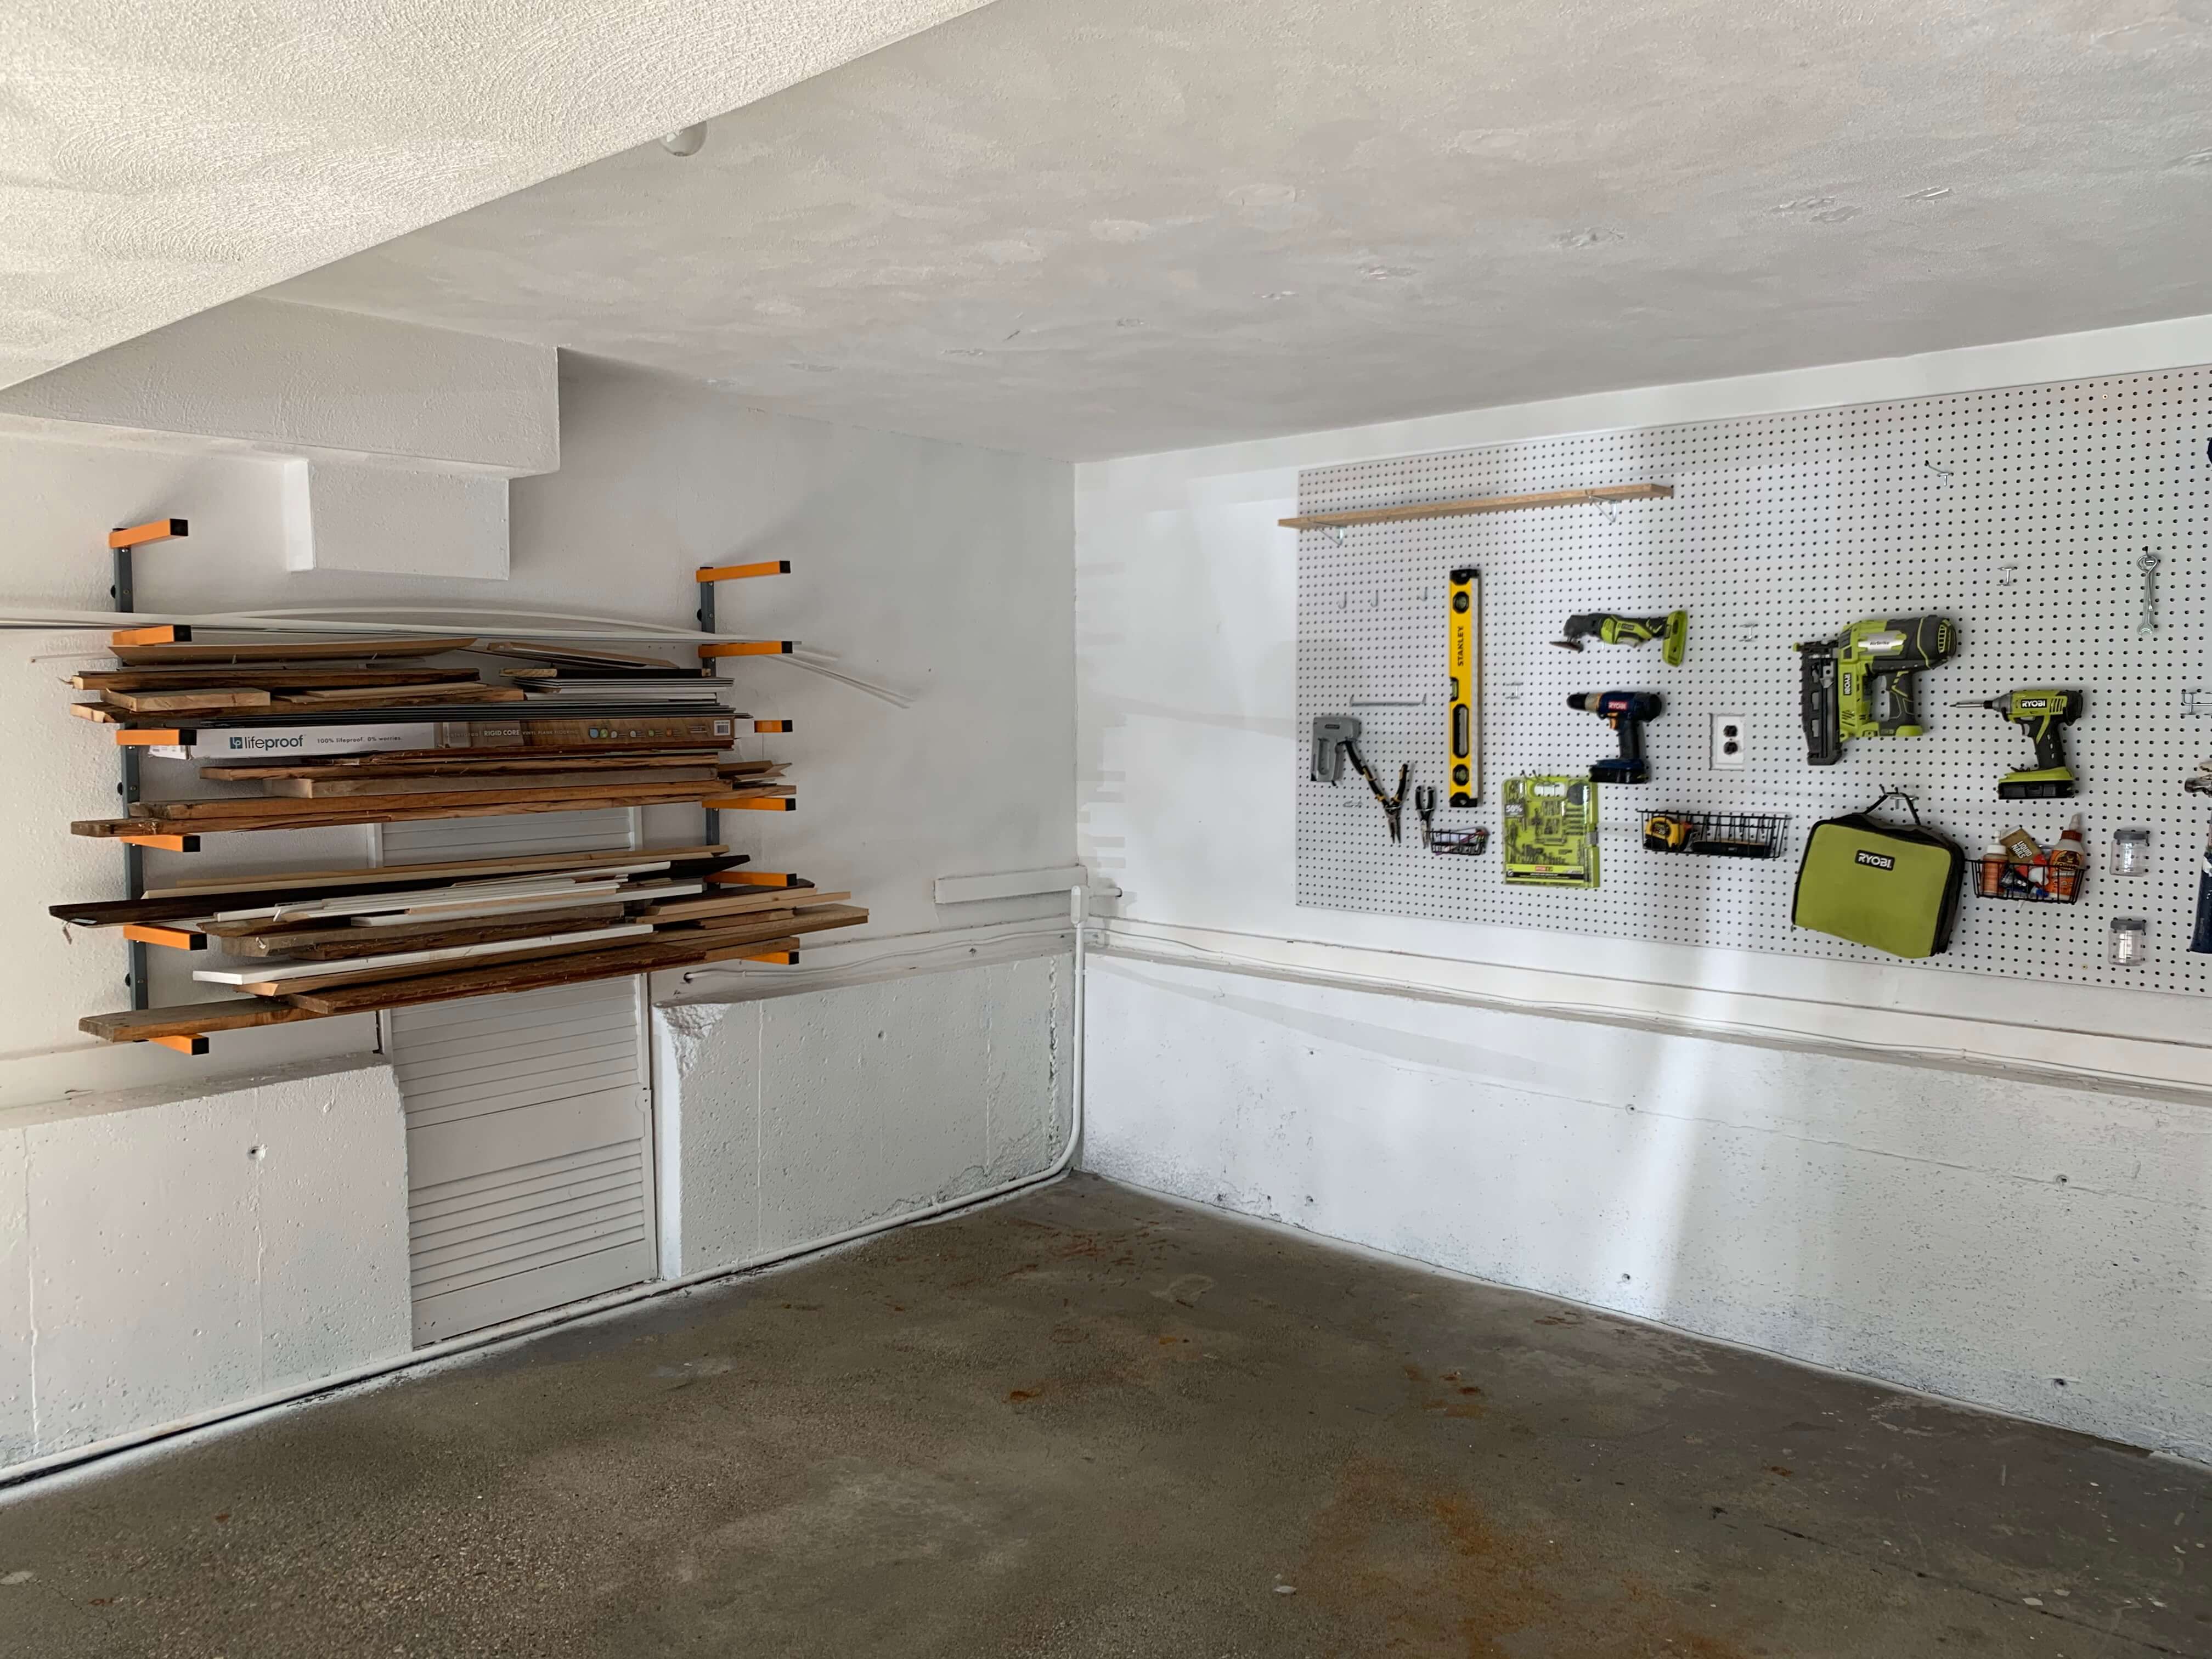
Now it is time to determine your storage needs. Again, I do woodworking in the garage so I opted to add a large 4’x8’ peg board behind my workbench for tool storage. In order to make it a bit more attractive, I framed it out using stained 1×4 boards. Now it looks like a cool picture frame! For wood storage, this Bora wall kit was installed and it can hold a TON of wood! Using vertical storage is also a great way to free up floor space.
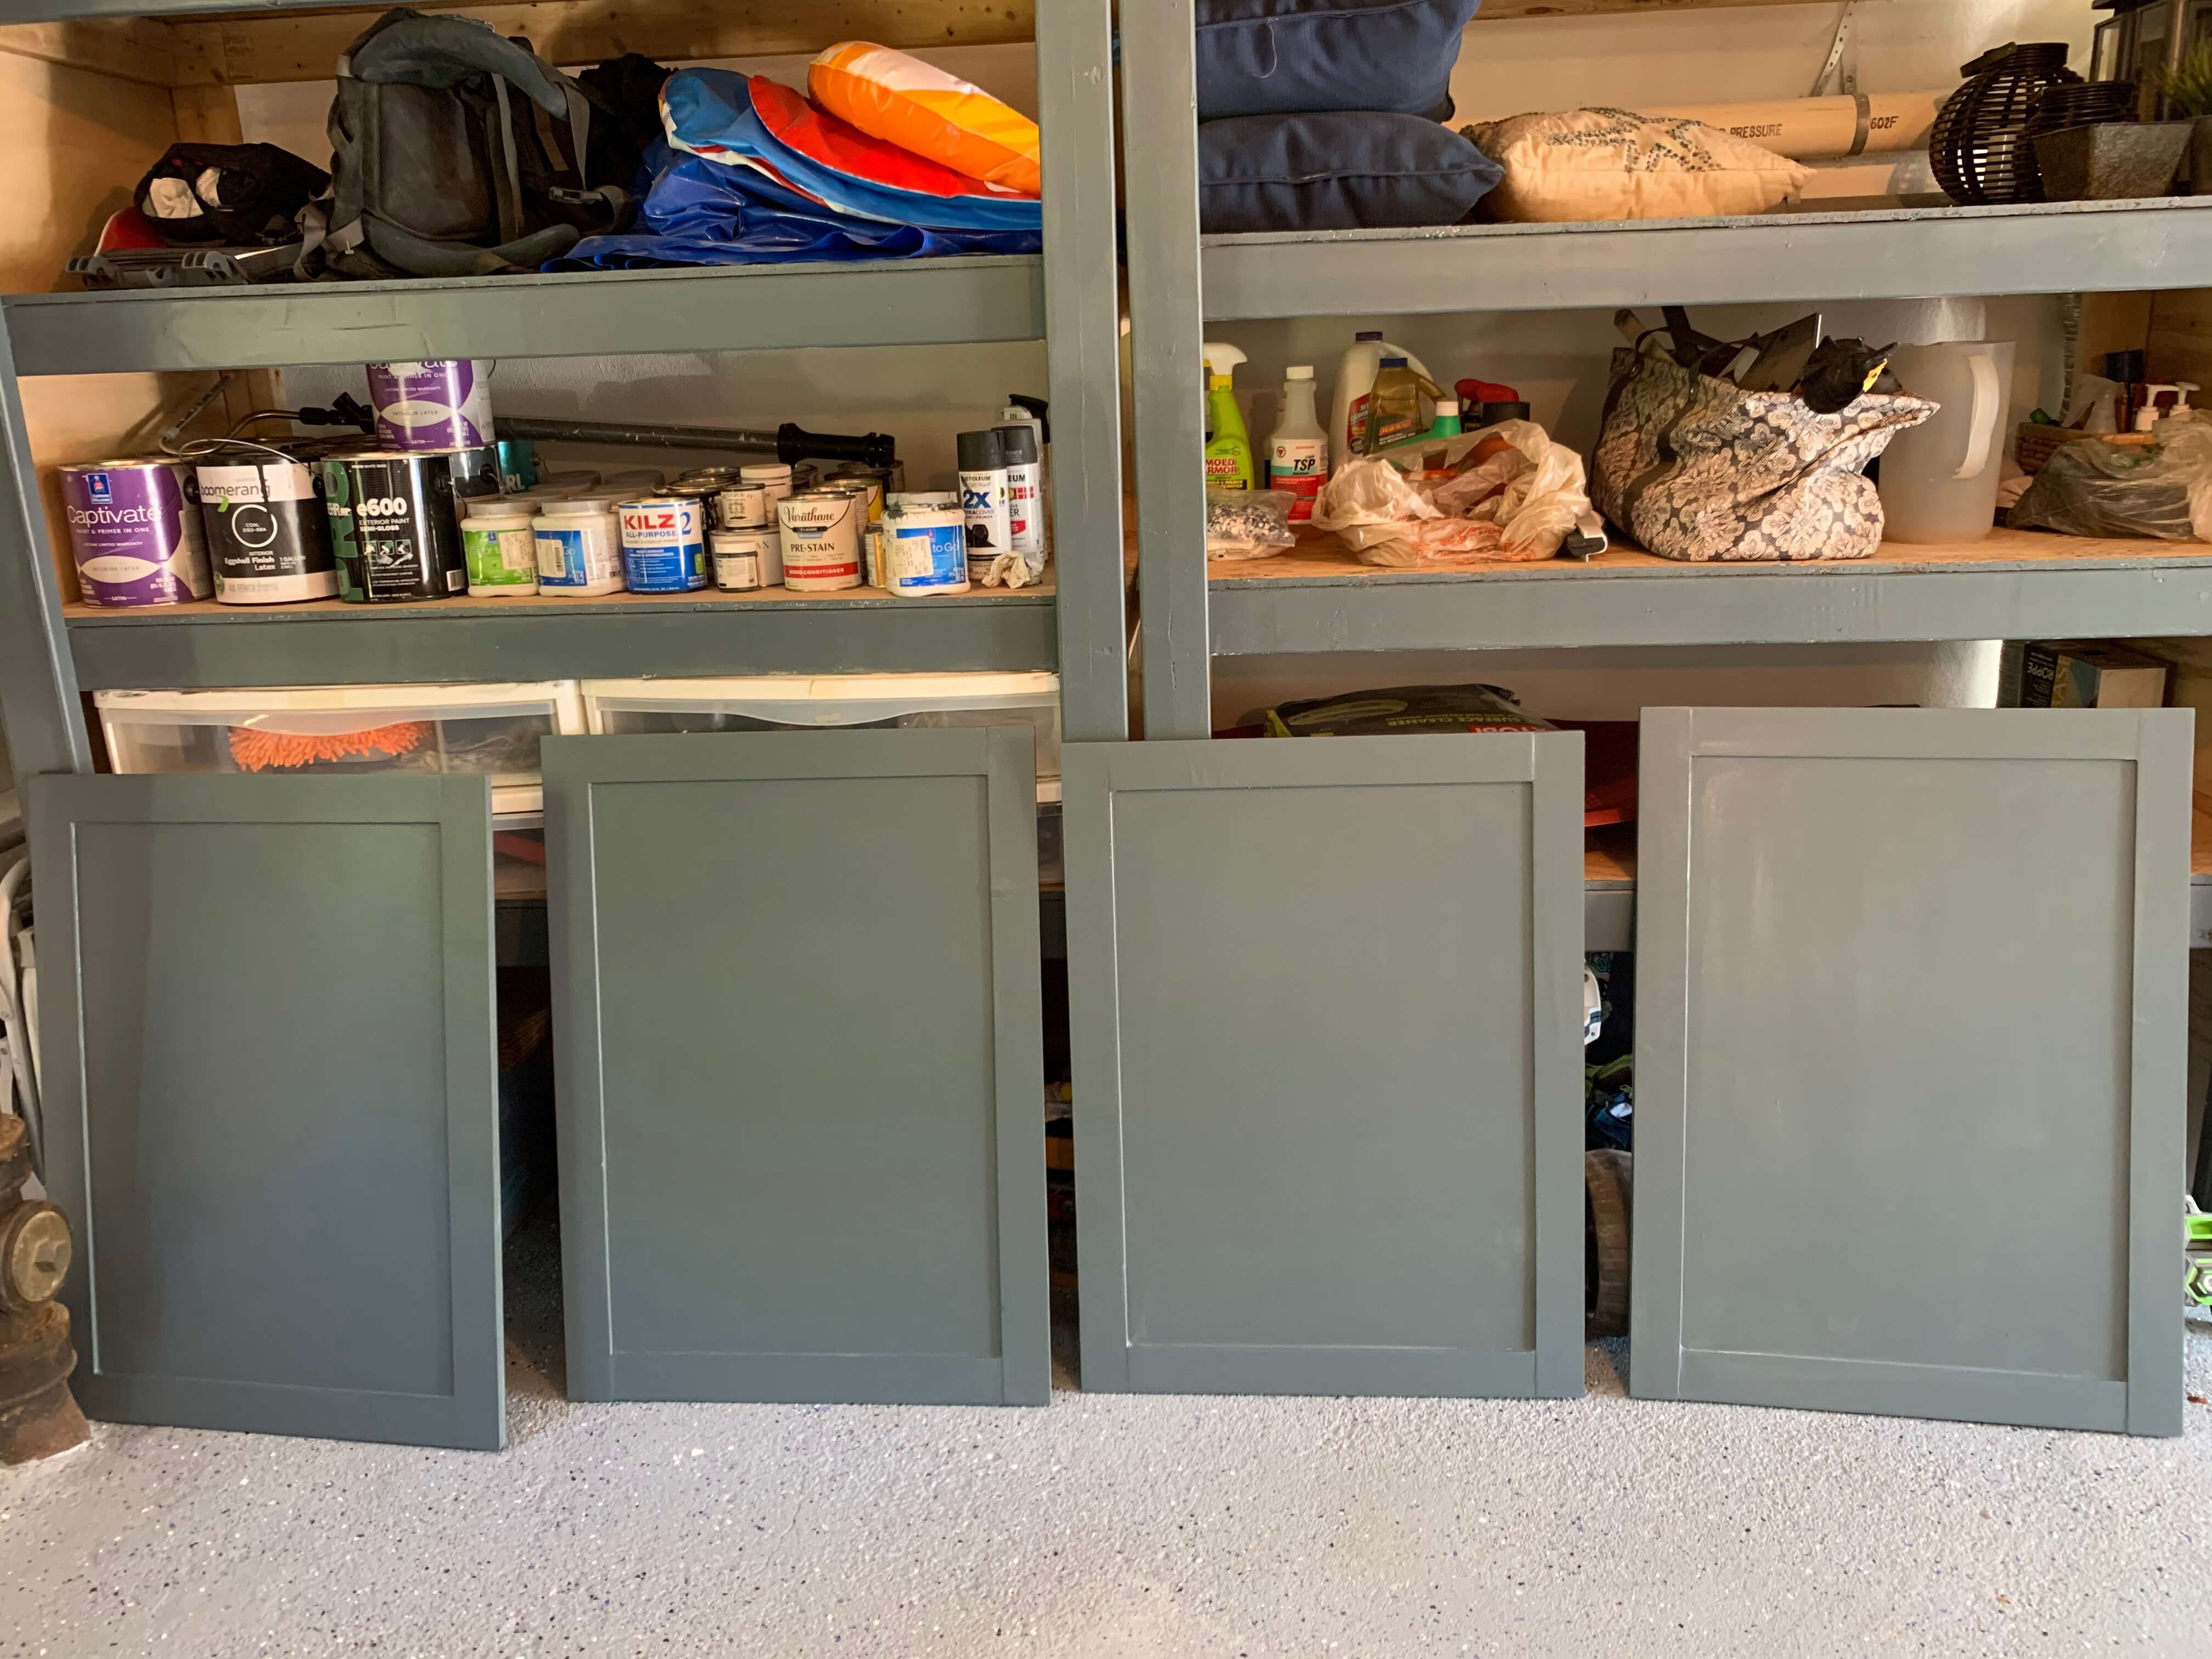
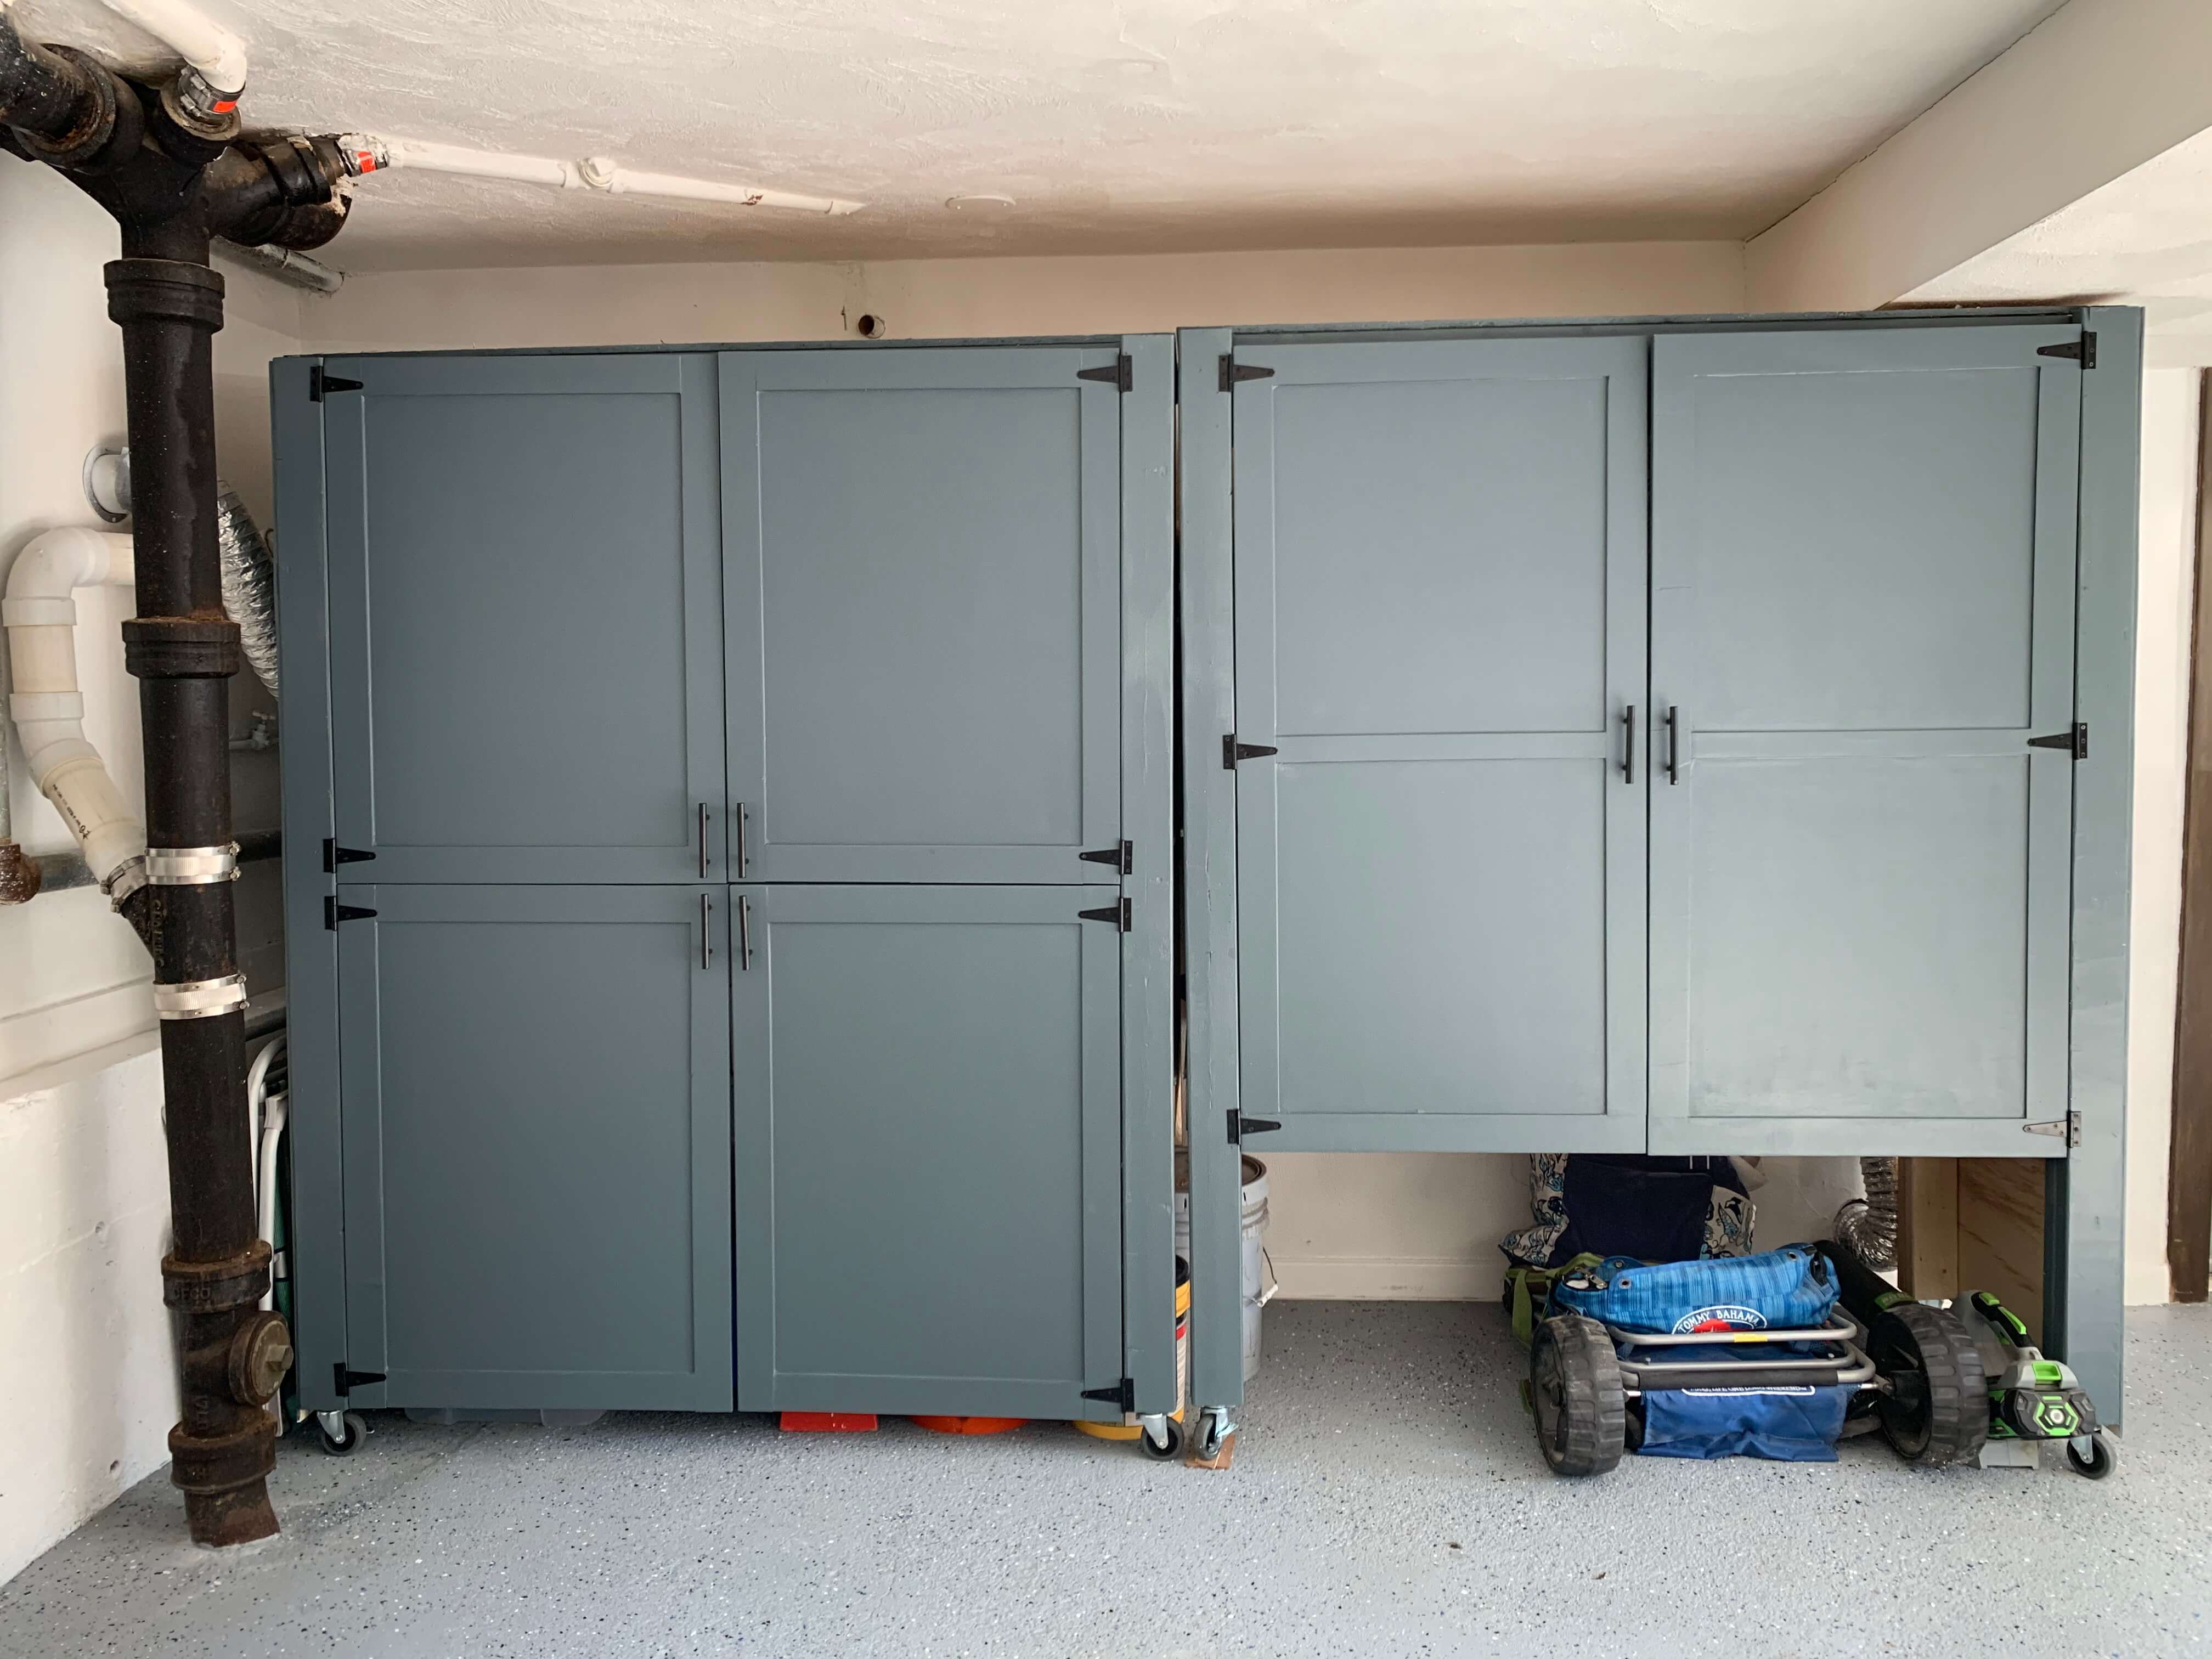
Lastly, I built some doors to cover my 2×4 garage storage shelves (which were built by my BIL a long time ago, before I started DIY’ing). The doors are ½” plywood. That said, I would recommend using ¾” instead because ½” isn’t as sturdy and warps more easily. I added trim to give a shaker look and painted them all with Grays Harbor by Sherwin Williams. The bottom of the shelving units and workbench got some wheels so they can be wheeled in and out of the garage for easier cleaning next time! Gotta think ahead, right?!
Now my garage is much more organized, functional, and almost even pretty! Now the hard part? Keeping it that way…
Looking for other organization projects? Check out my closet organization post! Prefer outdoor projects? I got you there too. Check out my deck refresh, large outdoor planter, or Adirondack chair tutorials!