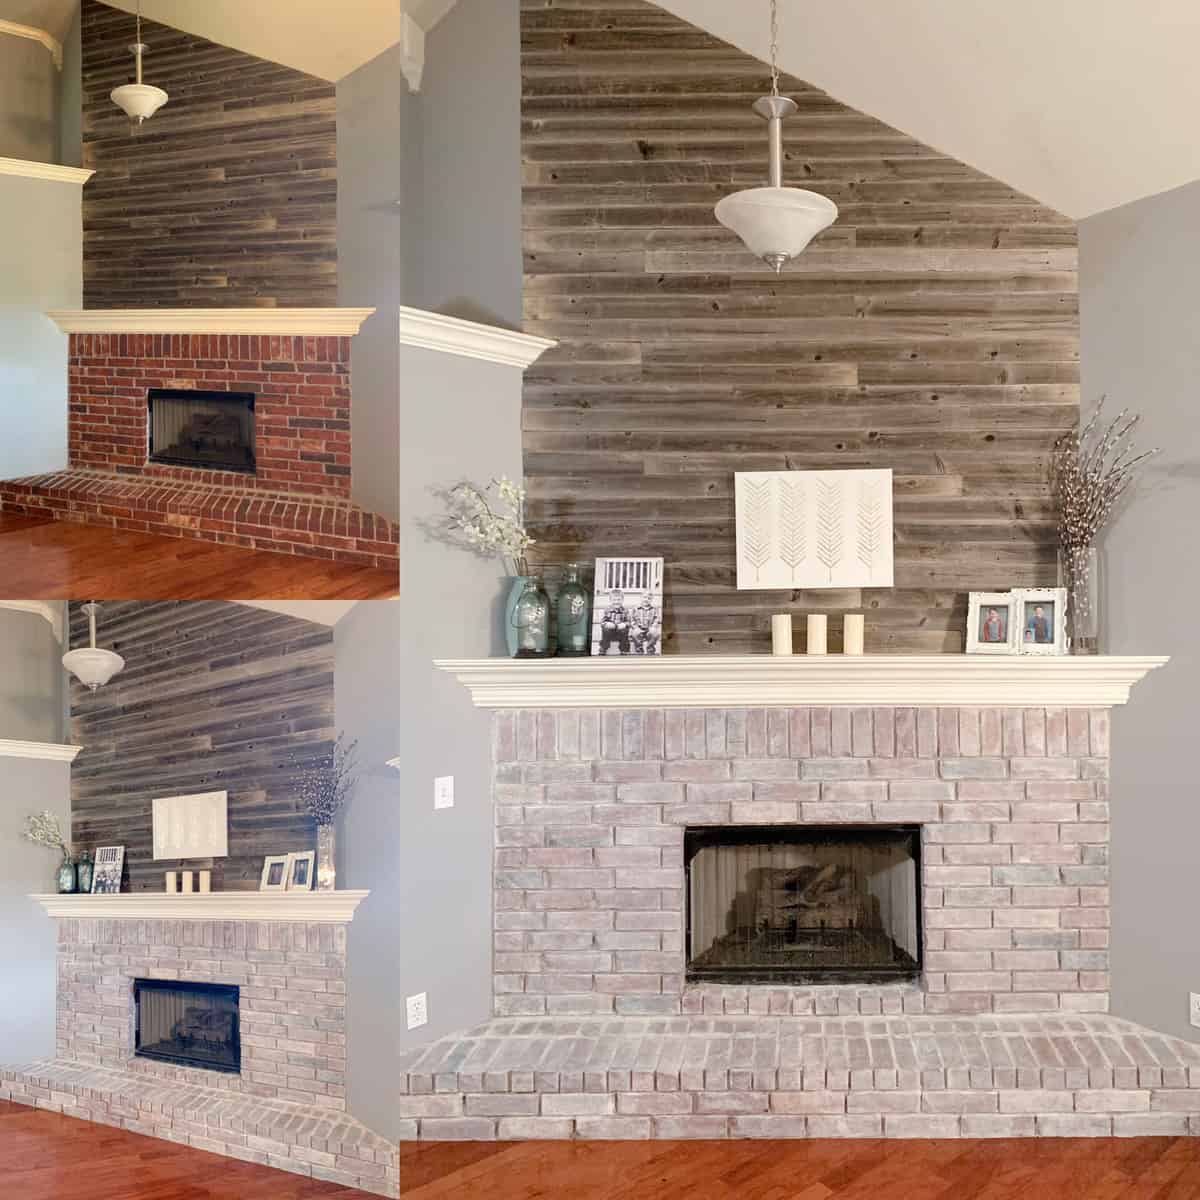
Whitewashed Brick Fireplace
If you are looking for an easy update with a lot of impact, a whitewashed brick fireplace is right up your alley! This update is fast (like 1-2 hours), cheap (free even if you have leftover paint), and crazy transformative! Below I’ll share with you the process I used to whitewash this brick fireplace.
Disclaimer: In the name of full transparency, please be aware that this blog post may contain affiliate links and any purchases made through such links will result in a small commission for me (at no extra cost for you). As an Amazon and Home Depot Associate I earn from qualifying purchases.
Length of time for project: 1-2 hours
Cost: Free if you have white paint and a brush lying around. Otherwise you could buy all necessary supplies for less than $20
What you’ll need: White latex paint, paint brush, old rag, cup for paint, drop cloth, painters tape.
What I learned: Whitewashing brick is super easy and hard to mess up! But I recommend working in small sections so it doesn’t dry too much before you wipe off excess.
Preparation Process
First thing you need to do is prep the surface. With brick, there really isn’t a whole lot of prep. I would recommend just going over the brick with a broom or a vacuum to remove any dust or debris. Then use painters tape to tape off the edges between the brick and the walls and/or floor surface. Placing a drop cloth on the floor could be helpful just to avoid any drips, especially if you have carpet. And that is it for prep! Doesn’t get much better than that!


Next up is making your whitewash solution. I had some leftover white satin acrylic paint on hand and mixed that with a little water. The ratio I use is approximately 75% paint and 25% water. If you want less coverage, use more water and less paint. This isn’t a super strict ratio, so just play with it a little to get the mixture you want. Keep in mind here, a little goes a long way! Like literally a red solo cup worth of whitewash should do your whole fireplace. I mixed mine in an old Easter bucket here and had way too much and had to find a way to dispose of the extra. Learn from my mistakes people.

Whitewash Application
Now it’s time to get started with the application! So so super easy. Just take any paintbrush, dip it in the whitewash, paint it over the bricks and try to get into all the little cracks and crevices. Before it dries, use a clean cloth and dab away any extra paint. This allows some of the base color of the brick to show through which gives a nice color variation. If you want more coverage with your paint then you can either skip this step or go over all of it with a second application of whitewash.


Because you are wiping away the excess paint, work in small sections. That said, this process goes very quickly! Just keep trucking along and you’ll be done before you know it!
Finished Whitewashed Brick Fireplace
That is literally the entire process. It honestly could not get any easier. I did my sister’s large fireplace, start to finish, in about an hour and a half. It cost us zero dollars. And, I must say, I think it completely transformed the way her living room looks! If you’d like a quick video tutorial on the whitewashed fireplace application, check out my Instagram story highlights to see the process.

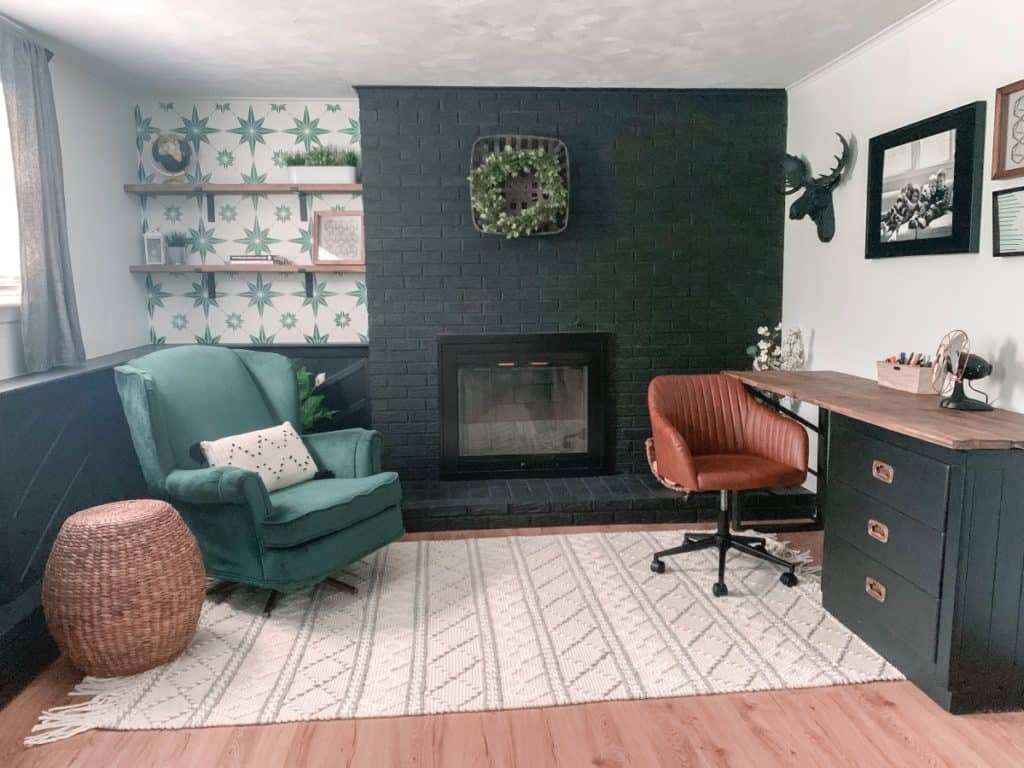
Looking for other fireplace update ideas?! Check out my black brick fireplace update!