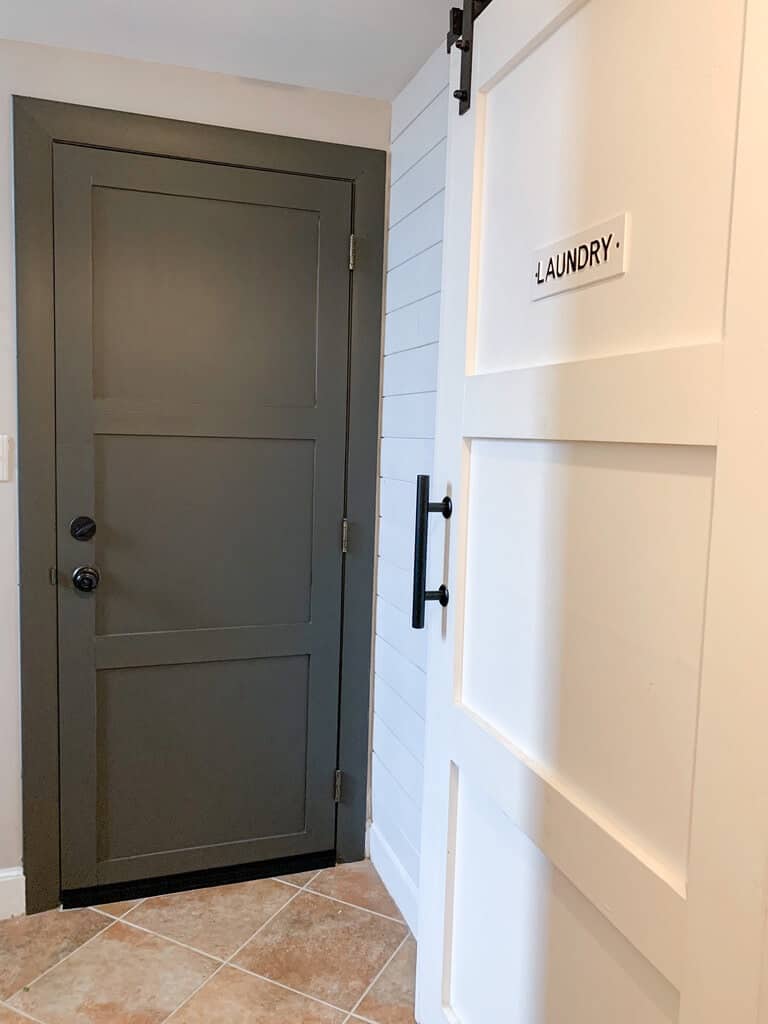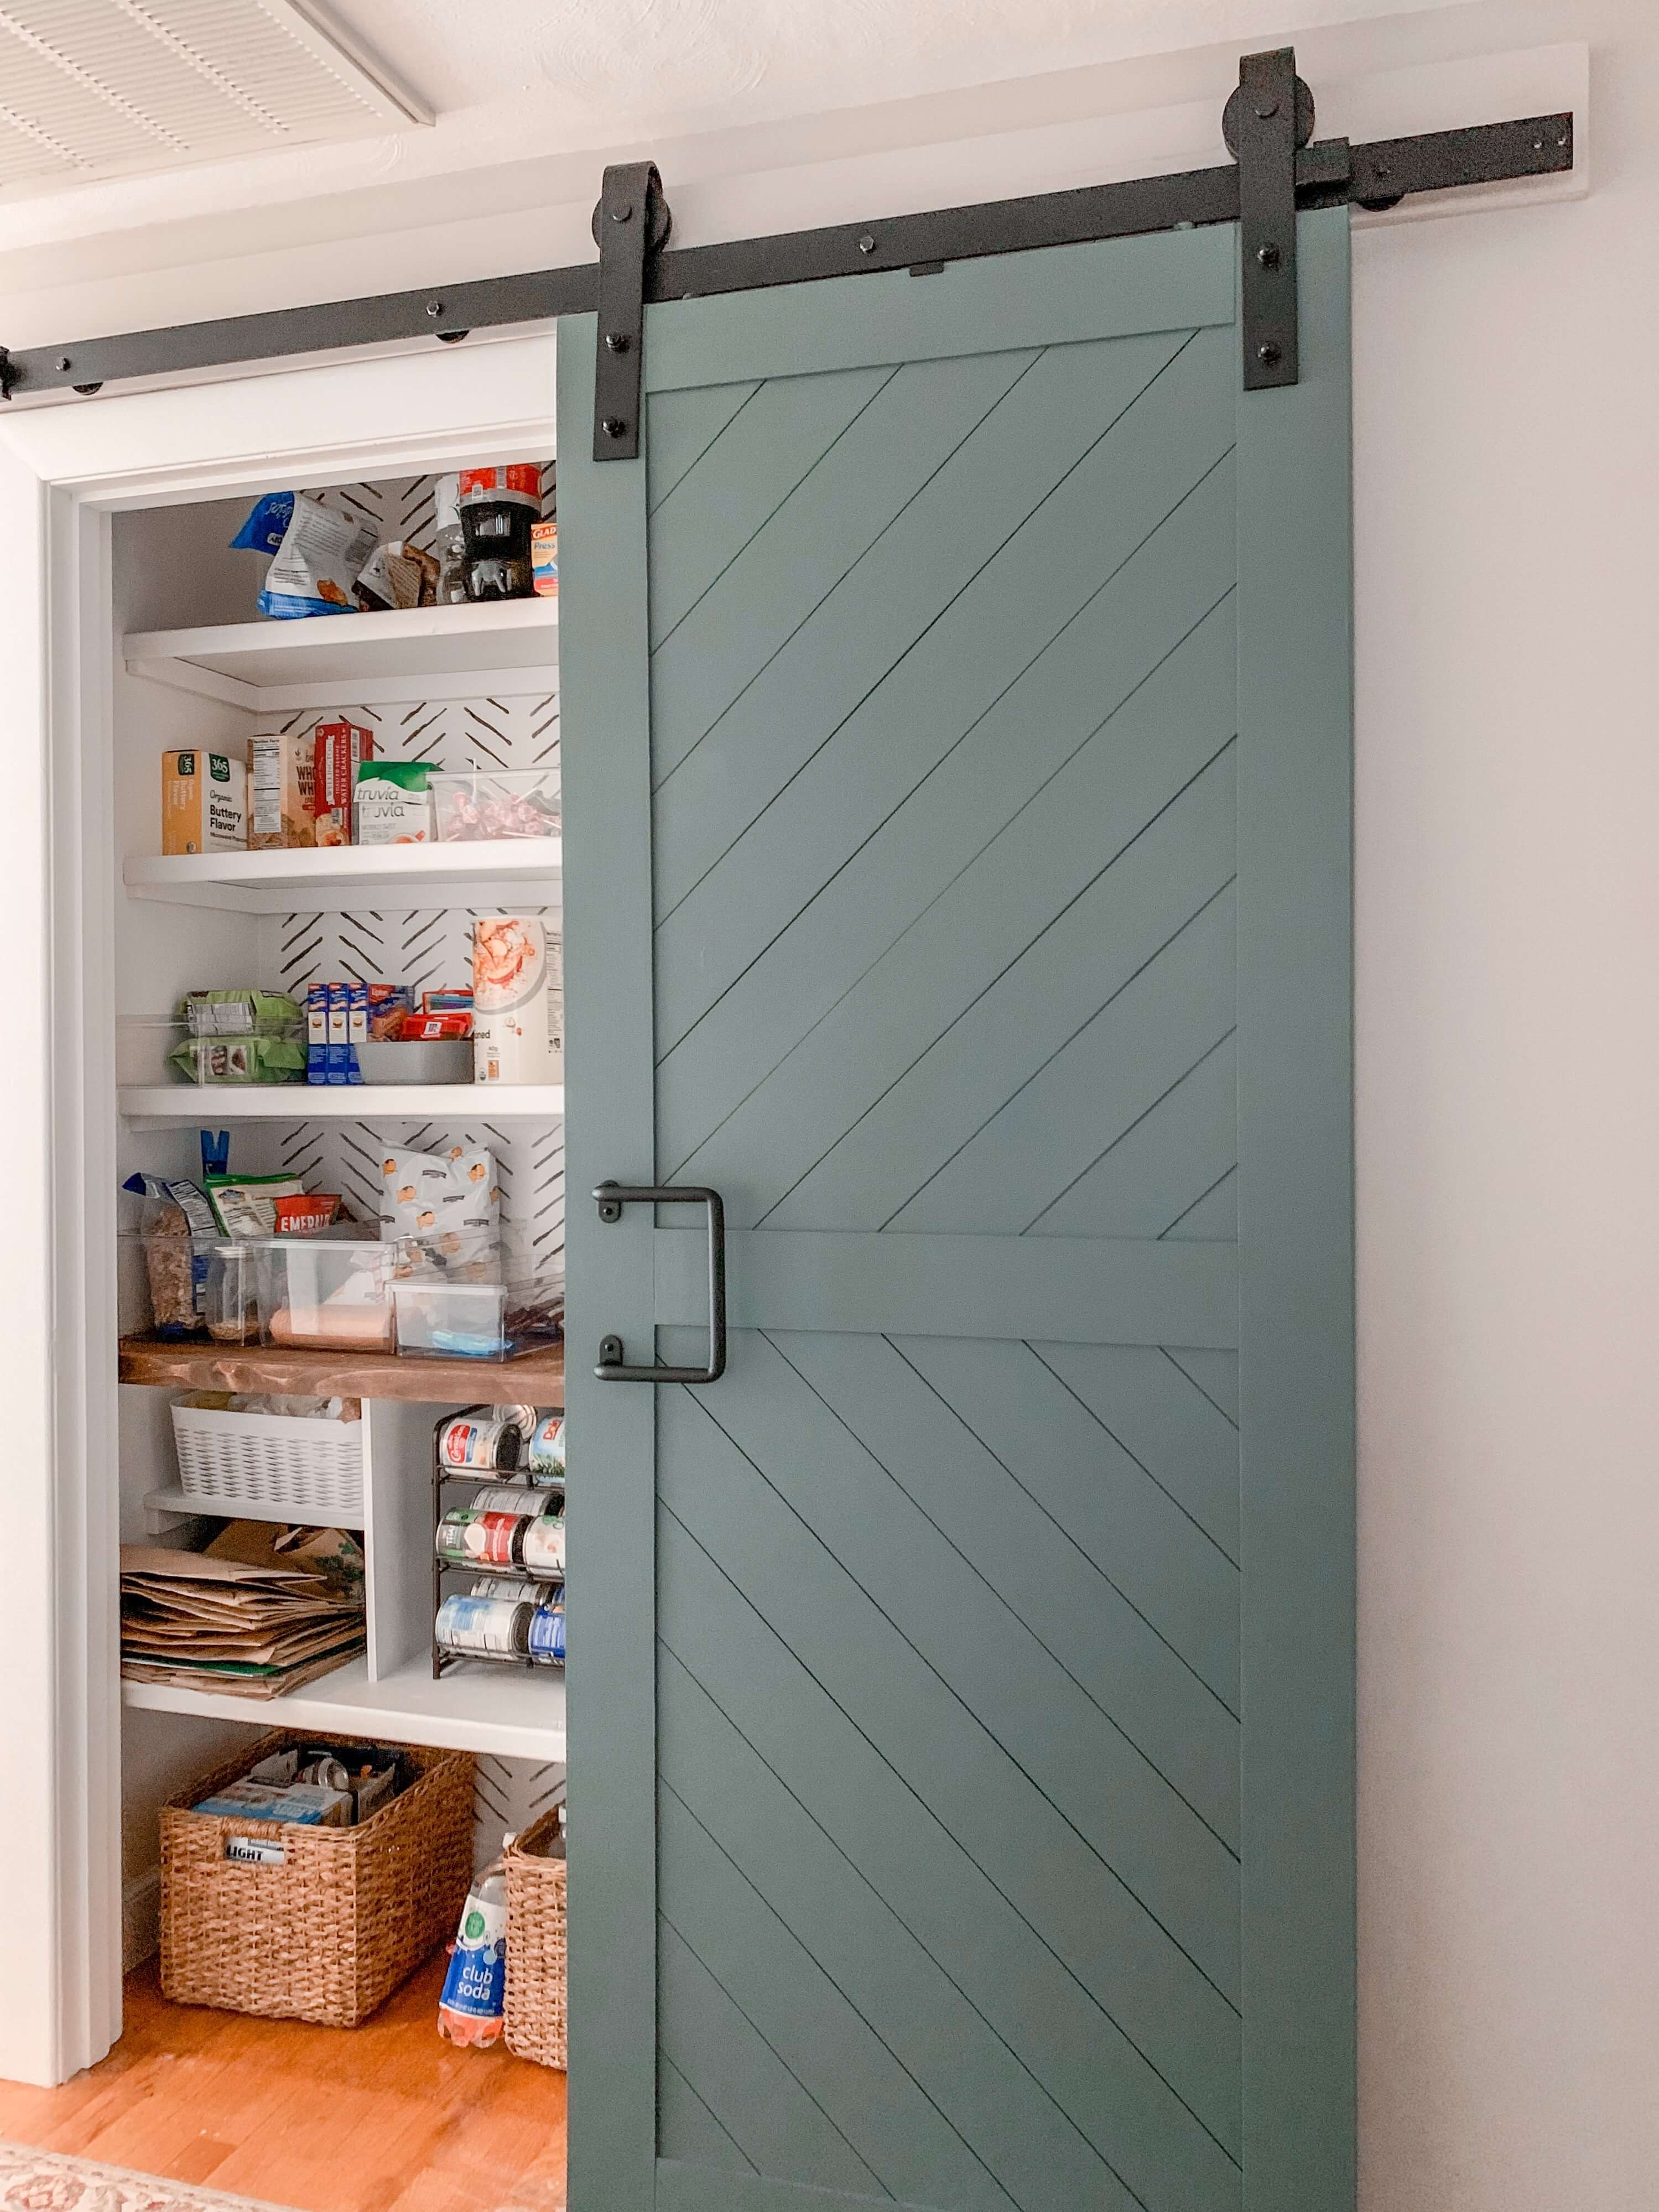
How to Create a Barn Door Using the Original Door
I know I probably say this about every project when it is still new and exciting….but I really think this is my favorite project to date! Not only did I make the most beautiful barn door, but I did it using the original pantry/closet door! I can’t believe I didn’t think to do this before! So much easier than building from scratch. Oh, and some gorgeous hardware from National Hardware definitely doesn’t hurt!!
*This post was sponsored by National Hardware but the opinions contained within are solely my own.
Disclaimer: In the name of full transparency, please be aware that this blog post may contain affiliate links and any purchases made through such links will result in a small commission for me (at no extra cost for you). As an Amazon and Home Depot Associate I earn from qualifying purchases.
Step 1: Remove the Original Door
First up, take the old door off by unscrewing the hinges of your current door to remove it from the door frame. Go ahead and remove all the hardware from the frame and the door because you won’t need it anymore. The door you have is what will serve as the base for your new modern barn door.
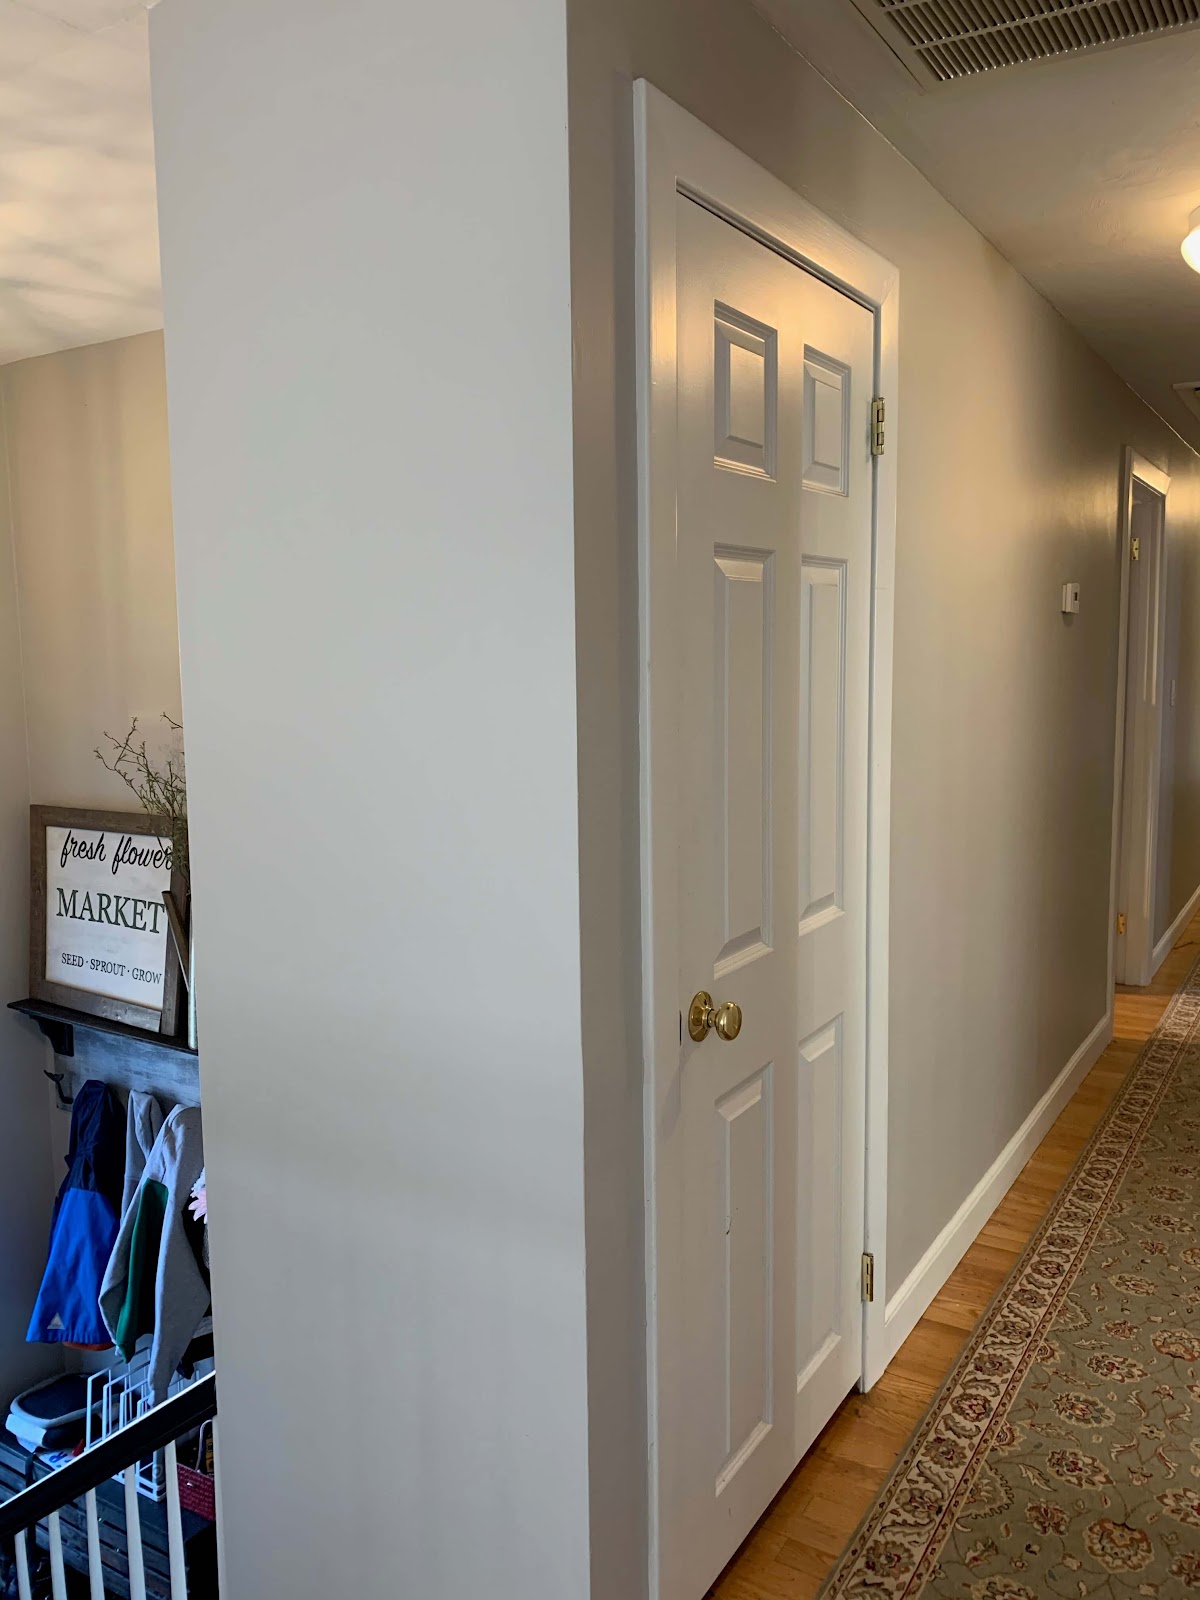
Use wood filler to fill the voids on the door frame where the hinges and door latch had been. Sand smooth and repaint to match the trim.

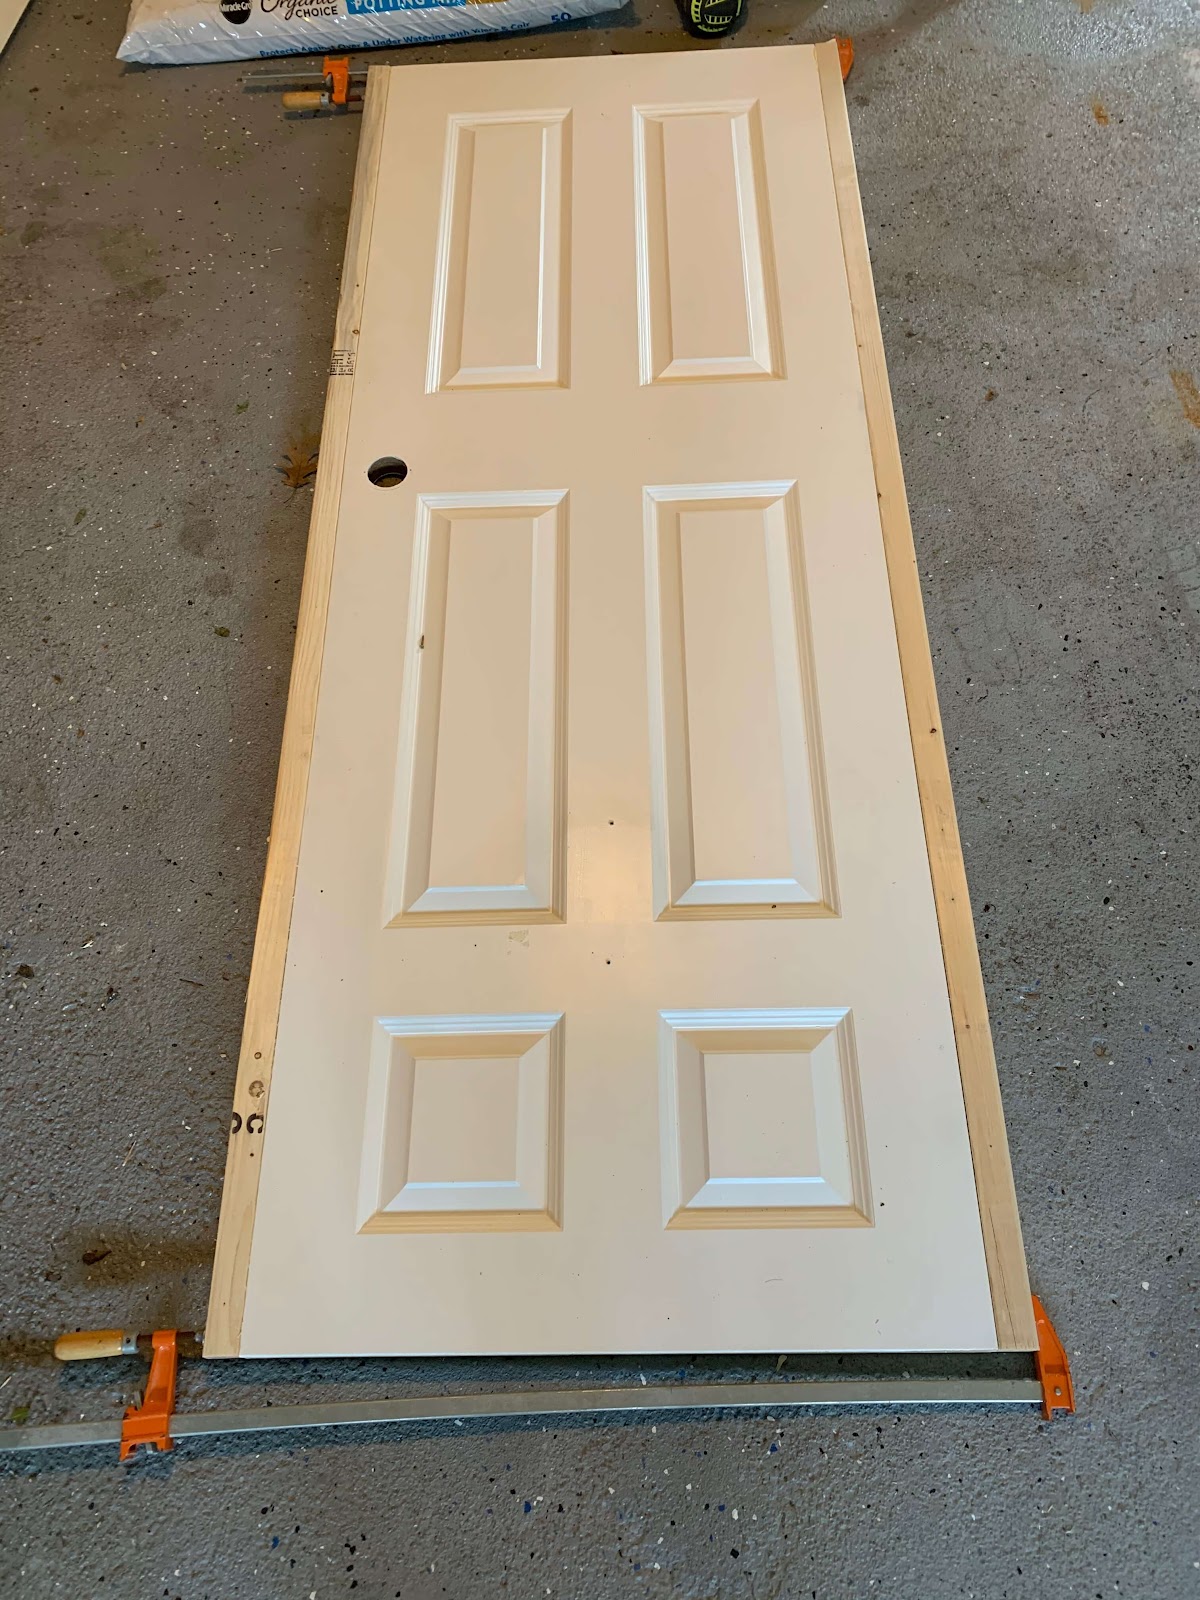
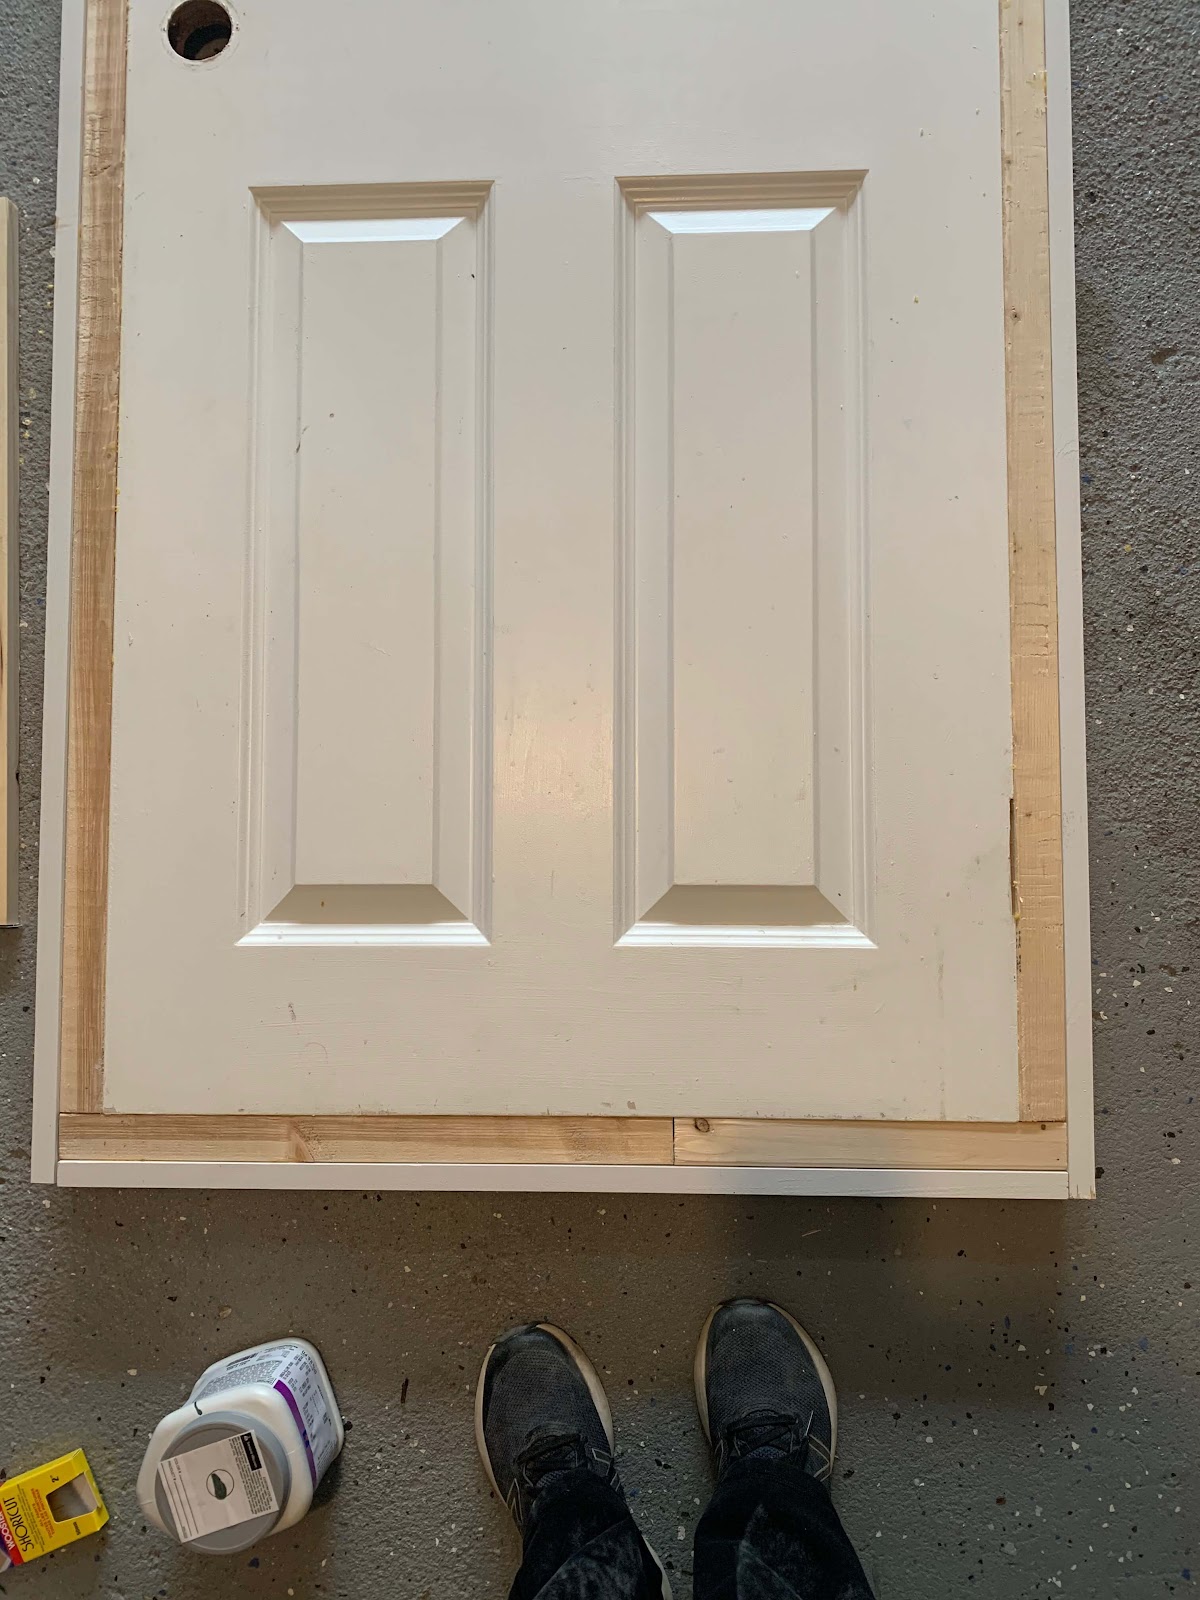
Step 2: Beef Up the Original Door
Barn doors are typically taller and wider than a normal door in order to cover some of the door frame. In order to re-create this with your existing door you need to add some additional wood for width and height. First add 2x2s around all door edges and attach with wood glue and screws. Then add additional 1×2 boards using wood glue and brad nails to give a bit more width and height but also provide a nice clean edge. It looks a little funky here but trust me, you won’t see any of this once the front trim is added.
Step 3: Create Door Design
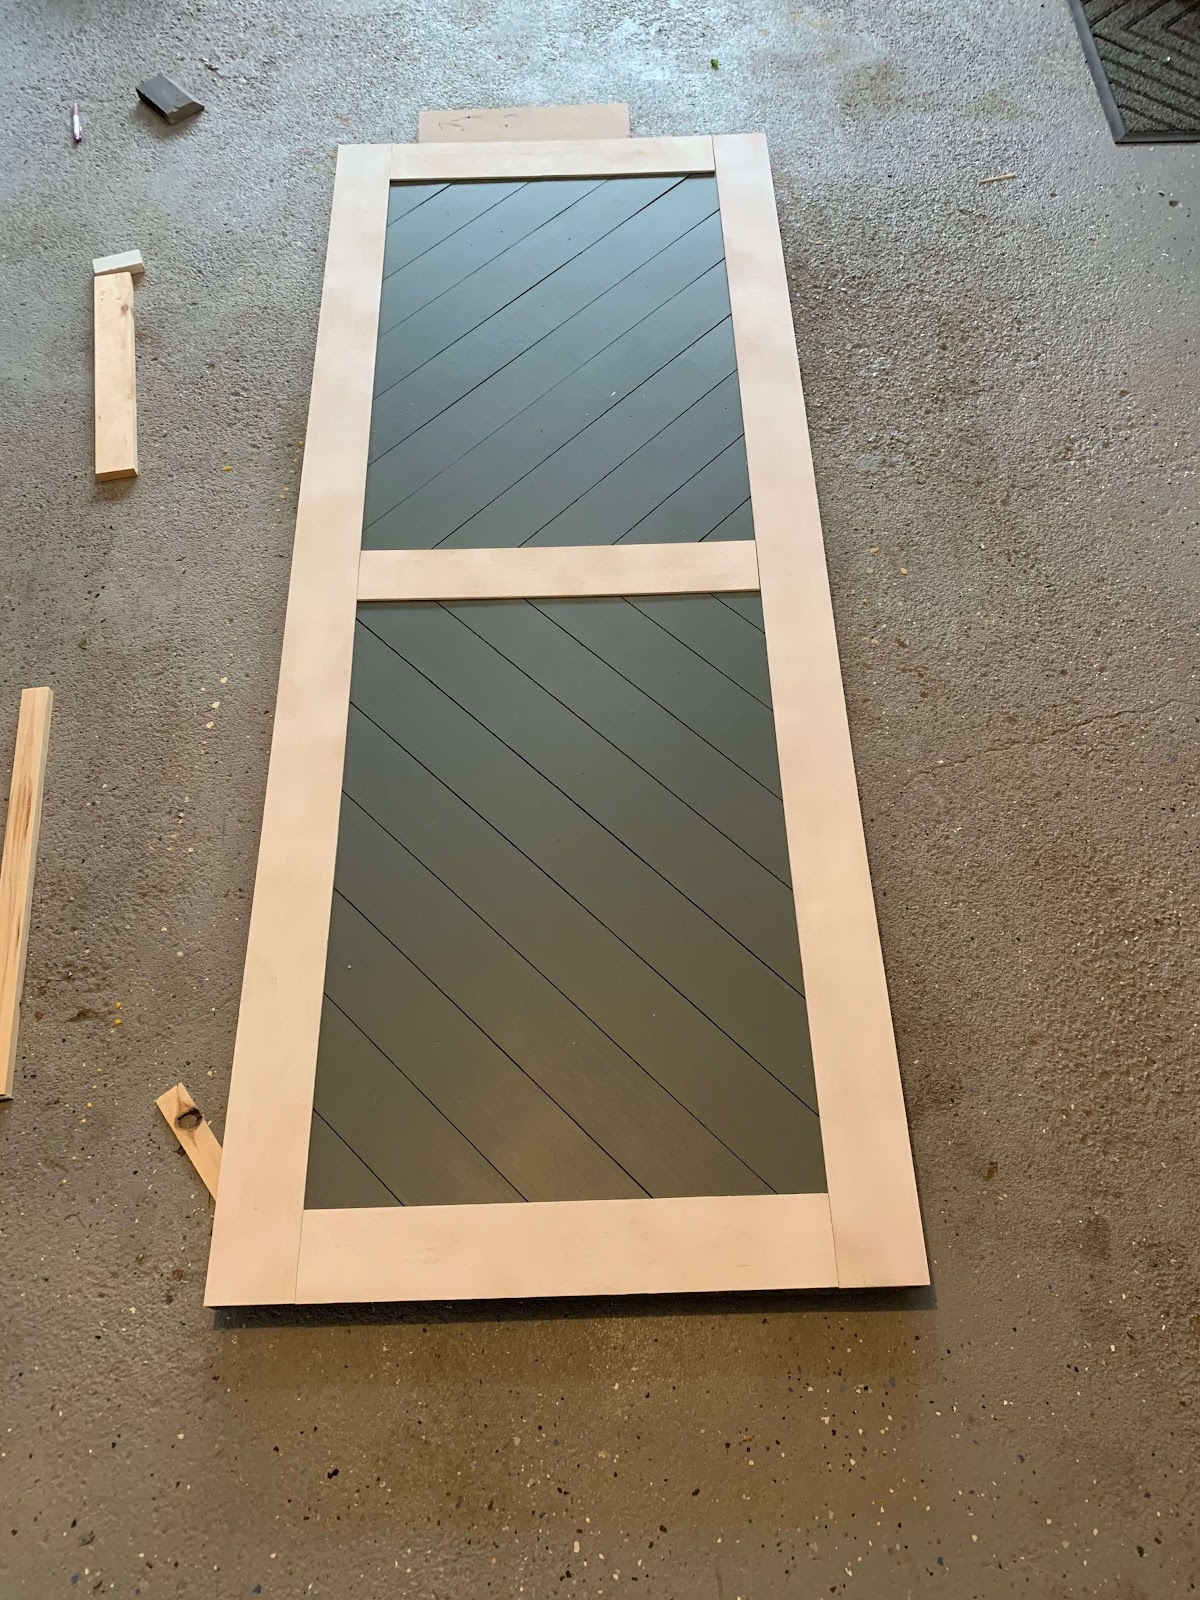
This door is a combination modern farmhouse herringbone pattern with a traditional shaker style trim. The design is created using very thin (5mm) plywood ripped down into 4″ strips. First, mark the center line of the door. Then clamp a board across the center as the starting point for the top herringbone strips. All strips start with a 45 degree cut, so cut a few and then lay them out, weighing them down and using dimes as spacers. I painted the door black first because I wanted the space between my boards to show as black and not white. You can skip this step if your door is white or light in color.

With the strips laid out on the door, mark where they intersect with the other side of the door and then make another 45 degree cut to cut the strip to length. Repeat this process until the whole top side is done.

For the bottom side, essentially repeat the process but in the opposite direction. Keep the top strips in place so that the bottom strips can be lined up with the top. Then, again, mark where the strips intersect with the door edge and make your cuts. If painting before assembly, (which is recommended), make sure to label the strips so the order is known for assembly.
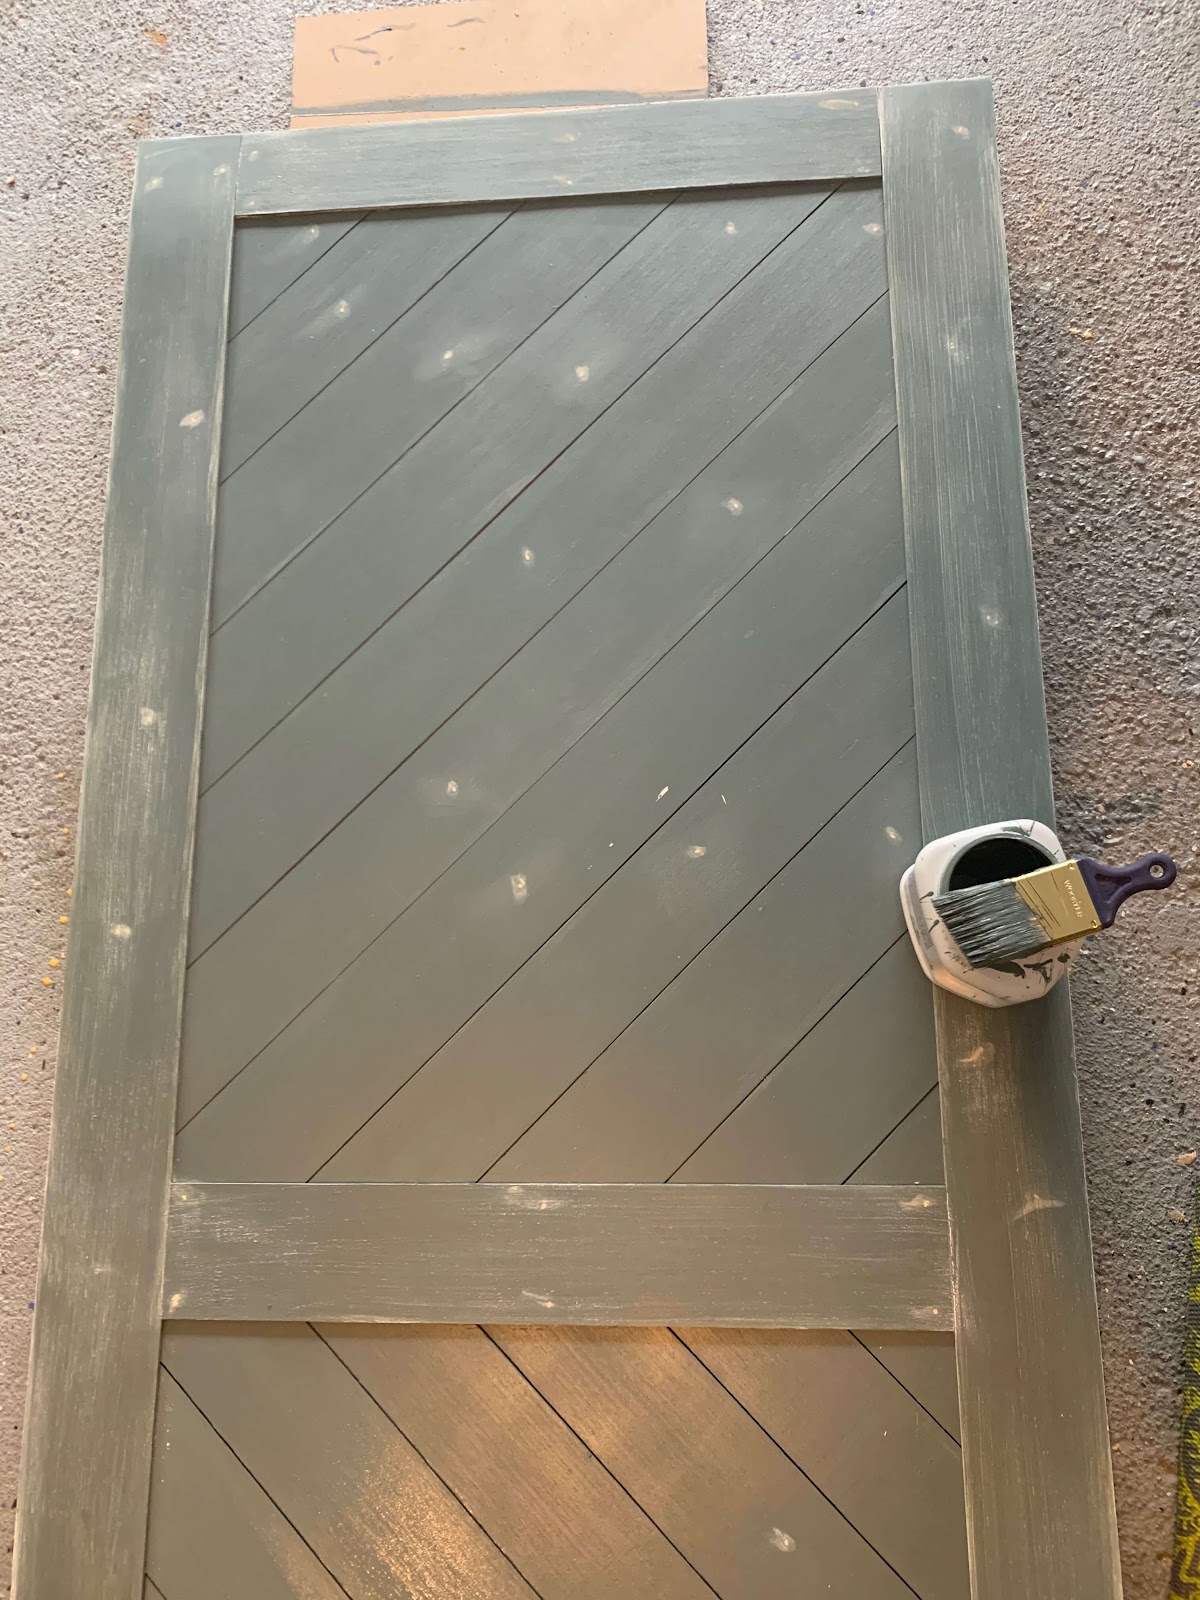
Step 4: Prime and Paint the Plywood Strips
Now it is time to paint until you can’t paint anymore!! I recommend you prime all your pieces first with either a spray paint primer or regular brush on primer. Once dry, follow with two coats of your desired paint color. If changing the door color, also paint the original door, front and back, prior to attaching the wood strips. Again, I painted my door underneath the strips black for contrast in the gaps…but that is totally optional! The main color I used for this door is Homburg Gray by Sherwin Williams.

Step 5: Assemble the Modern Barn Door
Now that the wood strips are all painted it is time to go back and lay them all out in the original order. Again, I labeled mine on the backside as I cut them to make this part easier. Use dimes for spacers and 1″ brad nails to secure. Add shaker style trim (2 long strips the length of the door sides and 3 shorter strips that fit in between the long side strips). Then fill all the nail holes, caulk seams, and apply touch up paint.
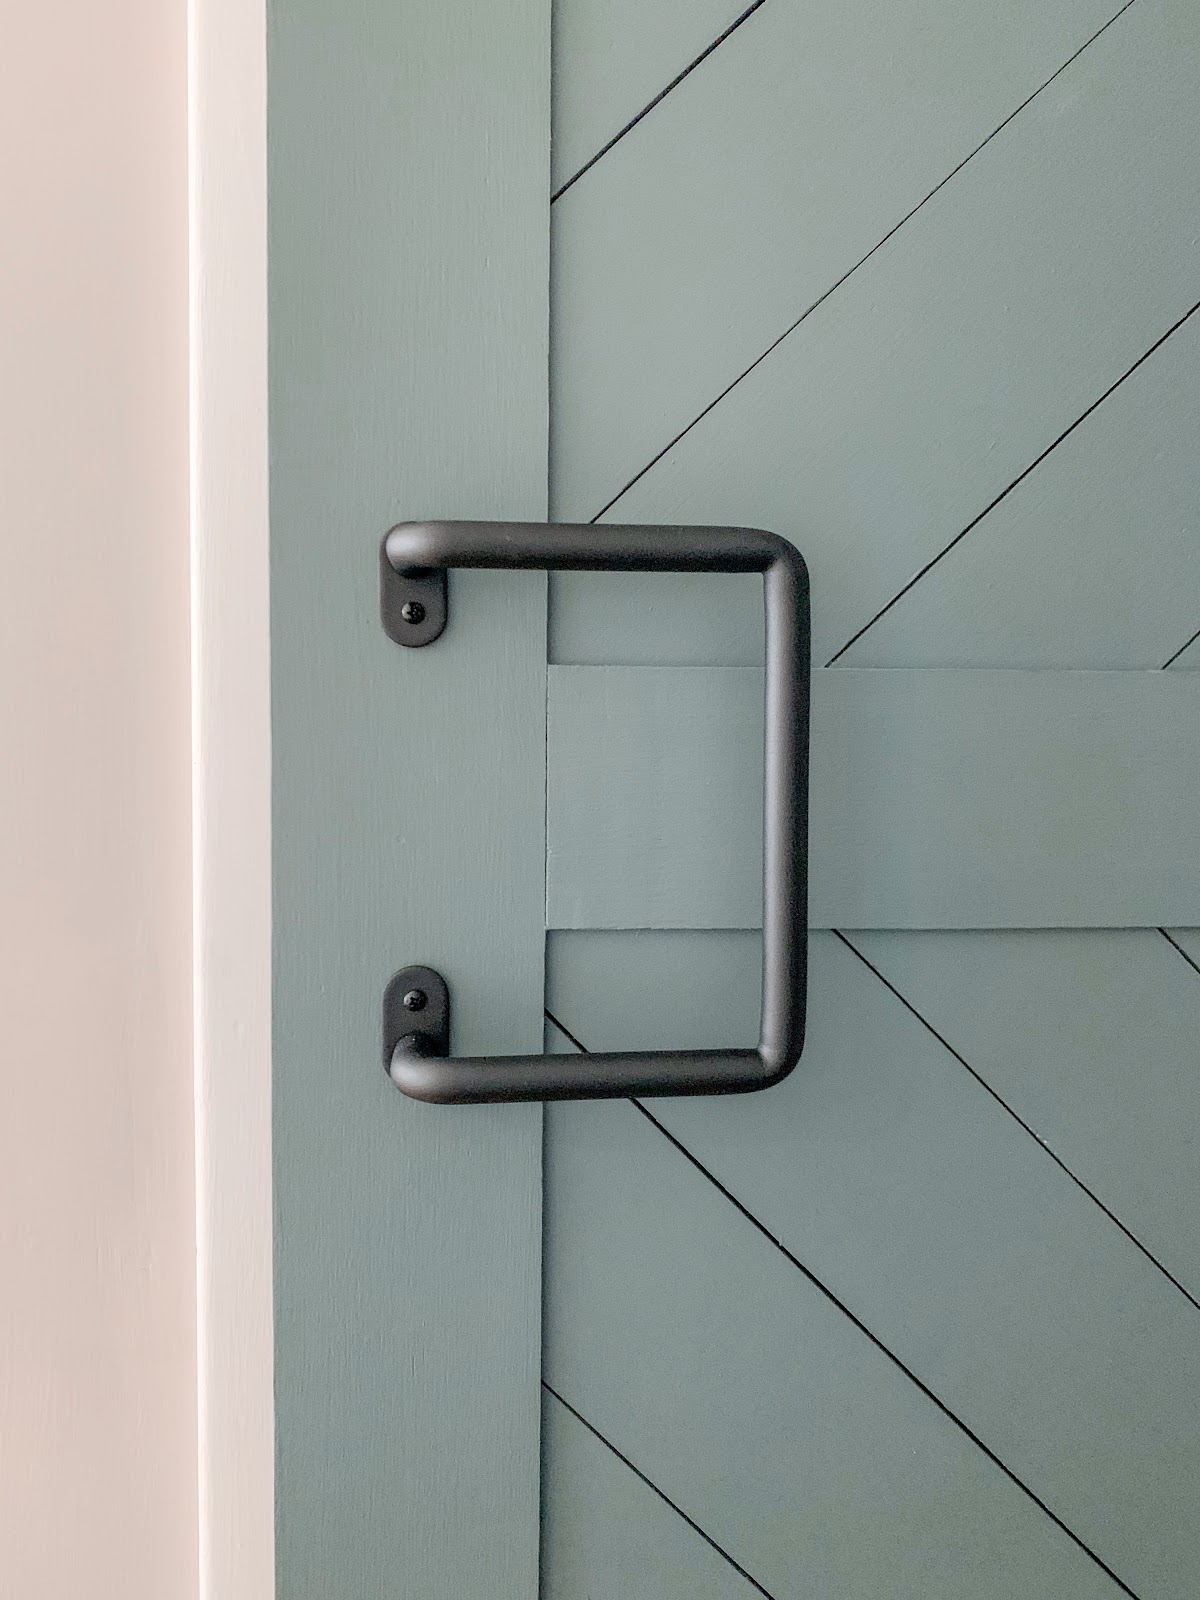
Step 6: Add National Hardware Barn Door Hardware
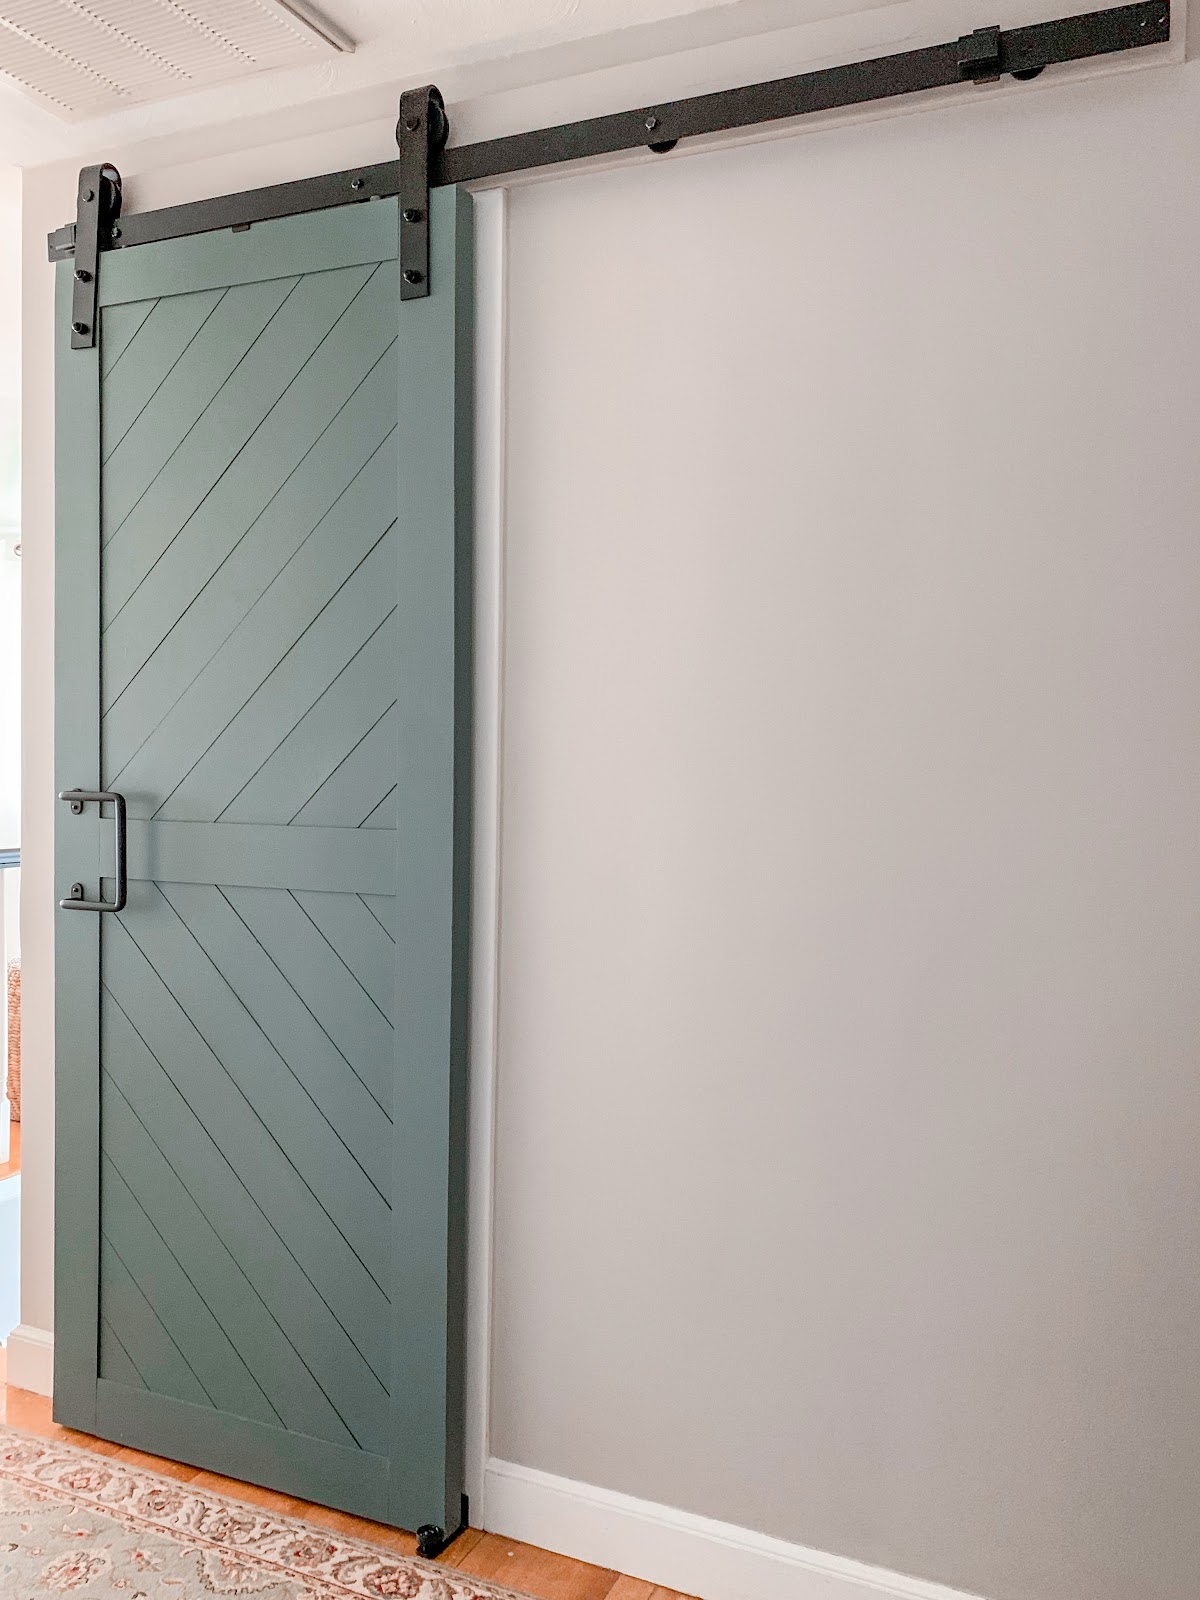
Ok, now I don’t typically rave about hardware…but this hardware is GORGEOUS! And super easy to install. I won’t go into all the details here because their instruction sheet is WAY better than any instructions I could provide. Just follow the directions provided in your matte black designer interior barn door kit. Installation is super easy and everything you need is provided in the kit! Lastly, finish with this super cool, low profile, matte black 8″ Troy pull handle.

This modern barn door is super budget friendly to create, costing less than $30 in wood and supplies (not including the hardware price)! And if you have searched for a barn door to buy, you will know this is a steal! Plus, no wasting the old door which is a huge perk to me!

Looking for a more traditional or larger DIY barn door tutorial? No worries, I got you there too! Check out my DIY white shaker style barn door too.