Easy Ikea Hack Dresser Update with Paint
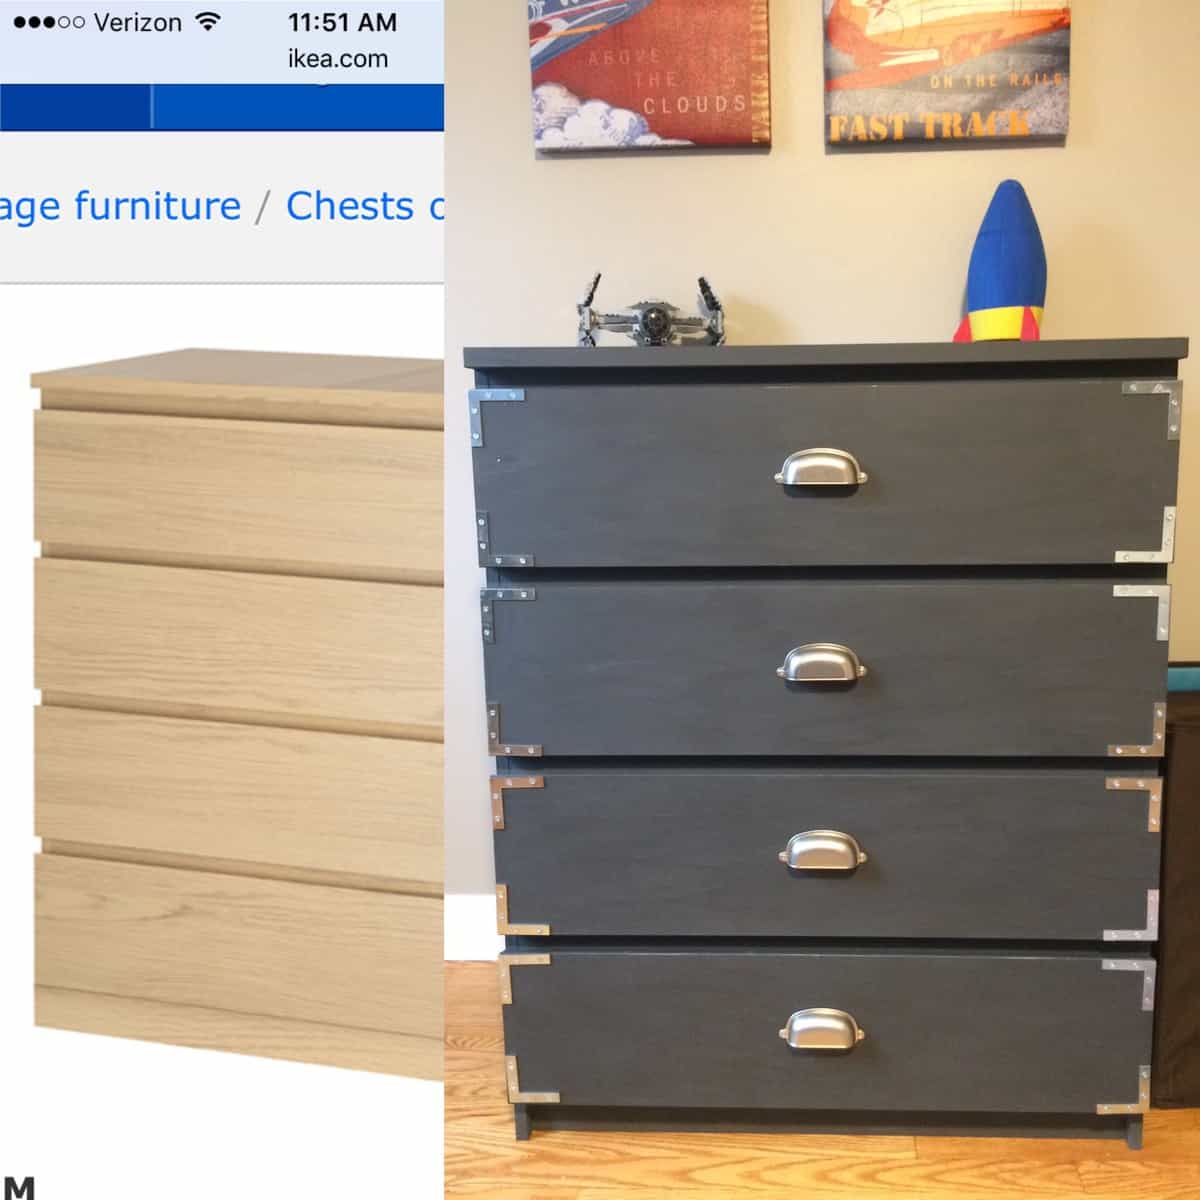
We have had this IKEA malm dresser for years now. Honestly, I think we bought it about 8 years ago when we were still dreaming of buying a house. It wasn’t the prettiest thing but it served it’s purpose. It stored clothes like a champ. But seriously, it needed an uplift and I think this industrial vibe IKEA hack does the trick nicely.
Anyway we’ve kept this dresser over the years and it has continued to be in pretty good shape, save the bottom of the drawer sag that we’ve had to fix at one point or another. It has moved from room to room throughout my house and finally landed in my sons room. When I recently decided to update his room to a Star-wars theme, I wanted his bedroom furniture to be out of this world! Haha, I’m funny.
Of note, the Malm dresser has since been recalled by IKEA, so keep that in mind if you are planning to find and/or update one of your own. They are fine to keep but need to be secured to a wall in order to make sure that they are safe, as they can be a tip hazard. Again, just keep that in mind. This hack could really be done with any dresser you might have!
Disclaimer: In the name of full transparency, please be aware that this blog post contains affiliate links and any purchases made through such links will result in a small commission for me (at no extra cost for you). As an Amazon Associate I earn from qualifying purchases.
Cost: ~$50 (that said, I have used the paint and polyurethane for multiple projects and did not include the cost of the actual dresser)
What you’ll need: Chalk paint (I’ve included a link of what I used in the text below), good quality paint brush, polyurethane, hardware, and hardware template (optional)
What I learned: If you are painting veneer with chalk paint, a polyurethane sealant works well! Trying to buff out a wax over chalk paint on veneer will just cause the paint to buff right off too
IKEA Dresser Preparation
Like I said before there really isn’t a whole lot of preparation for this project. I made sure the dresser was clean and free from dust and stickiness and grime and all that fun stuff. Then I lightly sanded all the surfaces and wiped away the excess dust. I applied this paint with a paintbrush, not a roller. Sometimes for furniture I feel like a roller leaves a weird bumpy texture. But if you have a process that you like, go for it! I like the control I get with a typical paintbrush.
Painting Process
I pulled the drawers out first and set those aside. I started painting from the top and worked my way down to the bottom and then to the front. Lastly I painted the drawer fronts. I did about two coats in total of the chalk paint. When the paint was all done and completely dried, I applied a polyurethane topcoat with a paintbrush. Now you might read that a lot of people use a wax with chalk paint. I have tried this and really not had great luck with it. I’m not sure if it’s the products that I’ve used, or a flaw in my application process, or just personal preference. But I just think that polyurethane is easier to work with and I like the sheen and the look of the finished product. And with veneer, the more you buff the wax, the more chalk paint you remove.
Finishing Touches on this IKEA Hack
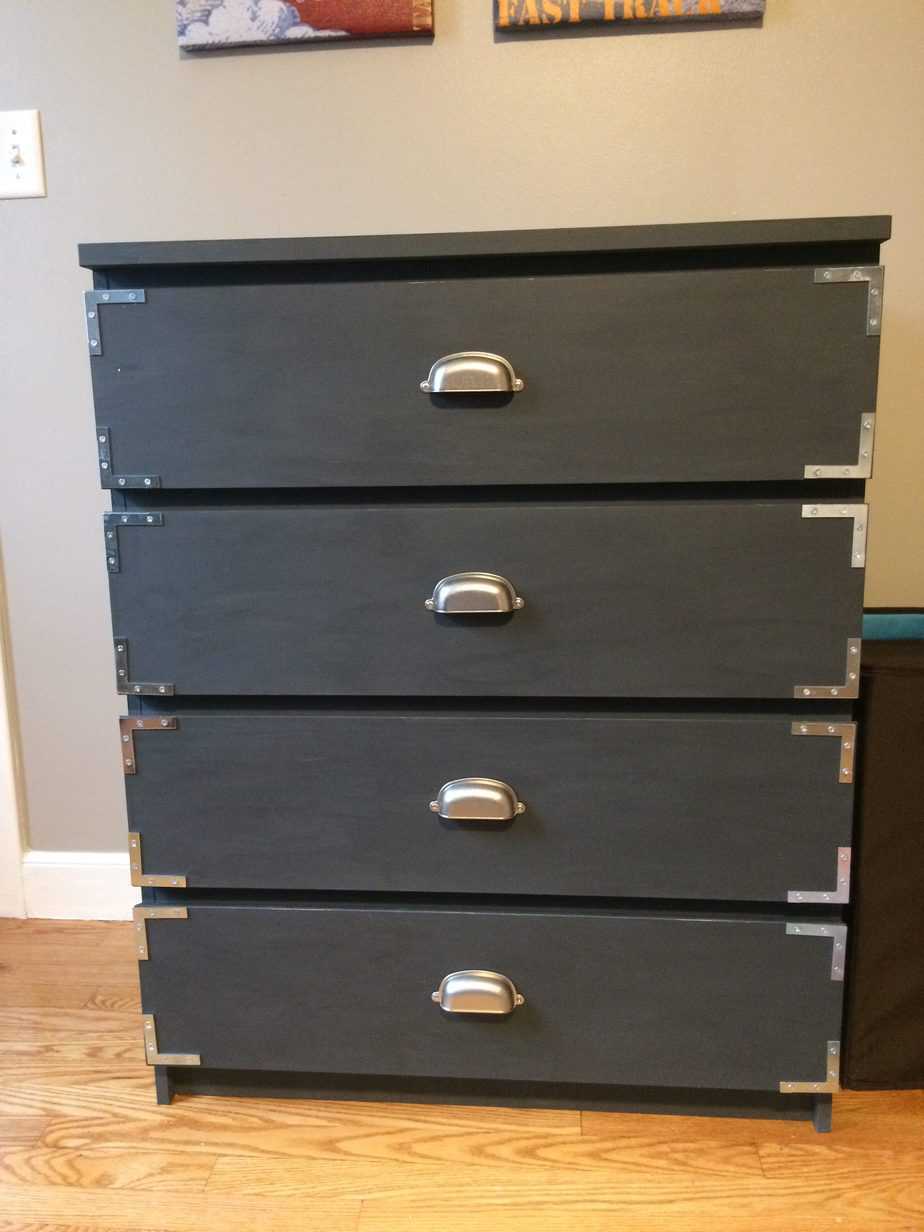
At this point you are basically done with the project! The last thing to do is attach hardware. I really like the look of cup pulls for pretty much anything and everything. So I chose these in the brushed nickel and found some flat corner brackets, 2.5″, that I attached on the outside as decorative hardware. I use this cabinet hardware template tool to help measure out handle placement. To be honest, attaching cabinet hardware is one of my least favorite jobs. Somehow, no matter what I do, it’s always just slightly off. These templates can really help with that.
And there you have it! An Ikea hack with only chalk paint and new hardware. I love how easy this is and how much of a difference it made in how this piece looks.
Also, as a follow up, I did this piece almost 4 years ago and it has held up really well! I did notice a couple of chips on the top early on which I just touched up with a bit of paint. Otherwise, no issues with chipping, scratching, or wear and it belongs to a young boy who is not exactly easy on his furniture! Looking for some other great IKEA hacks? Check out this IKEA daybed makeover I did, again using paint, hardware, and a little added trim. I also did an IKEA platform bed flip! I clearly like IKEA makeovers.