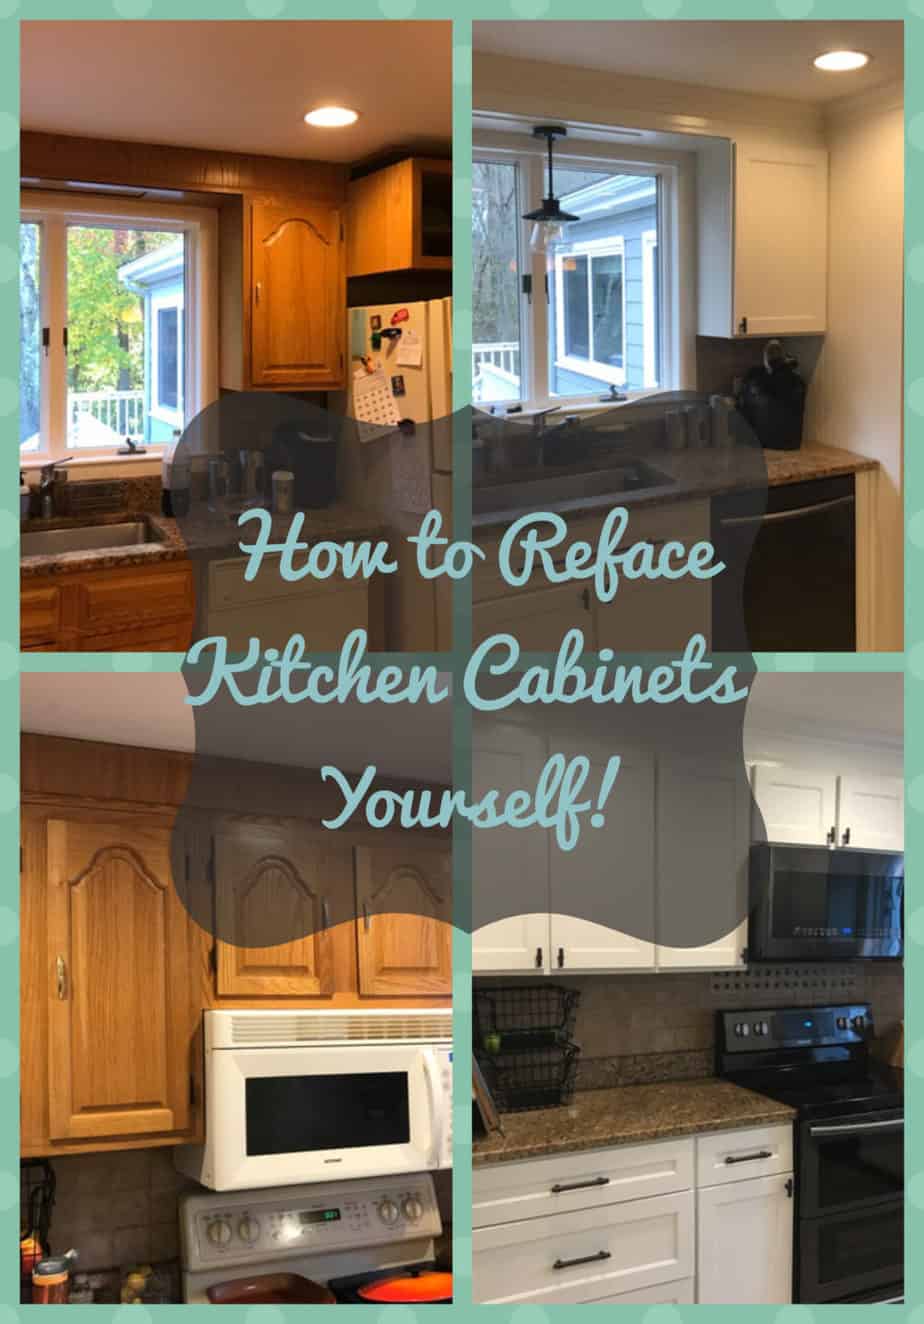
DIY Kitchen Cabinet Refacing- The Easy Way to Transform Your Cabinets
I love a gorgeous kitchen remodel as much as the next girl, but like many of you, I don’t have the heart (or the wallet) to gut, toss, and replace an entire kitchen! Especially if the layout is functional and the countertops are decent. Plus, the environment and such. I have learned some easy and inexpensive ways to update your kitchen to make it look beautiful and brand new without re-mortgaging your house to do it! So what do you do when you want a renovated kitchen but don’t want to pay for it?? You work with what you’ve got, yo. And you do it yourself. Below I’m going to teach you how to update your own kitchen on budget by doing a DIY kitchen cabinet refacing.
For us, that meant kitchen cabinet refacing along with some additional trim and carpentry to elevate the space a bit. We initially got quotes from a couple of cabinet refacing companies, including our local big box store. Unfortunately, those quotes still came out to about $15,000. WHAAAT?? Um, thanks but no thanks.
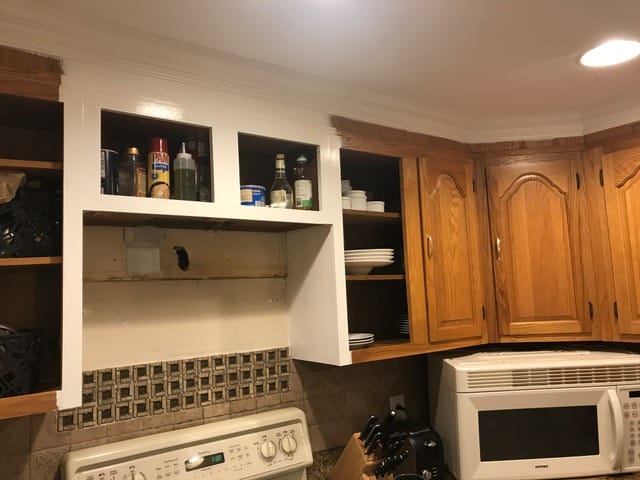
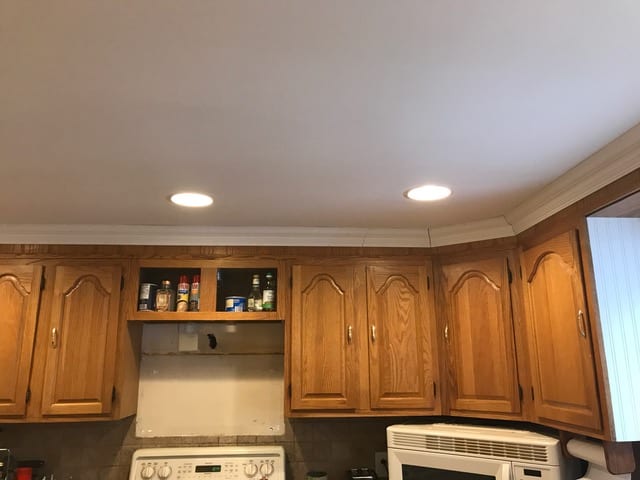
At this point I strongly considered just painting the cabinets and calling it a day. In turn, I read through approximately 1000 tutorials on the subject. The cost associated is very tempting and the impact is pretty significant as well…but the process is pretty tedious and all around awful. Not to mention painted doors can chip from ongoing wear and washing and just don’t hold up quite as well as a laminated cabinet door. Also, my cabinet doors had a very dated design, exposed hinges, and also showed a lot of the cabinet base frame (all of which I wanted to change). I figured, if I could just get new cabinet doors that would allow me to update all of the things I disliked and make the space look much more modern.
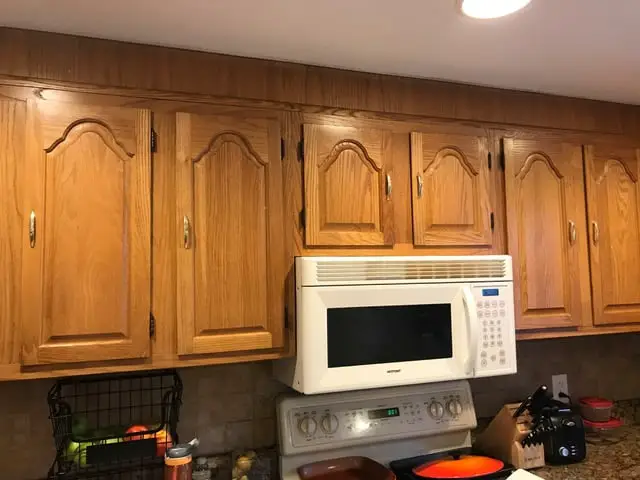
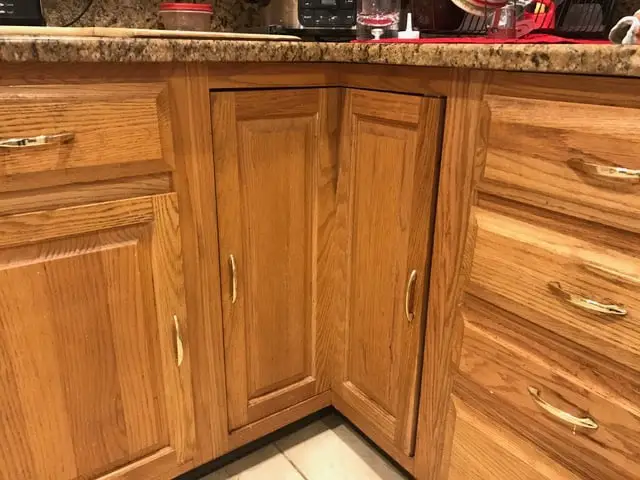
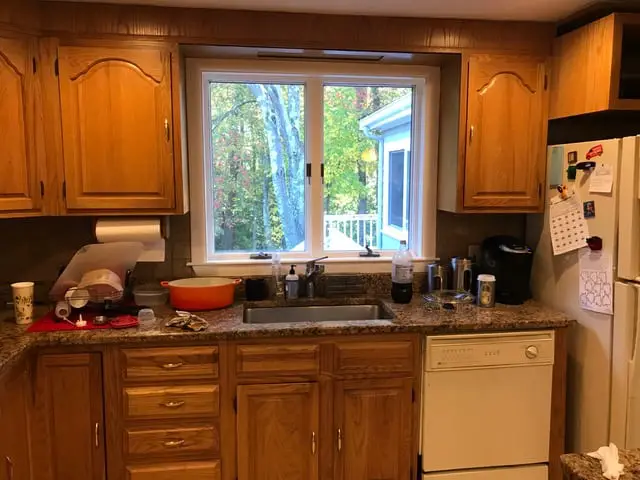
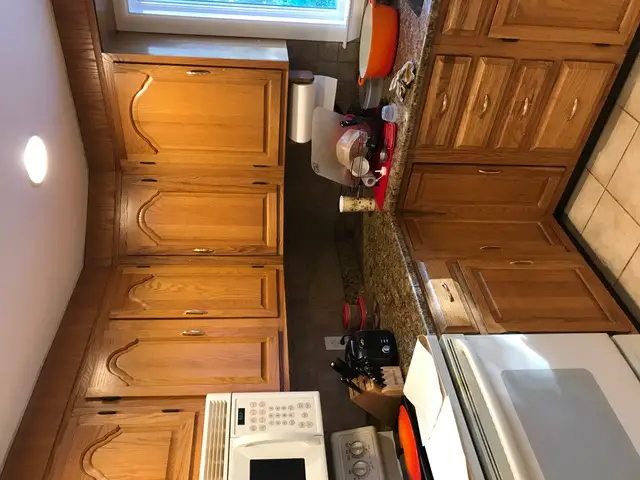
Then I started to wonder, could I just reface my own cabinets?? Is that even a thing?? The answer: YES!! You absolutely can! But good luck finding much information on HOW to do it. Until now, of course 😉 Now, bear with me. This is going to be a long one. Go grab a coffee, I’ll wait. Then browse through these lovely orange oak before shots (do you see the odd placement of those gold handles on the cabinet doors??!).
Disclaimer: In the name of full transparency, please be aware that this blog post contains affiliate links and any purchases made through such links will result in a small commission for me (at no extra cost for you). As an Amazon and Home Depot Associate I earn from qualifying purchases.
Quick Run Down
Length of time for project: This honestly depends on how big your kitchen is, how much time you have to devote to the project, and how much extra carpentry work you need and want to do. But since it takes 3-4 weeks to get your custom cabinet doors and drawer fronts delivered, I’d say that’s a good amount of time to plan for. I had everything in my kitchen done in 3 weeks and that was only working on this project during naps, at bedtime, and weekends. If you’ve got a whole weekend to throw at it, you may very well be able to crank out your own cabinet refacing in that amount of time!
Cost: Approximately $1,850
What you’ll need for DIY Cabinet Refacing:
- Custom ordered cabinet doors and drawer fronts through Home Depot: $1625 (for 19 doors and 10 drawers)
- Hardware: drawer pulls, cabinet handles, long below sink drawer handle
- Paint: Custom color Behr Enamel
- Wood Grain Filler
- Crown Molding (optional)
- Beadboard Wallpaper (optional)
- Trim and carpentry supplies: This is so custom and unique to each kitchen that I won’t price that out here.
What I learned: Refacing your own cabinets is easier than you think and arguably easier than painting all your cabinets and doors. You can still use your kitchen while you work, unlike a remodel. Crown molding is totally DIY doable and makes a huge difference in the space. Beadboard wallpaper looks awesome but isn’t super durable.
Step 1: Measuring
Where to start? First things first, measuring. You’ll need to measure the openings of all your cabinet doors and drawer fronts. I even drew out a rough sketch of my cabinets so I could keep track of how many I had and all of the measurements. Once that part was complete, I determined the cabinet door overlay. My cabinet doors orignially had a 1/4” overlay. What does that mean? It means, when the cabinet door is closed, 1/4” of the base frame is covered by the edge of the cabinet.
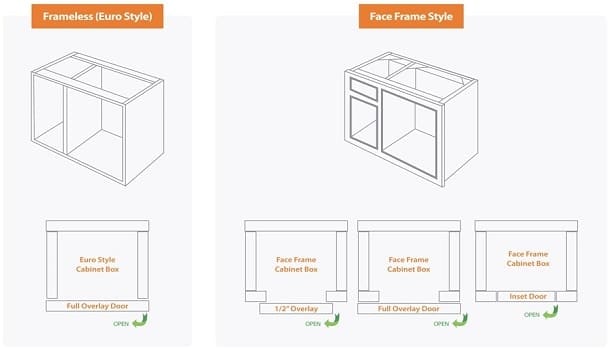
If you like your current overlay, great! Just jot that part down and you don’t have to change anything when it comes to the size of your doors. But as I mentioned before, I felt that too much of my cabinet base frames were exposed. So I increased my overlay to 3/4”, which is a pretty standard measurement. Given that this was my first time doing something like this and the Home Depot cabinet people weren’t even sure I could just randomly decide to increase my cabinet overlay by ordering new doors, I was WAY too nervous to try to cover the cabinet frame altogether and create a full overlay. But that is OK. I think what I decided worked well in the end.
Now, here is where your brain will start to hurt a little. If you change your overlay you will have to go back to your original measurements of the cabinet door openings and add back your overlay. So, if you have a 3/4” overlay on all sides, you will add 1.5” to the width and 1.5” to the height. If you are not changing the size of your doors at all, just measure the height and width of the doors directly and call it a day. You still need to know your overlay for ordering purposes (this determines where your hinge holes are placed) but the measuring piece will be a little more straight forward if you aren’t changing the size of your doors at all.

Don’t let this overwhelm you. This is my overly complicated drawing with lots of numbers and measurements on it. 
I swear I flipped this image right side up. It just doesn’t want to cooperate. 
This list I took with me when I placed my order.
Next, measure your cabinet drawer fronts as well. Most of the time you aren’t going to change these measurements much (overlay isn’t a term used with drawer fronts, so even though you might be changing the amount of drawer front that covers your base frame, just write down the width and height of your desired drawer front size). If you want the front bigger just make sure your measurements reflect that.
Step 2: Ordering
If you like your trim and layout, this will be a super easy project! I had some things I wanted to change and I will talk about those things more in depth below. The main thing you need to do now is get your measurements 100% right (Like quadraluple check them. Who cares if I made that word up, just check them many times so you are sure they are correct). Then take these measurements to your store and pick out the color and style of your doors. I used Home Depot as my provider. The store will tell you what your options are for custom orders. Many cabinets are only sold as a set with the cabinet bases and you only need to purchase doors and drawer fronts for cabinet refacing. You will not find this information on their website, which is annoying, at best.
I went with the Martha Stewart Annandale (style) Picket Fence (color) option. Everything gets ordered through the cabinet specialist inside the store and all the measurements are input into the computer and submitted directly to the cabinet maker. At this point I had a mini panic attack but was also just excited to get going on everything! It took like 3-4 weeks for them to make the cabinet doors and ship them to my house. Yep! They come straight to your door! Oh, and before I forget to mention it, they come WITH the hinges! Not hardware, but hinges. So that definitely helps!

Step 3: Painting
Now, you may be wondering, what about the bases? How do I get those to match the color of the new drawers and doors? Two different options here. Home Depot sells the veneer they apply when they do cabinet refacing. I personally didn’t trust myself to install this stuff well enough for it to look good. So I decided to paint my bases. I know, I know….I said you wouldn’t have to paint! Or did I?? Buah, buah, buah (I’m trying to do a creepy laugh here). What I actually said is that you wouldn’t spend the rest of your life painting because painting cabinet doors takes FOREVER!! The bases actually go pretty quickly.
When I picked my cabinet door at home depot they allowed me to take the sample door over to the paint department and use that to match the paint color. There is the very slightest of color variation between the door and base frames but I think I’m the only one who notices. To be quite honest, most of what you see is the door/drawer front anyway.
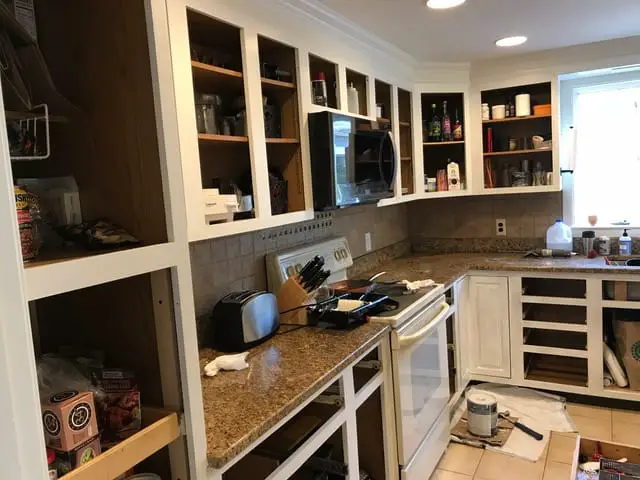
After I got my paint I went home and got to work. I removed all the cabinet doors and removed the drawers and left them on the counters. The kitchen was still usable (messy, but workable) during this whole process, which is another nice benefit to refacing vs. complete renovation.
I cleaned the bases really well with a cabinet degreaser and a wipe on deglosser. Then, because my cabinets were old oak with A LOT of wood grain, I took the extra step of trying to fill my wood grain so that the finish would be smooth (I had previously tried to paint a corner cabinet without doing this step and, not only did it take like 15 coats a paint, but it still didn’t look very good once it was done.) I used this product to fill the wood grain. You just apply a very thin layer with a squeegee like device all over the wood bases. When it dried, I followed up with a second coat. Then (once the second coat was dry as well) I used a fine grit sanding block and very lightly sanded so the surface was nice and smooth.
Once I started painting, it really went pretty quickly. For paint application, I used a brush and ended up doing three coats of Behr Enamel paint in a satin finish (custom color matched to the cabinet doors) in total. This was finished with a satin finish polyurethane top coat, but after that was done and the doors were up I wished I had used something a bit less shiny. The sheen was somehow more matte on the door fronts. I also felt like as though the polyurethane added the very faintest yellow tinge even though it was a water based product. So I ended up doing one more light coat of paint to calm down the discoloration and sheen a bit, which made it look much better.
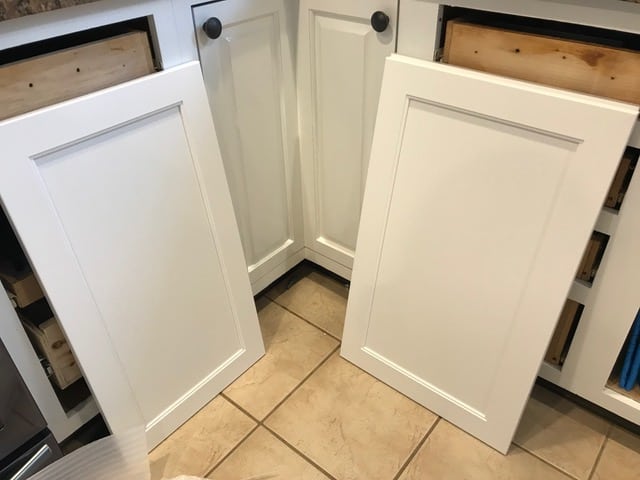
Step 4: Cabinet Refacing Installation
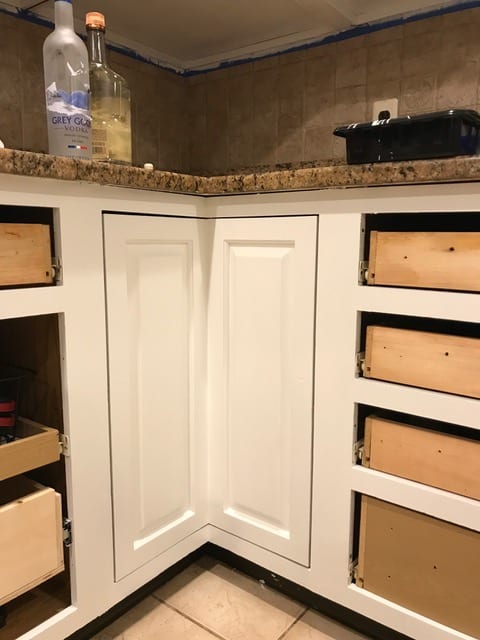
I was able to finish all this (and the carpentry I discuss below) working in short spurts over about a 2-3 week period, just in time for the cabinet doors to arrive! And once they arrive you basically just need to install them onto your cabinet base frame. Pretty easy! Installation is best done with two people though, just to be sure you get everything even.
If you haven’t already at this point, you remove your old drawer fronts from the front of your drawer boxes. The new drawer fronts will be installed with screws being drilled from the inside of the box into the back of the drawer front. I found it was easiest to use double sided tape to attach the drawer front to the box while the drawer is in its place inside the cabinet base. Once you have it on where you want it, you can clamp it and screw them into place. I found this step to be a little tricky, but after an attempt or two, it did get easier.
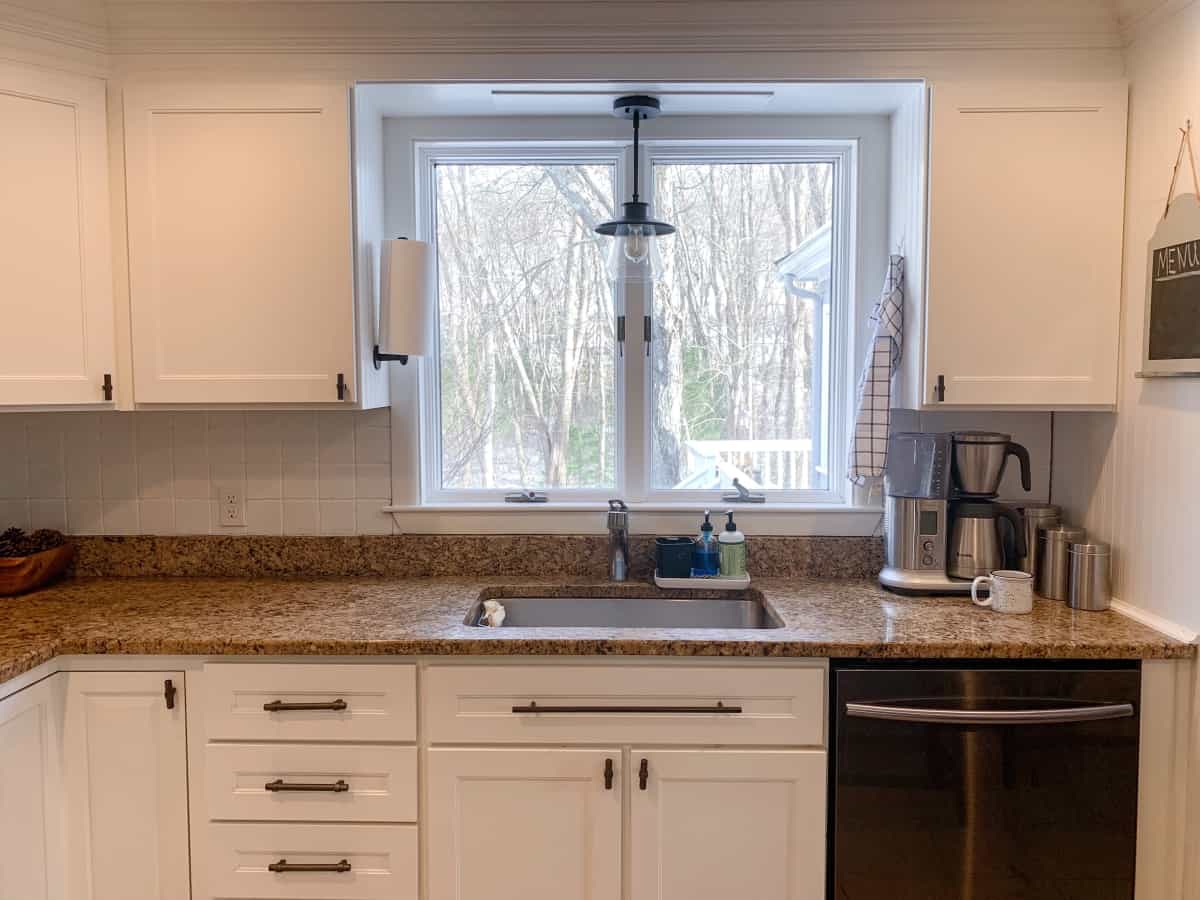
Finally, it’s time to install the hardware you selected! Mine are from Amazon and I love them! Oil rubbed bronze and I are very good friends right now. The drawer pulls are long and sleek and the cabinet handles are a similar style but unique and adorable.
This cabinet hardware template was also used to help make sure all of the hardware holes were correct. The holes for your drawer pulls will need to be drilled through both the drawer front and the drawer box. Once all your hardware is installed, it is time to step back and enjoy your work!
Additional Carpentry
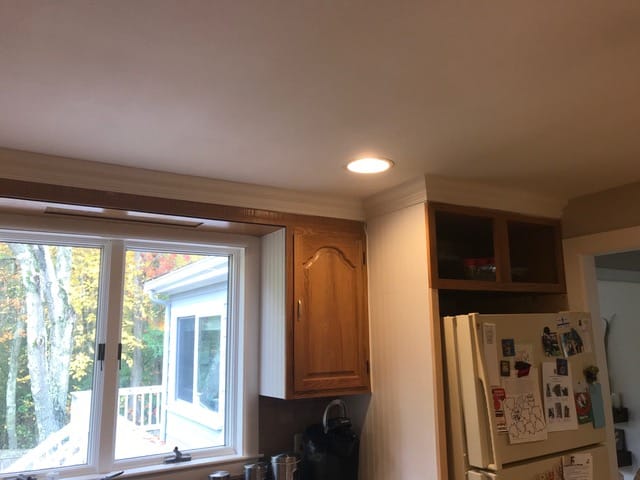
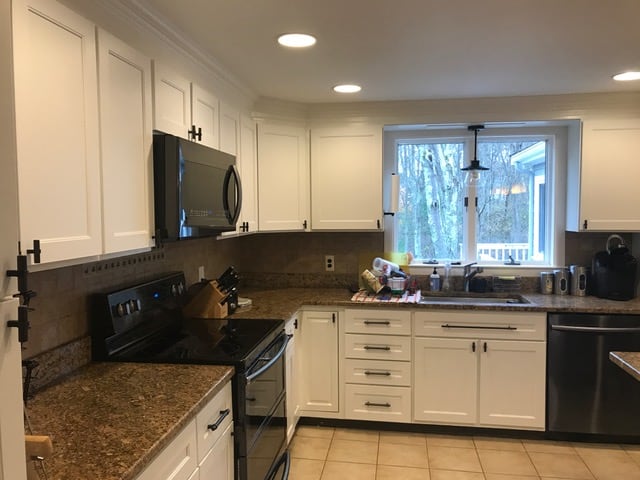
My kitchen had some other issues that I needed to fix to make it look updated and complete. For one thing, the cabinet over the refrigerator was too low for a standard height refrigerator and the cabinet over the stove was too tall causing our microwave to be too low and close to the stove top which was not up to code. Insert major eye roll here.
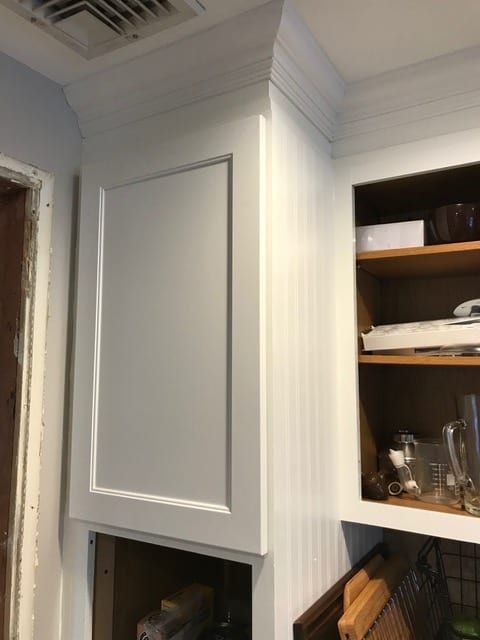
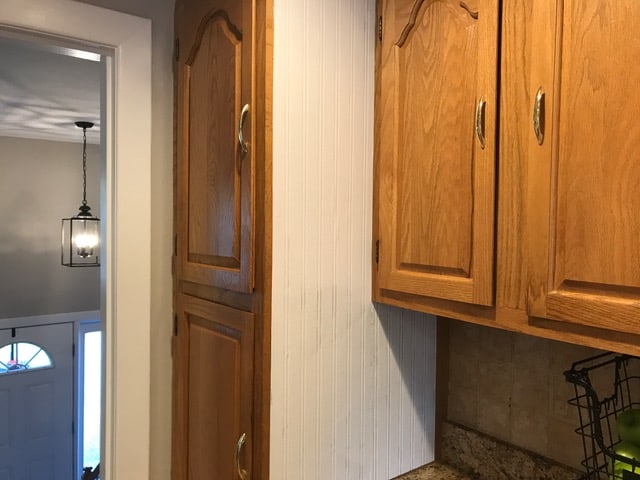
In order to solve these issues, I had to move some things around. Removing the trim above the refrigerator cabinet and remounting that cabinet higher up on the wall allowed me to use the existing cabinet without any significant modifications (as my cabinets had trim at the top and didn’t go all the way to the ceiling). Once crown molding was added, you couldn’t even tell that this cabinet sits higher than the others. I then added a side panel of 3/4″ plywood and trimmed it out to look like a built in refrigerator cabinet. The main problem is that you could see the seam between the cabinet and the plywood. I contemplated adding decorative trim but opted to cover it with beadboard wallpaper which did the trick. This was also added in a couple other locations as well and it tied everything together nicely.
Smaller cabinet above stove. 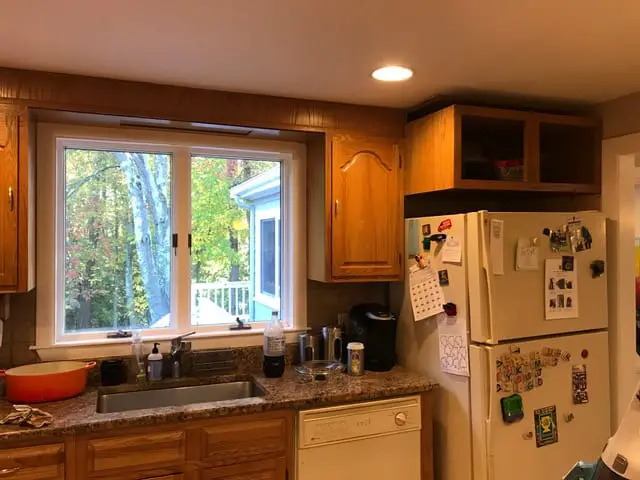
Fridge cabinet raised up. 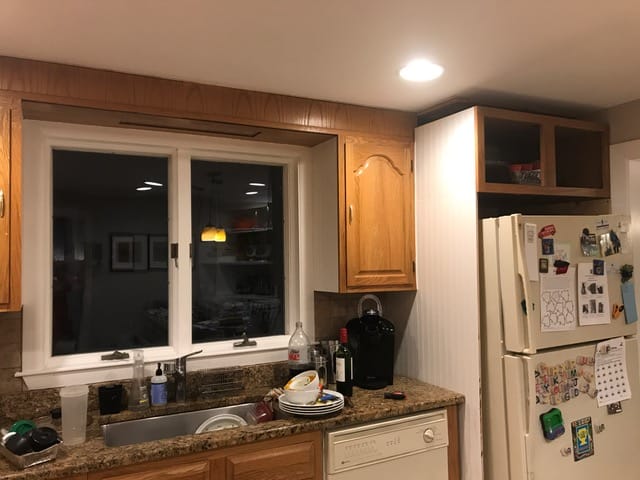
New side panel for fridge.
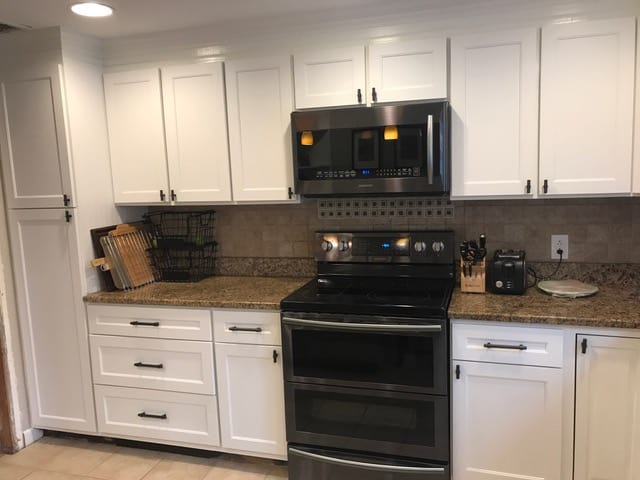
The cabinet above the microwave was a bit more work. I could’ve just gone to the store or a salvage and found an existing 12” H cabinet that fit my opening. Instead, I decided to cut it down myself instead using my table saw. I followed this tutorial and it worked pretty well! Since I was already purchasing new doors, it was a relatively straightforward process. https://www.youtube.com/watch?v=r6hTtQMZ4VM&t=132s
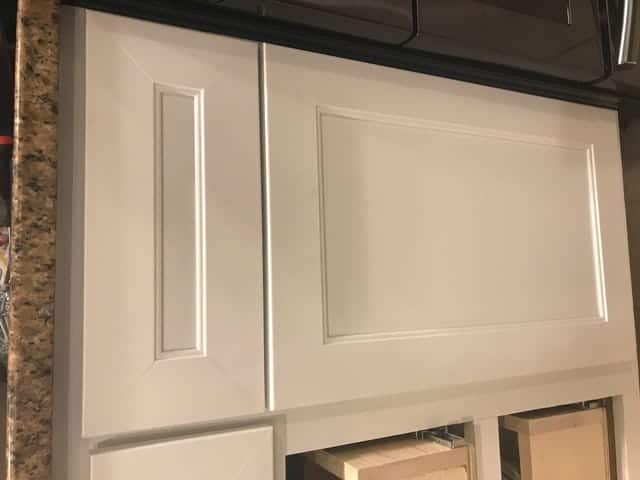
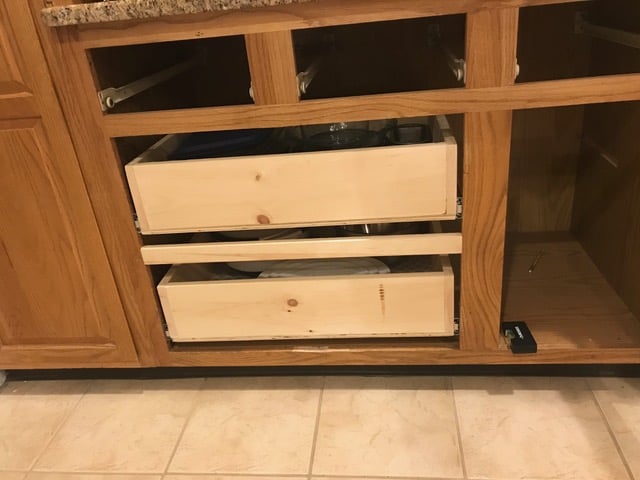
I decided to change two lower cabinet doors into two long drawers, which was surprisingly easy. Also, I had two small drawers that were pretty easily converted in one longer drawer which is more usable. Kitchen drawers are super modern and kind of all the rage right now.
Using my jigsaw to cut out the center separator bar, I added a new horizontal piece of 1 x 2″ wood to the frame to serve as the cabinet base frame between the 2 bottom drawers. The drawer slides were attached to the front and back sides of the cabinet, so no alterations were needed to add those. You can buy drawer boxes from a variety of places. I decided to make my boxes to save money. One is perfect and one is a little wonky. I will say that if I were to do this project all over again, I would probably save myself the headache and just spring for the store bought drawer boxes.
Two doors covered to drawers 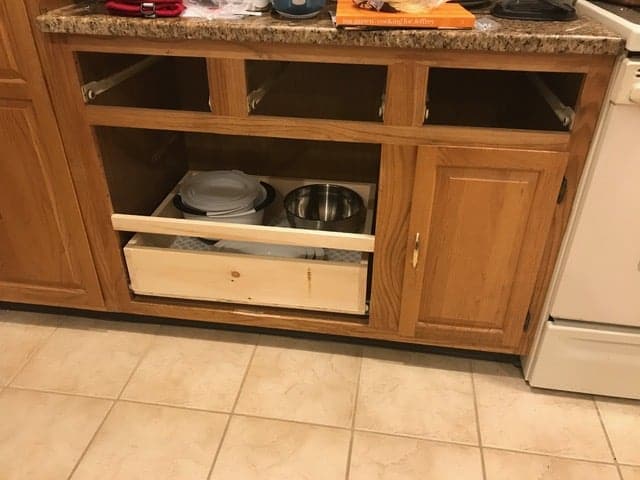
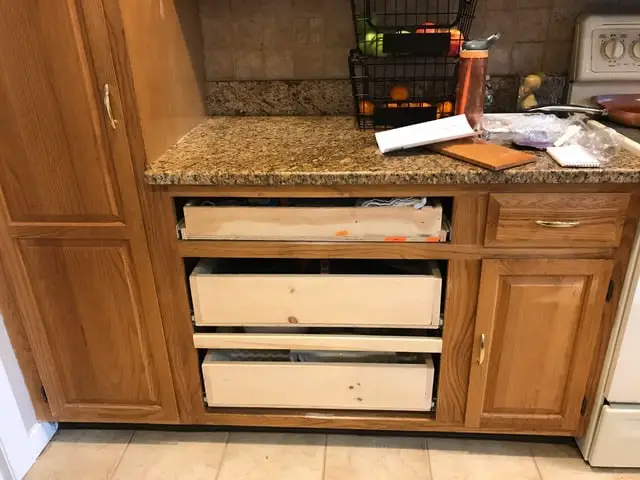
Two small top drawers now one long drawer.
Crown Molding
Next, I added crown molding. Yes I did, baby!! It was my first time doing crown and I was pretty intimidated to start. But once you figure out the basics and get into a groove, it really isn’t so bad. And remember, caulk hides everything!!! So it doesn’t have to be perfect perfect. Just close enough to fill with caulk. I highly recommend adding crown. For my smaller kitchen, it took me maybe a few hours to do and I really think it made the kitchen.
A few tips about what I learned about crown molding and also a few tutorials I used to make it more clear:
- The detail always goes at the bottom, cabinet side.
- You always cut crown standing up/leaning against your miter saw guard
- You always cut crown upside down- so detail side up
- When cutting an outer corner, remember your long point will be on the top, pointing the direction of the corner. It was helpful for me to make a little mark in the direction I wanted the cut to go before actually getting it on the saw. Cutting things upside down with angles always got me confused.
I suggest watching a few videos on youtube about making inside corners and outside corners. It is helpful to watch it a couple of times before you get started. I love this video by seejanedrill! She does an excellent job explaining how to make a basic outside corner cut.
Decorative Finishes
As I mentioned before, I decided to add some interest to a couple of exposed cabinet sides with beadboard wallpaper. It is super easy to apply and looks great but I will say that it isn’t super durable. The texture is basically a raised foam and can dent and nick pretty easily. In retrospect, I probably should have used legit beadboard. However, if cost is an issue for you, as it was for me, I think the wallpaper is a good option in areas that aren’t super high traffic. Really I’ve just noticed a few nicks here and there and you really can’t see them unless you are looking for them.
Summary
Take a deep breath. You can do this! If you can read this whole post, then DIY cabinet refacing is for you, because you’ve got stamina. Just take it one task at a time. Don’t rush. Don’t stress. You basically just want nice clean, painted cabinet bases and good measurements so you can order your new cabinet doors and drawer fronts. You’ll be amazed at how great it will look when you are done and how much money you saved by skipping that full kitchen remodel!
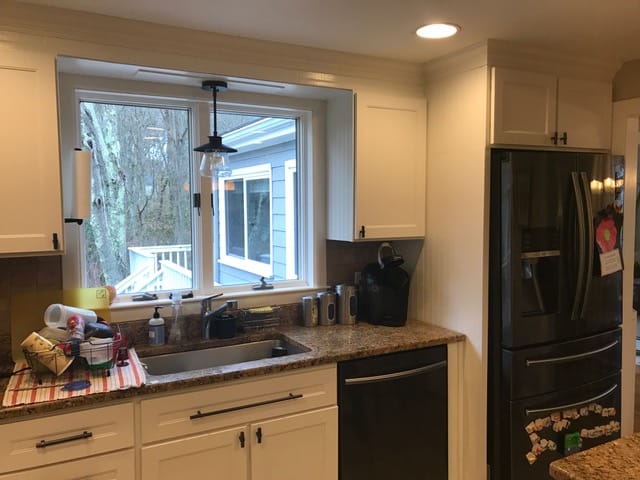
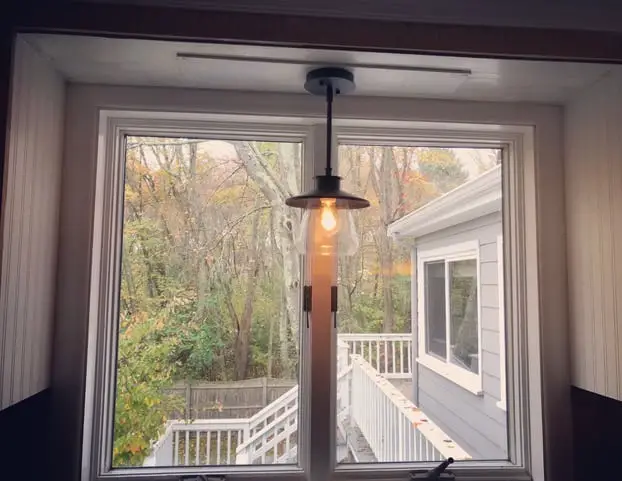
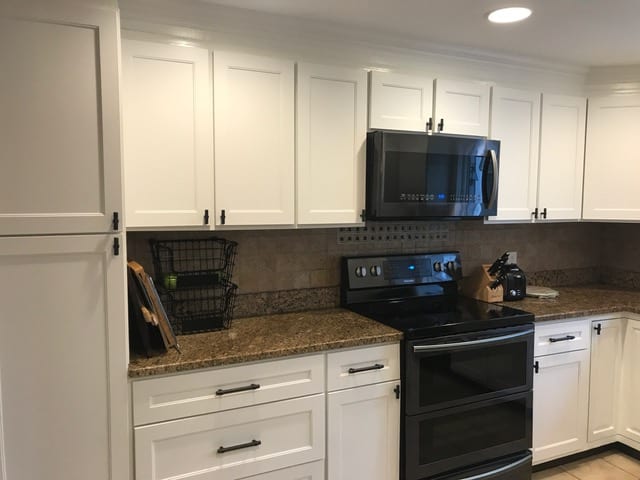
And, of course, more after pics!! I still can’t believe how much of a difference this made in our kitchen! We obviously were due for an appliance update too and went with the black stainless Samsung line from Home Depot. The new appliances are just the icing on the cake!!


Please leave your comments and let me know if you have any questions or need clarification on anything!
Also, make sure to check out my bathroom and guest room updates as well!