Light fixture replacement- How to replace a light fixture yourself
Have you ever wanted to replace a light fixture but found the idea of doing something electrical intimidating? Yeah, me too. That is, until the day I finally stepped out of my comfort zone and gave it a try. Replacing a light fixture may seem hard or intimidating but it’s really totally doable, even for the beginner DIY’er. I will share with you the tips and tricks I’ve learned along the way to make changing a light fixture easier and more achievable.
One thing here I feel I should state, I am absolutely in no way a trained professional electrician. Everything I know I have learned by watching others, doing research, and trying things myself. This advice is in no way meant to serve as your only form of research or guidance and does not cover every possible situation you may encounter. That said, I will go through the basics of how to change a light fixture, not necessarily how the electrical wiring works.
Disclaimer: In the name of full transparency, please be aware that this blog post may contain affiliate links and any purchases made through such links will result in a small commission for me (at no extra cost for you). As an Amazon and Home Depot Associate I earn from qualifying purchases.
Step one: pick a new light fixture.
First thing you’re going to want to do is choose a new light fixture to replace the one you are planning to remove. It should be relatively similar in size and shape, depending on where you want the fixture to go. For example, you can’t place a large flush mount overhead light fixture in the place of a bathroom vanity light. It won’t fit and it likely wouldn’t look right either. You also need additional support to go from a regular overhead light to a large heavy ceiling fan. Just stuff to keep in mind.
You want to have your new light on hand because you don’t want to remove the old light and have wires left exposed while you go shopping or wait for a fixture to be delivered. For this project I went with this LED flush mount light fixture which is super reasonable on Amazon. And because it has LED bulbs, there are no light bulbs to replace.
I’ve put together a list of the best Amazon flush mount ceiling lights for under $50 that you can shop here!
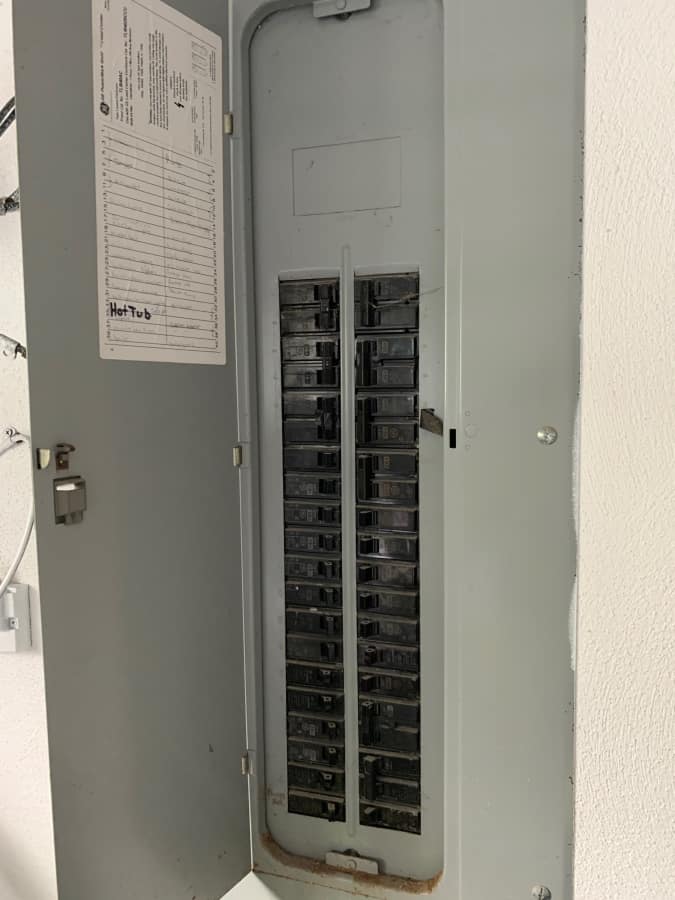
Step two: turn off the power
You will want to turn the power for the light fixture off at the breaker box. Many times the switches are labeled but sometimes they are not accurate. My tip is to always leave the light on and then flip the switch and when the light turns off you know you were in the right place.
Step three: remove the old light.
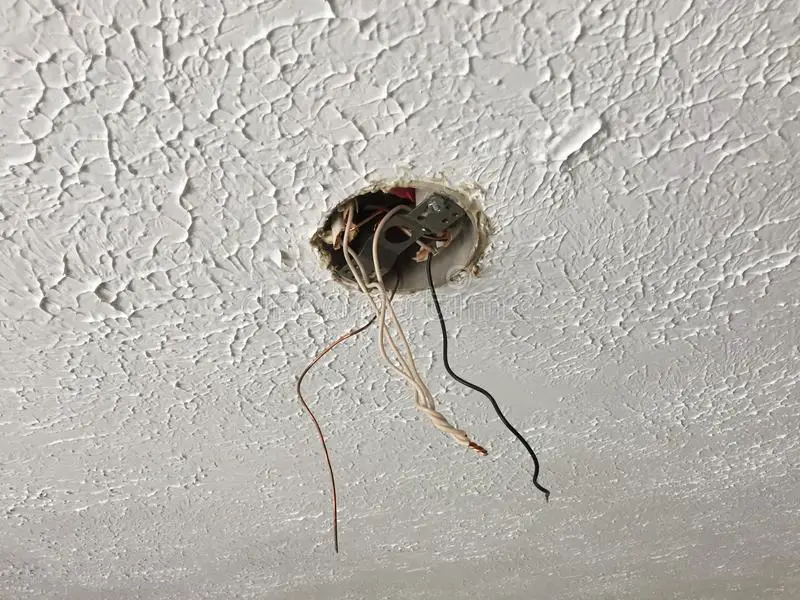
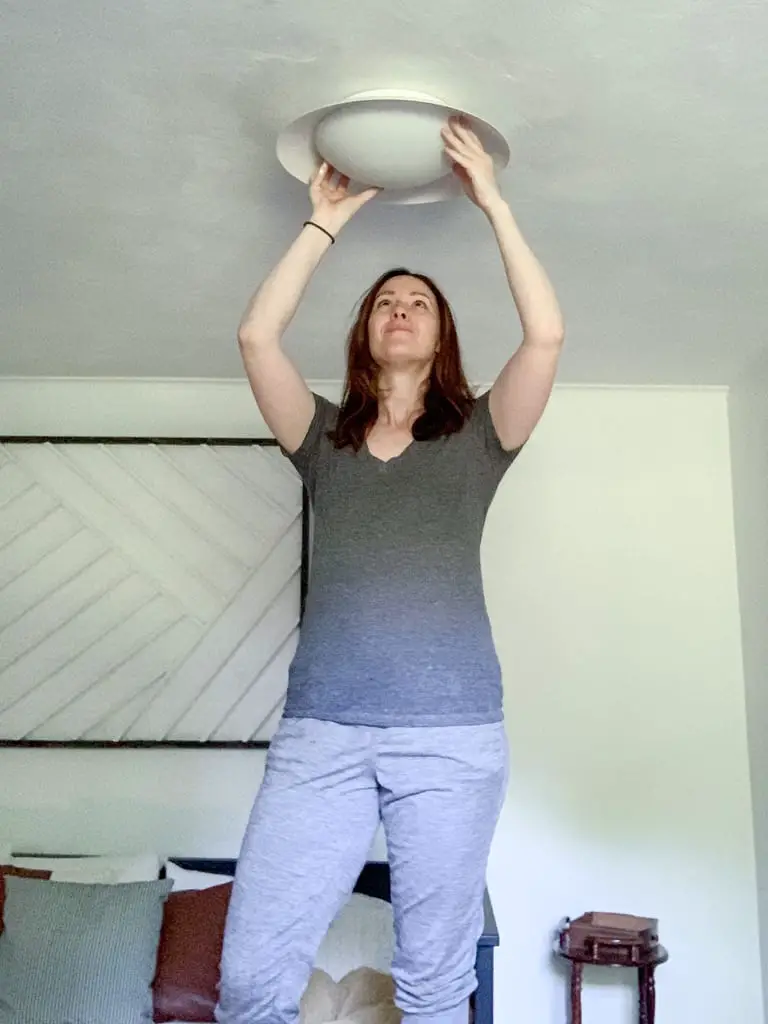
Once the electricity is fully off, you can begin to remove the old light fixture. First you need to take off the glass globe. Once that is off you will likely see screws that attach the backing of the old light fixture to the box located in the ceiling. You will want to unscrew these until it releases and you are able to see the wires above. At this point I recommend using a voltage detector to do a quick double check that the power is actually off to those wires. It’s a very inexpensive way for a little extra safety.
Then you disconnect the wires. You’ll see three wires. A white, a black, and either a green or copper colored wire. They are typically all connected using plastic wire nuts which just unscrew to release. If the light fixture is big or extra heavy, make sure you get someone to help you out here so the light doesn’t fall once it is released.
Step four: get your new light ready.
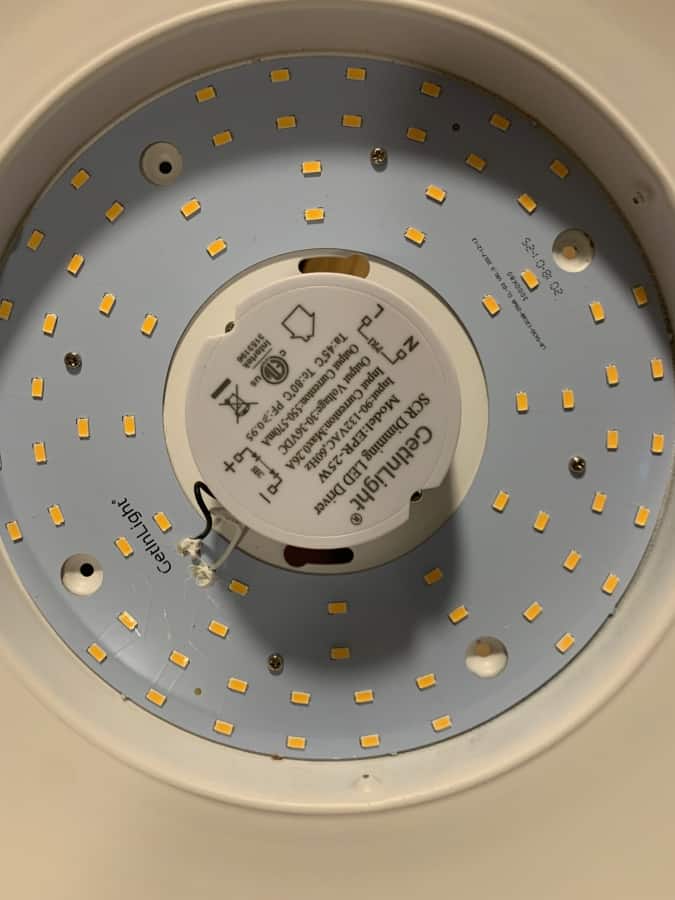
First thing you want to do with your new light fixture is take everything out of the box and make sure it is all in good condition. Then go through its instruction manual quickly to double check the process for installation. Large light fixtures weighing greater than 50 pounds will require extra support. I will not go into that here.

Step five: reconnect the wires.
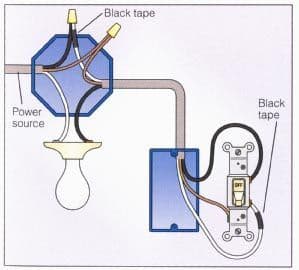
You will want to match up the wires from your new light fixture to the wires located in the ceiling electrical box. Reconnect the white to white wires, black to black wires, and the copper ground wires using the provided plastic wire nuts. Screw these in place (righty tighty). I typically do a quick wrap of electrical tape over the top as well just to be extra safe and add a little additional support so things don’t slip as you are pushing them back into the ceiling box.
You then need to push the wires back up into the box. These wires can be a bit stiff and sometimes you have to be a little rough with them. Don’t worry, they won’t break. Just push them until they’re nice and tight.
Step six: Turn the power back on
Secure the new light fixture in place using the screws provided. Typically there are screws with the tread facing down from the ceiling box that thread through the base of your new light. There will then be screw on caps that hold it in place. This one actually had screws that went directly into the ceiling box from the bottom up and then tightened in place.
Now it is time to add a bulb and re-flip the circuit breaker to double check that your light works! As long as it turns on without problem, you can add any additional lightbulbs and put on the new globe cover, if necessary.
If for some reason it doesn’t turn on, recheck that your wire colors match, that the connections between the bare wires are good and stable (sometimes it can slip when pushing back into the box) and retry. If things still don’t work, keep the power to that light fixture off and call in a professional. For reassurance though, I’ve changed at least 10 fixtures in my short DIY lifetime and I’ve never had one that wouldn’t work after a little troubleshooting. Most work the first time, no problem.
You can totally do this! You can replace that light fixture yourself! Stop being scared and just do it already. Oh, and check out the whole room makeover here! I promise you won’t be disappointed.

One Comment
Comments are closed.